TBB - Black and Blueberry Pie
Patricia @ ButterYum

Today Rose's Alpha Bakers share our 7th selection as we bake our way through The Baking Bible. As a reminder, the recipes made during this project are not being shared, but I will share my commentary about each recipe, followed by a full photo tutorial.
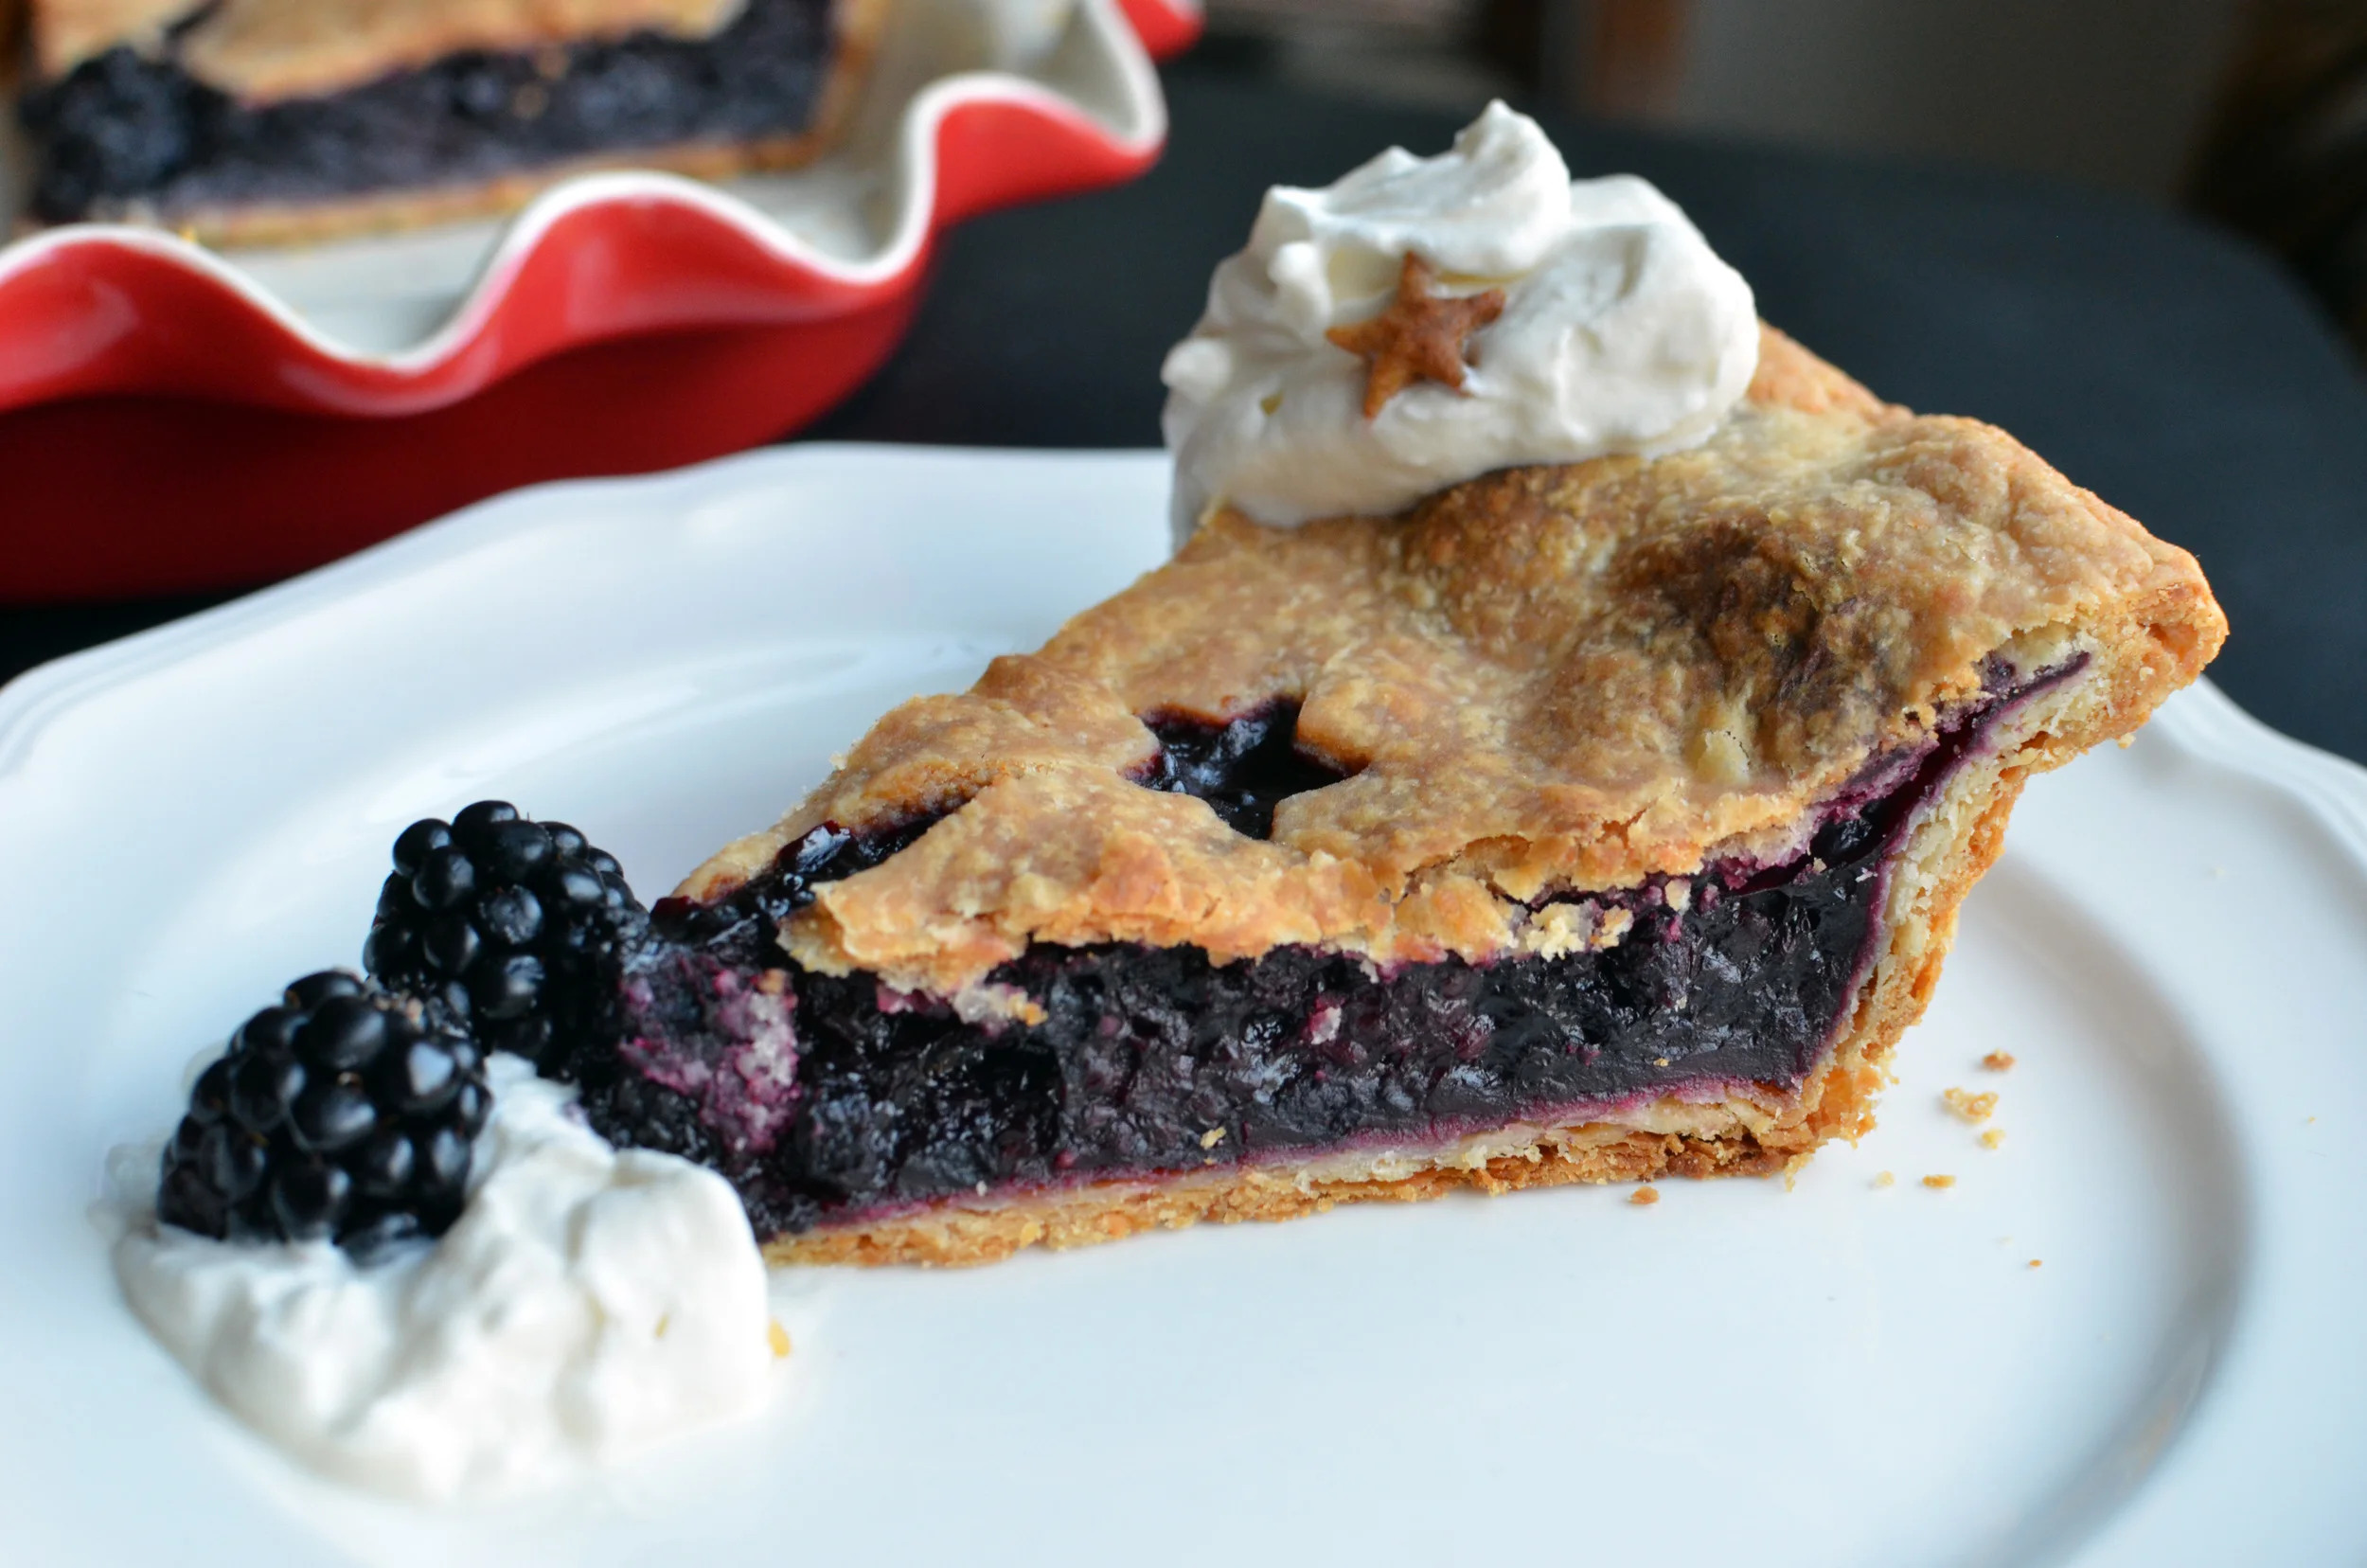
This week's selection - Black and Blueberry Pie, a mix of berries in a cream cheese enriched crust.
Special ingredients and/or equipment needed - large baking stone, 9-inch pie plate (I used Rose's Perfect Pie Plate), optional aluminum (not silicone) pie shield, microplane zester, digital scale, digital instant read thermometer, nonstick foil, expandable cake ring.
How does it taste - It's good. Admittedly, I would have preferred a pie made of only blueberries (my favorite), but this mixture, which is mostly blackberries, is very nice. The lemon juice and zest really add a nice touch. I should mention that all of my tasters commented that they liked the pie, but didn't care of the large blackberry seeds. I agree.
How does it look - Not the most beautiful pie I've ever made, but it looks very nice. The cream cheese crust is very easy to work with, which is half the battle when you make a pie.
Level of difficulty - The filling for this pie is very easy to make. The crust can go one of two ways, if you use a food processor, it's pretty easy. If you follow the directions given to make the crust by hand, you might want to pull your hair out by the time you're done. Not only does making the crust by hand take longer, but I found the directions to be overly fussy and incomplete - and don't get me started on the mess. More on all that later.
Were the directions clear - Yes and no.
Some of the Alpha Bakers mentioned concern on our facebook page about the cost of buying fresh berries in January, but Rose chimed in that frozen berries would be fine to use, and that they should be used while still frozen which would extend the baking time a bit.
Slowly, one baker after another reported ending up with sloshy, soupy pies - some with burnt crusts, and some with raw cornstarch in the filling. Rose then suggested that it might be helpful to thaw the berries first, then drain and reduce their juice by half before adding the reduction back to the berry filling mixture. She also commented on one baker's blog that the internal temperature of the pie should reach 212F for the cornstarch to reach its full thickening potential. I found this info to be very helpful, but it would be more helpful if it were listed in the book.
Also, something I just noticed - Both the "food processor method" and "hand method" directions for making the crust are followed by their own "divide the dough" section, but only the one following the food processor method includes a paragraph that gives tips for creating an extra flaky pie crust (page 190, second paragraph). Since I used the "hand method", I didn't read the food processor section so I completely missed the tips for making an extra flaky pie crust. Major bummer.
What would I do differently next time - First, I'd definitely make the crust in a food processor. Second, I prefer the flavor of an all butter crust so I'd use that in the future. I'd also brush the crust with milk or cream and sprinkle with sugar before baking. That's my usual pie crust treatment and I think it really enhances a crust's appearance and overall flavor.
Next up - Golden Orange Panettone with Chocolate Sauce. It's going to be a challenge - I've looked over the recipe several times and my head is spinning (which isn't helping my headache). Stay tuned.
Okay, here's my photo tutorial.
I got Rose's Perfect Pie Plate for Christmas and couldn't wait to use it.
So pretty. I have a thing for pie plates.
Okay, for the crust we start by chilling flour, baking powder, and salt. To make this crust by hand, put the chilled the flour, baking powder, and salt in a mixing bowl and add the cream cheese.
Use your hands to rub the cream cheese into the flour mixture until it resembles coarse meal. This takes a long time and I have to admit that I pulled out out my pastry blender to speed the process up a bit.
Once that's done, transfer the mix to a gallon size zipper bag.
Add cubed butter that has been chilling in the freezer for 30 minutes. Hard 1/2-inch cubes of frozen butter.
Remove as much air as possible from the bag and seal it closed. Use a rolling pin to flatten the frozen butter cubes into thin flakes. Sounds easy enough, but I found it very frustrating. The frozen butter doesn't want to cooperate at all. What it did want to do was stick all over the inside of the bag. I tried to reduce the sticking by redistributing the flour in the bag, but since all the air had been squeezed out of the bag, a sort of vacuum had been created and the flour didn't want to flow freely from one part of the bag to another. Whatever, I was over it by this time so when I felt that I had rolled the butter to my best ability, the bag was placed back in the freezer for 10 more minutes, as directed.

Flat butter slabs stuck to the bag. Can you see how all the flour has fallen to the bottom of the bag? I can tell this isn't going to end well.
I was hoping the 10 minute stay in the freezer would enable the flattened butter slabs to release from the bag easily, but that didn't happen. I had to turn the bag inside out and pull the chunks of butter off with my fingers. There was butter all over my fingers and there was flour in the air and all over me! What a mess.
Here's what the mixture looked like when I emptied the bag. Some of the butter flakes were huge - not sure how they were supposed to get incorporated into the crust, but the directions simply said to stir in the cream and vinegar into the frozen butter and flour. I didn't see that ending very well so I pulled out my trusty pastry blender again.
For the record, I don't like the flavor of apple cider vinegar, but you you really can't taste it in the finished crust.
Here's what my crust mixture looked like after breaking up the large butter flakes and stirring in the cream and vinegar. I know it looks like it needs more liquid at this point, but it doesn't.
Next the crust mixture is placed into a gallon size bag and you use your knuckles to knead the mixture together.
Here's what it looks like after it's been kneaded for a few minutes. Still looks a bit on the dry and crumbly side, but it's fine. Divide the dough into two portions and shape each into a flat-ish circle. Wrap in plastic and chill for at least 45 minutes (or up to 2 days). Chilling allows the dry ingredients to fully absorb the moisture from the wet ingredients. It also allows the dough to relax, making it easier to roll and reduce the chance of it shrinking during baking.
Tip: if you squeeze a handful of the crumbly crust mix in the palm of your hand and it holds together after you open your fingers, you should be good to go.
Time to roll the bottom crust. I love to roll dough on my pastry cloth. It requires very little flour and the rolled crust easily releases from the cloth.
I used an expandable cake ring to cut the dough to a 12-inch diameter circle.
Place the crust in the pie plate. Cutting the dough ahead of time eliminates the need to trim excess dough at this point. Okay, let's make the filling.
If using fresh berries, you can skip the next few photos, but if you are using frozen berries, let them thaw completely and strain their juice. My berries gave off nearly 1 cup of juice.
Pour the juice into a heavy bottom saucepan. Over medium to medium-high heat, allow the juice to boil slowly until reduced by half.
The smell of ripe berries will perfume your home. Not a bad thing in the dead of winter.
Done.
In the bowl, sugar, cornstarch, and salt. We're also going to add lemon zest. A microplane grater is the perfect tool for this. I grated the zest into fine bits.
We're going to add freshly squeezed lemon juice too. Do you have a citrus squeezer yet? Awesome kitchen tool. Be sure to place the fruit in cut side DOWN.
Stir everything together until the mixture is smooth and there are no lumps of cornstarch.
Gently stir the thawed berries into the cornstarch mixture, being the cornstarch mixture coats all the berries.
Pour the reduced juice into the berry and cornstarch mixture. I got nervous and ended up only using half of my reduction, but now that my pie is done, I think it would have been fine to add all of it.
Here's the filling just before I poured it into the bottom crust. Not sure why the photo I took of the filled crust disappeared from my camera. That's been happening a lot lately. Maybe it's time for a new sd card (?).
The top crust is rolled and cut into a 12-inch circle, just like the bottom crust. I added a star motif, but you should check out some of the other designs by my fellow Alpha Bakers.
Edges tucked and crimped and stars glued in place with a little water. Time to chill again, this time for an hour.
While the pie is chilling, place a baking stone on the bottom rack of your oven and top it with some nonstick foil (nonstick side facing up). I love nonstick foil!
Preheat the oven to 425F for at least 45 minutes. This will allow the baking stone to heat through.
When the pie has chilled for an hour, place it into the preheated oven for 45-55 minutes.
Oops, I nearly forgot to cover my crust with a aluminum pie crust shield. It will keep the crust from getting too brown around the edges. Some bakers in the group had trouble when they used silicone pie crust shields so stick with metal if you can. If you don't have one, you can wrap your crust edges with foil.

The pie is done when the internal temperature reaches 212F. See how nice those edges look? Oh how I wish you could smell this pie! Mmmm.
I let my pie rest at room temperature overnight before I cut it. You can see that my filling isn't soupy at all. It's not dry either, but I do think I could have used the entire 1/2 cup of reduced juice in the filling. Next time.
links to more alpha baker photo tutorials
-
2016
- Dec 7, 2016 TBB - Luxury Chocolate Buttercrunch Toffee
- Sep 26, 2016 TBB - Bourbon (Whiskey) Pecan Butter Balls
- May 11, 2016 TBB - Blueberry Buckle
- Apr 5, 2016 TBB - Meringue Birch Twigs
- Jan 26, 2016 TBB - Lemon Almond Cheesecake
-
2015
- Nov 19, 2015 The Hazelnut Praline Cookies that Never Were
- Sep 1, 2015 TBB - Flaky Cream Cheese Scones
- Aug 23, 2015 TBB - Woody's Black and White Brownies
- Jul 1, 2015 TBB - Praline Meringue Ice Cream Sandwiches
- Jun 23, 2015 Ricotta Loaf - The Bread Bible
- Jun 4, 2015 TBB - French Orange Cream Tart
- May 19, 2015 TBB - Double Chocolate Oriolos
- May 15, 2015 Touch of Grace Biscuits - The Bread Bible
- May 7, 2015 TBB - Blu-Rhu Mini Pies
- Apr 27, 2015 TBB - Lemon Jammies
- Apr 2, 2015 Pita Pizzas - The Bread Bible
- Mar 22, 2015 TBB - Luxury Oatmeal Cookies
- Mar 15, 2015 TBB - Sour Cherry Pie (Pi Day)
- Mar 9, 2015 TBB - Caramel Buns
- Mar 4, 2015 TBB - Hamantaschen (Purim)
- Feb 23, 2015 TBB - Lemon Posset Alma
- Feb 15, 2015 TBB - Chocolate Pavarotti with Wicked Good Ganache
- Feb 11, 2015 TBB - Golden Orange Panettone with Chocolate Sauce
- Feb 9, 2015 Panettone Delay
- Feb 2, 2015 TBB - Swedish Apricot Walnut Bread
- Jan 26, 2015 TBB - Gingersnaps
- Jan 19, 2015 Biga Fail
- Jan 12, 2015 TBB - Black and Blueberry Pie
- Jan 5, 2015 TBB - Chocolate Cuddle Cake
-
2014
- Dec 29, 2014 TBB - Frozen Pecan Tart
- Dec 22, 2014 TBB - Almond Coffee Crisps
- Dec 15, 2014 TBB - The Ischler
- Dec 8, 2014 TBB - English Dried Fruit Cake
- Dec 1, 2014 TBB - Kouigns Amann (kween ah-mahn)
- Nov 5, 2014 Rose's Alpha Bakers - Intro