contact us

Use the form on the right to contact us.

You can edit the text in this area, and change where the contact form on the right submits to, by entering edit mode using the modes on the bottom right.

Form Block
This form needs a storage option. Double-click here to edit this form, and tell us where to save form submissions in the Storage tab. Learn more
         

123 Street Avenue, City Town, 99999

(123) 555-6789

email@address.com


You can set your address, phone number, email and site description in the settings tab.
Link to read me page with more information.

Blog

Butteryum food blog recipes

Filtering by Category: chocolate recipes

Chocolate Chip Cookie Sticks

Patricia @ ButterYum

chocolate.chip.cookie.sticks_ButterYum

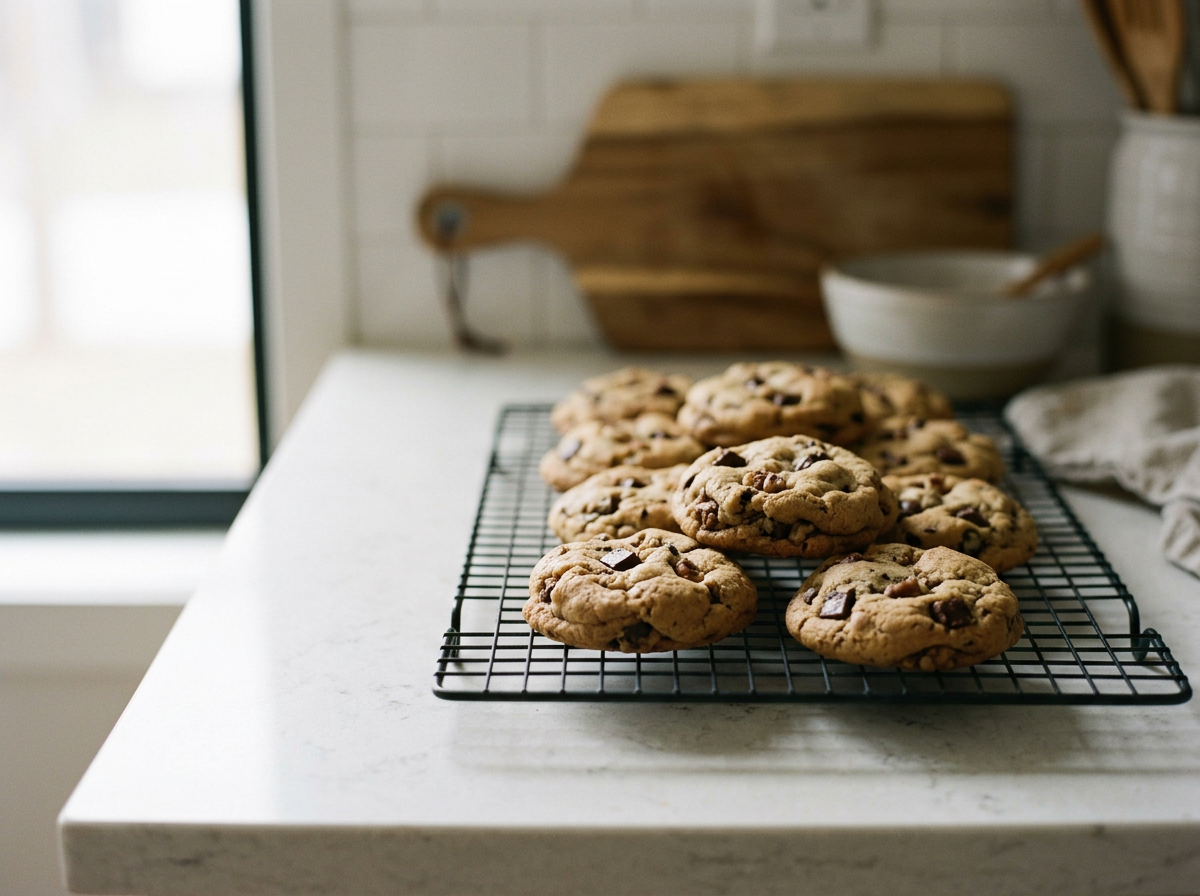
So there I was, around 9pm the other night, when out of nowhere my daughter tells me she needed to bring cookies to school in the morning.  *Sigh*  I really hate when that happens.

So I started brainstorming my memory banks for a fast cookie recipe and this one came to mind.  It was perfect for this situation because you don't have to wait for butter to soften to room temperature, the dough is easily mixed by hand, and all 36 cookies bake on one sheet pan in less than 10 minutes.  Oh and they're super cool looking too.

Mix the dough and divide it into two equal portions.

Pat each portion into a 3x15-inch rectangle.

You don't have to do this, but I like to use a pastry scraper to make the edges nice and neat.

Chocolate chips are gently pressed into the cookie dough before baking.

The baked cookie rectangles are allowed to cool for 5 minutes before removing from the sheet pan. Allow cookie rectangles to cool completely before cutting into 1-inch wide sticks. For best results, use a serrated knife.

Now grab a beverage and dunk away. Enjoy!
Items used to make this recipe:

(affiliate links)


Chocolate Chip Cookie Sticks

Printable Recipe

Ingredients

  • 1/2 cup canola oil (see note below)

  • 1/2 cup granulated sugar

  • 1/2 cup packed brown sugar

  • 1 large egg

  • 2 teaspoons pure vanilla extract

  • 1 1/2 cups all purpose flour

  • 1/2 teaspoon baking soda

  • 1/2 teaspoon fine salt

  • 1 cup (6 ounces) semisweet chocolate chips

Directions

  1. Preheat oven to 375F.

  2. In a medium bowl, whisk together the flour, baking soda, and salt; set aside.

  3. In a large bowl, combine oil, both sugars, egg, and vanilla; add the dry ingredients and stir until well blended.

  4. Divide dough in half.

  5. On a silicone or parchment lined sheet pan, shape each half into a 3x15-inch rectangle.

  6. Sprinkle each rectangle with 1/2 cup chocolate chips; gently pressing the chocolate chips into the dough.

  7. Bake in the center of the oven for 6-7 minutes for chewy cookies (8-9 minutes for crisper cookies).

  8. Allow to cool completely before cutting into 36 cookie sticks.

  9. Use a serrated knife for best results.

Note

  • Melted butter may be substituted, but cookies will spread a bit more.  

adapted from Taste of Home

Chocolate Mocha Snack Cake (and a cake tip)

Patricia @ ButterYum

Have you had the pleasure of tasting Biscoff Spread yet?  I've been hoping our local grocery stores would start carrying it for more than 2 years now and I finally stumbled upon it a few weeks ago.  I quickly grabbed some and headed home to see if all the fuss I'd read about was true.  I'm happy to report, IT WAS!!!  If you're familiar with Biscoff Cookies, you already know that amazing butter-cinnamon-caramel flavor.  Now imagine it as a soft, creamy spread.  Insanely good, I tell you.  Insane!   I made the mistake of letting one of the teens taste my glorious find, but then I noticed the contents of the jar disappearing at an alarming rate so I had to move it into protective custody. 
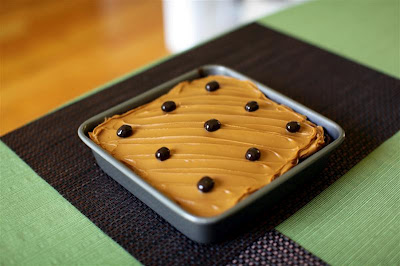
Anyway, Biscoff Spread is soft, sweet, and spreadable, making it a perfect no-fuss substitute for frosting on my mocha version of this super simple chocolate mocha snack cake - a one-bowl recipe that bakes in about 35 minutes. 

There’s a reason why this cake is a family favorite! Don’t forget to check out the bottom of this post to see how I bake my cakes without a big hump in the middle.

Items used to make this recipe:

(affiliate links)


Chocolate Mocha Snack Cake w/Biscoff Frosting

Printable Recipe

serves 9-12

Ingredients

Cake:

  • 1 1/2 cups all-purpose flour

  • 1 cup granulated sugar

  • 3 tablespoons Dutch-processed cocoa powder

  • 1 teaspoon baking soda

  • 1 teaspoon table salt

  • 6 tablespoons vegetable oil

  • 1 teaspoon pure vanilla extract

  • 1 tablespoon white vinegar

  • 1 cup freshly brewed coffee (or hot water)

Frosting:

Directions

  1. Preheat oven to 350F.

  2. Prepare an 8x8-inch square cake pan with Baker's Joy baking spray.

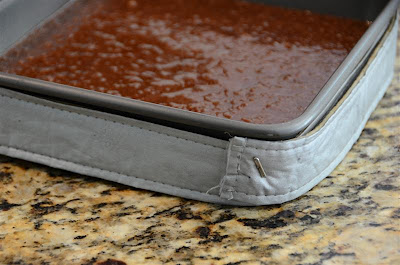
  3. If you want your cake to bake without an ugly hump in the middle, wrap the pan with a moistened insulated baking strips (see photos below).

  4. In a medium bowl, combine all the cake ingredients and mix just until incorporated.

  5. Pour the batter into a prepared pan and bake in preheated oven for 35-40 minutes, or until a toothpick inserted in the center comes out clean.

  6. Remove cake from oven and place on a rack to cool completely; about 2 hours.

  7. To decorate the cake, use an offset spatula to spread the Biscoff in a thin, even layer on top of the cake.

  8. Garnish with chocolate covered coffee beans.

Notes

  • This cake is great served at room temperature, but it's also excellent chilled (that's the way I like to enjoy it).

  • Cake batter can also be used to make 24 cupcakes.

adapted from Lucinda Scala Quinn


Now for my tip:

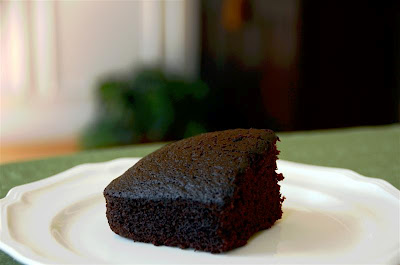
See this cake?  It was baked in a naked cake pan.  Kind of sad looking, don't you think?  The edges of the cake are over baked and dry, and the center of the cake puffed into a huge hump.

Why does this happen?  Because naked cake pans heat very quickly in the oven, causing the batter along the edges to bake and set while the batter in the center of the pan continues to rise.

To avoid the hump issue, simply wrap the pan with a moistened insulated baking strip before popping it in the oven.

So why do the insulted baking strips make such a difference?  They keep the cake pan temperature in check, which allows all of the batter to bake at the same rate, resulting in a even layer.

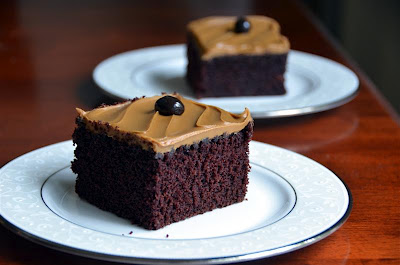
See?  This is exactly the same cake recipe, but look how nice and even it baked.  The sides are as high as the middle.  No Hump!

And here's what that beautifully even cake looks like when plated.  Professional, no?  Needless to say, I highly recommend using insulated baking strips.  Happy Baking!

Recent Posts