contact us

Use the form on the right to contact us.

You can edit the text in this area, and change where the contact form on the right submits to, by entering edit mode using the modes on the bottom right.


123 Street Avenue, City Town, 99999

(123) 555-6789

email@address.com


You can set your address, phone number, email and site description in the settings tab.
Link to read me page with more information.

Blog

Butteryum food blog recipes

Filtering by Tag: valentines day recipes

Black Forest Dutch Baby

Patricia @ ButterYum

Black Forest Dutch Baby - ButterYum. how to make a chocolate dutch baby. Chocolate dutch baby recipe. chocolate German pancake recipe. recipe for dutch baby or German pancake. Black Forest desserts that aren’t cake.

Ugh… we’re having a snow day here in Virginia so I was looking online for some recipe inspiration and I stumbled upon a yummy looking Chocolate Dutch Baby (or German pancake), which got me thinking… what if I took that chocolate idea and elevated it a bit by adding sweetened whipped cream and a delicious cherry topping? That was it - I decided making a Black Forest Dutch Baby would be part of my snow day activities! So glad I did because it’s definitely a treat worth trying, snow day or not.

How to make cherry sauce from frozen tart cherries. How to make cherry topping with tart cherries. How to make cherry sauce from frozen sour cherries. How to make cherry topping with sour cherries. how to make cherry topping from scratch. cherry top…

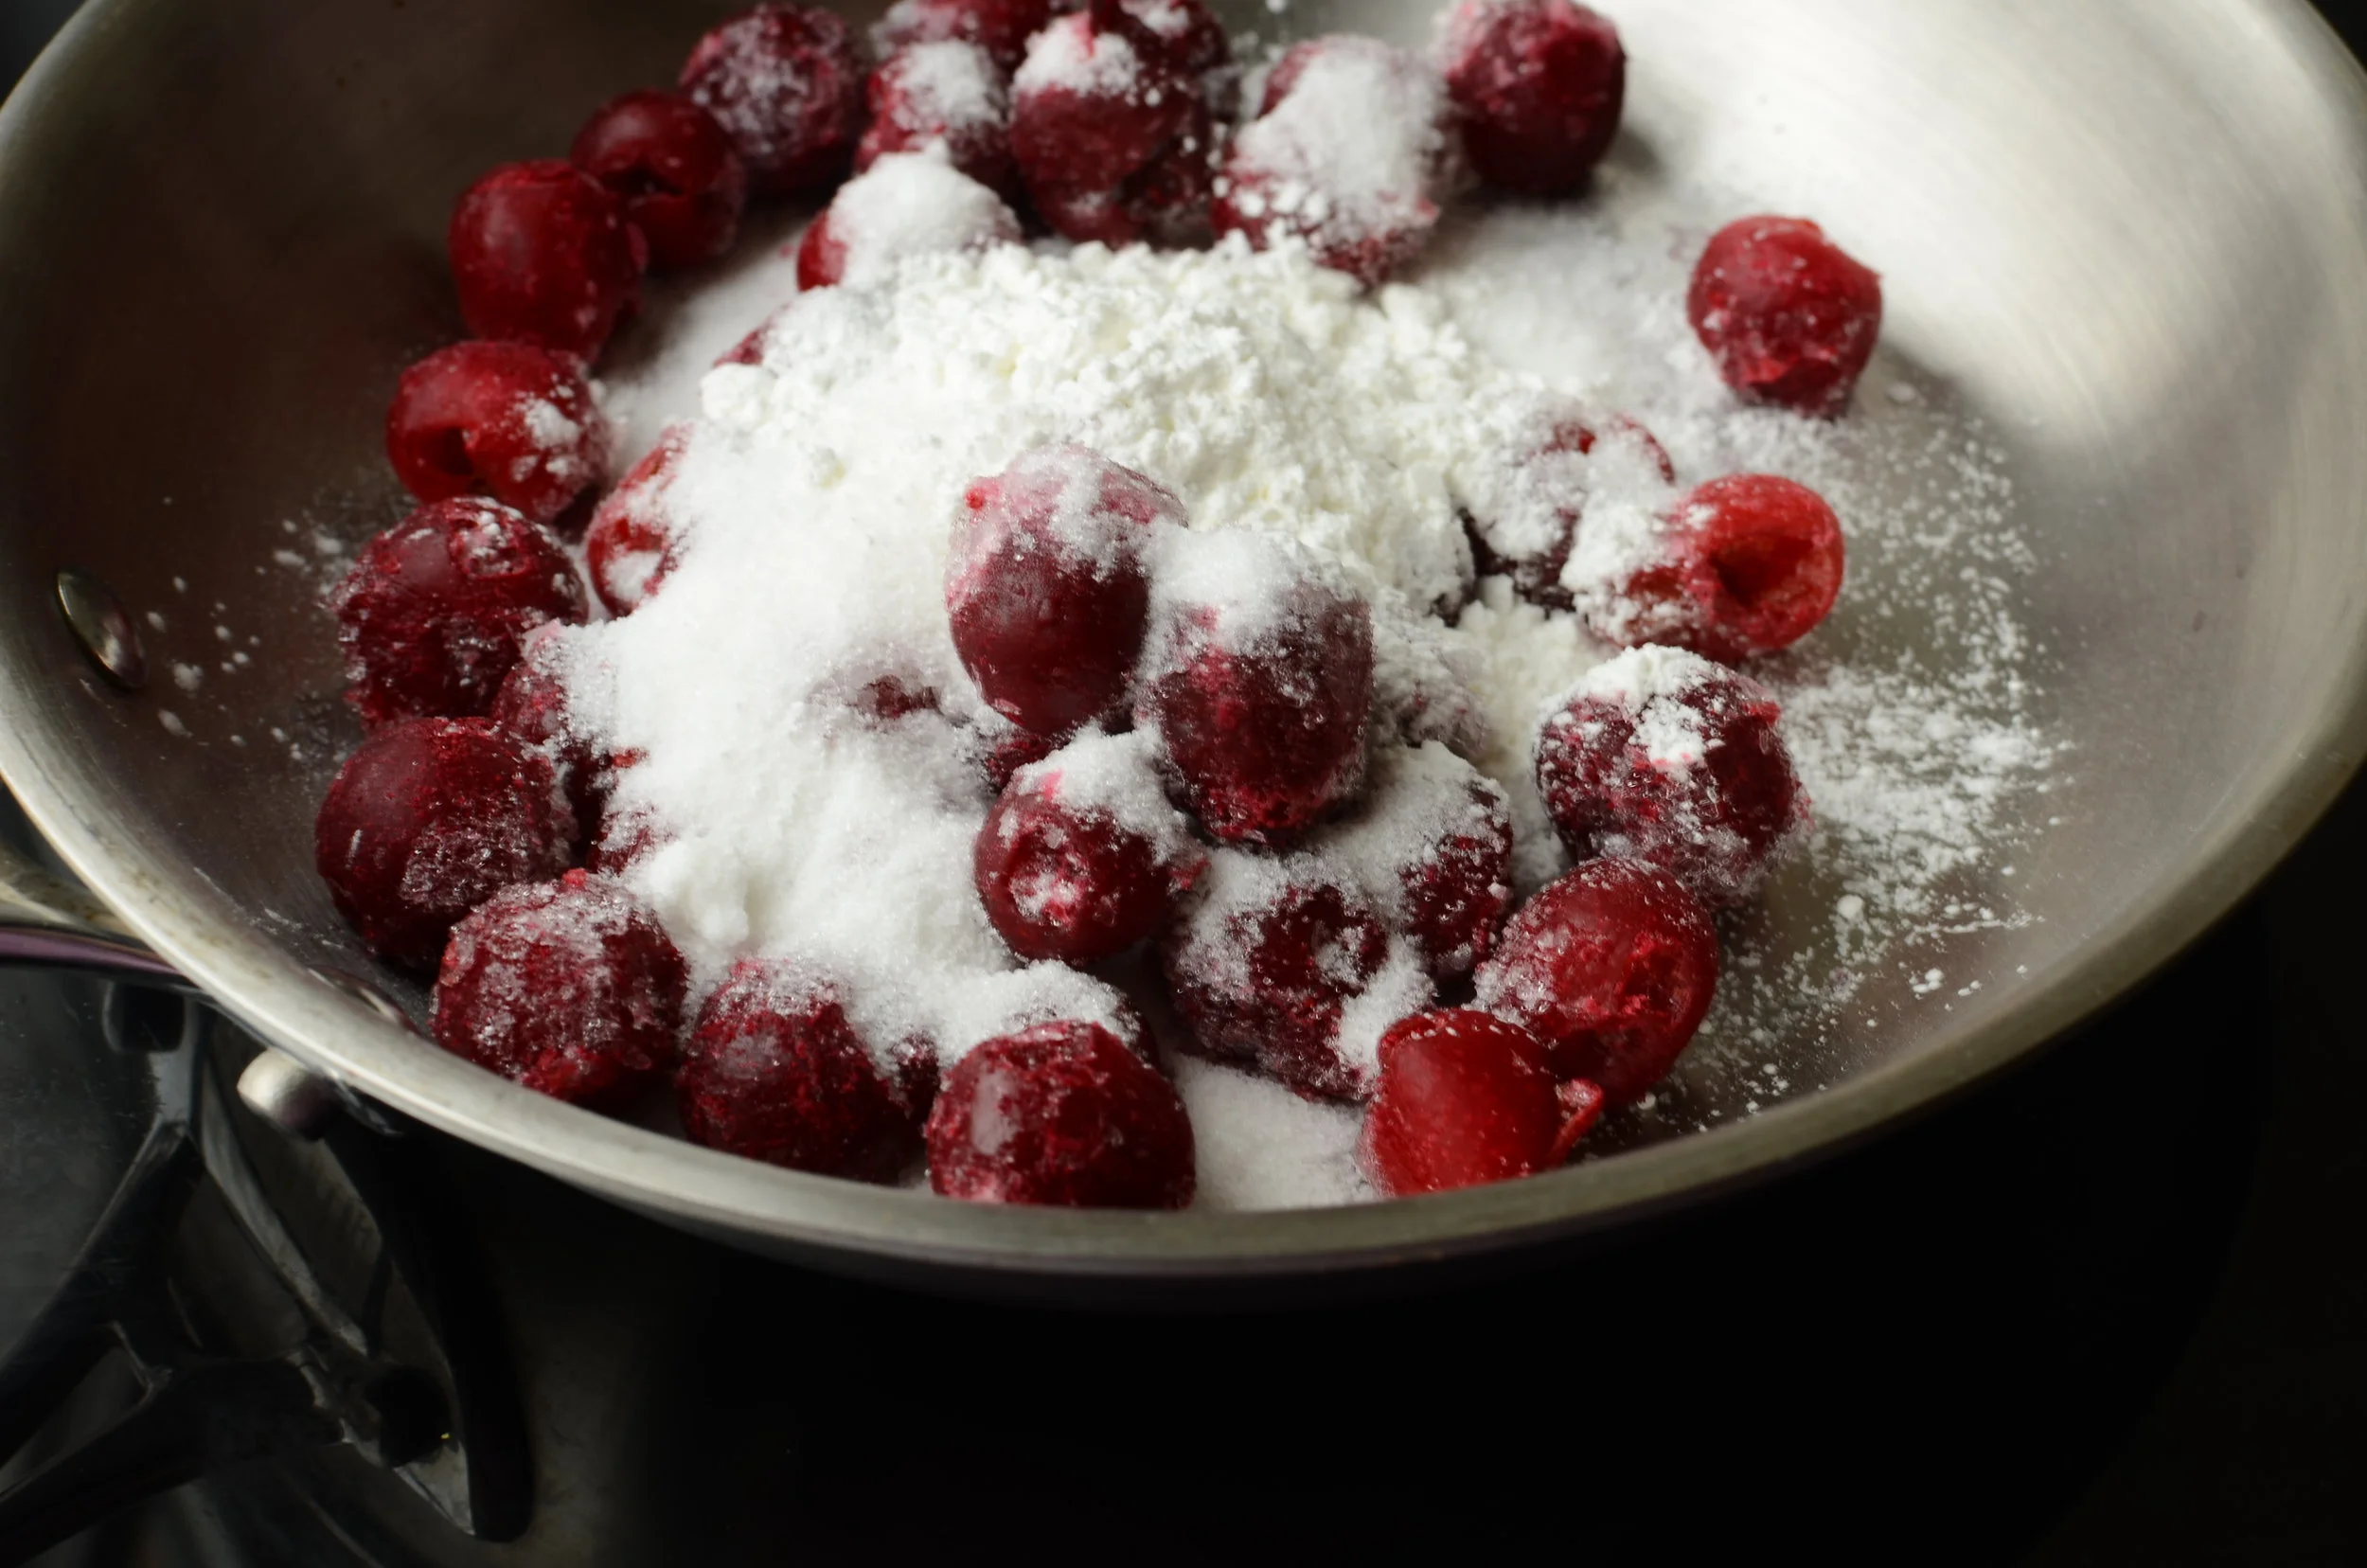
We’ll start by making the cherry topping. In a skillet over medium-high heat, combine tart cherries, sugar, cornstarch, and a salt. I used tart cherries I stashed away in the freezer this past spring, but if you have fresh tart cherries, you can certainly use ‘em.

making-cherry-topping-for-black-forest-dutch-baby-recipe-butteryum

Cook, stirring constantly until the mixture begins to boil; continue cooking for a full minute, then turn off the heat.

easy cherry topping recipe. how to make cherry sauce from scratch. how to make cherry topping from scratch.

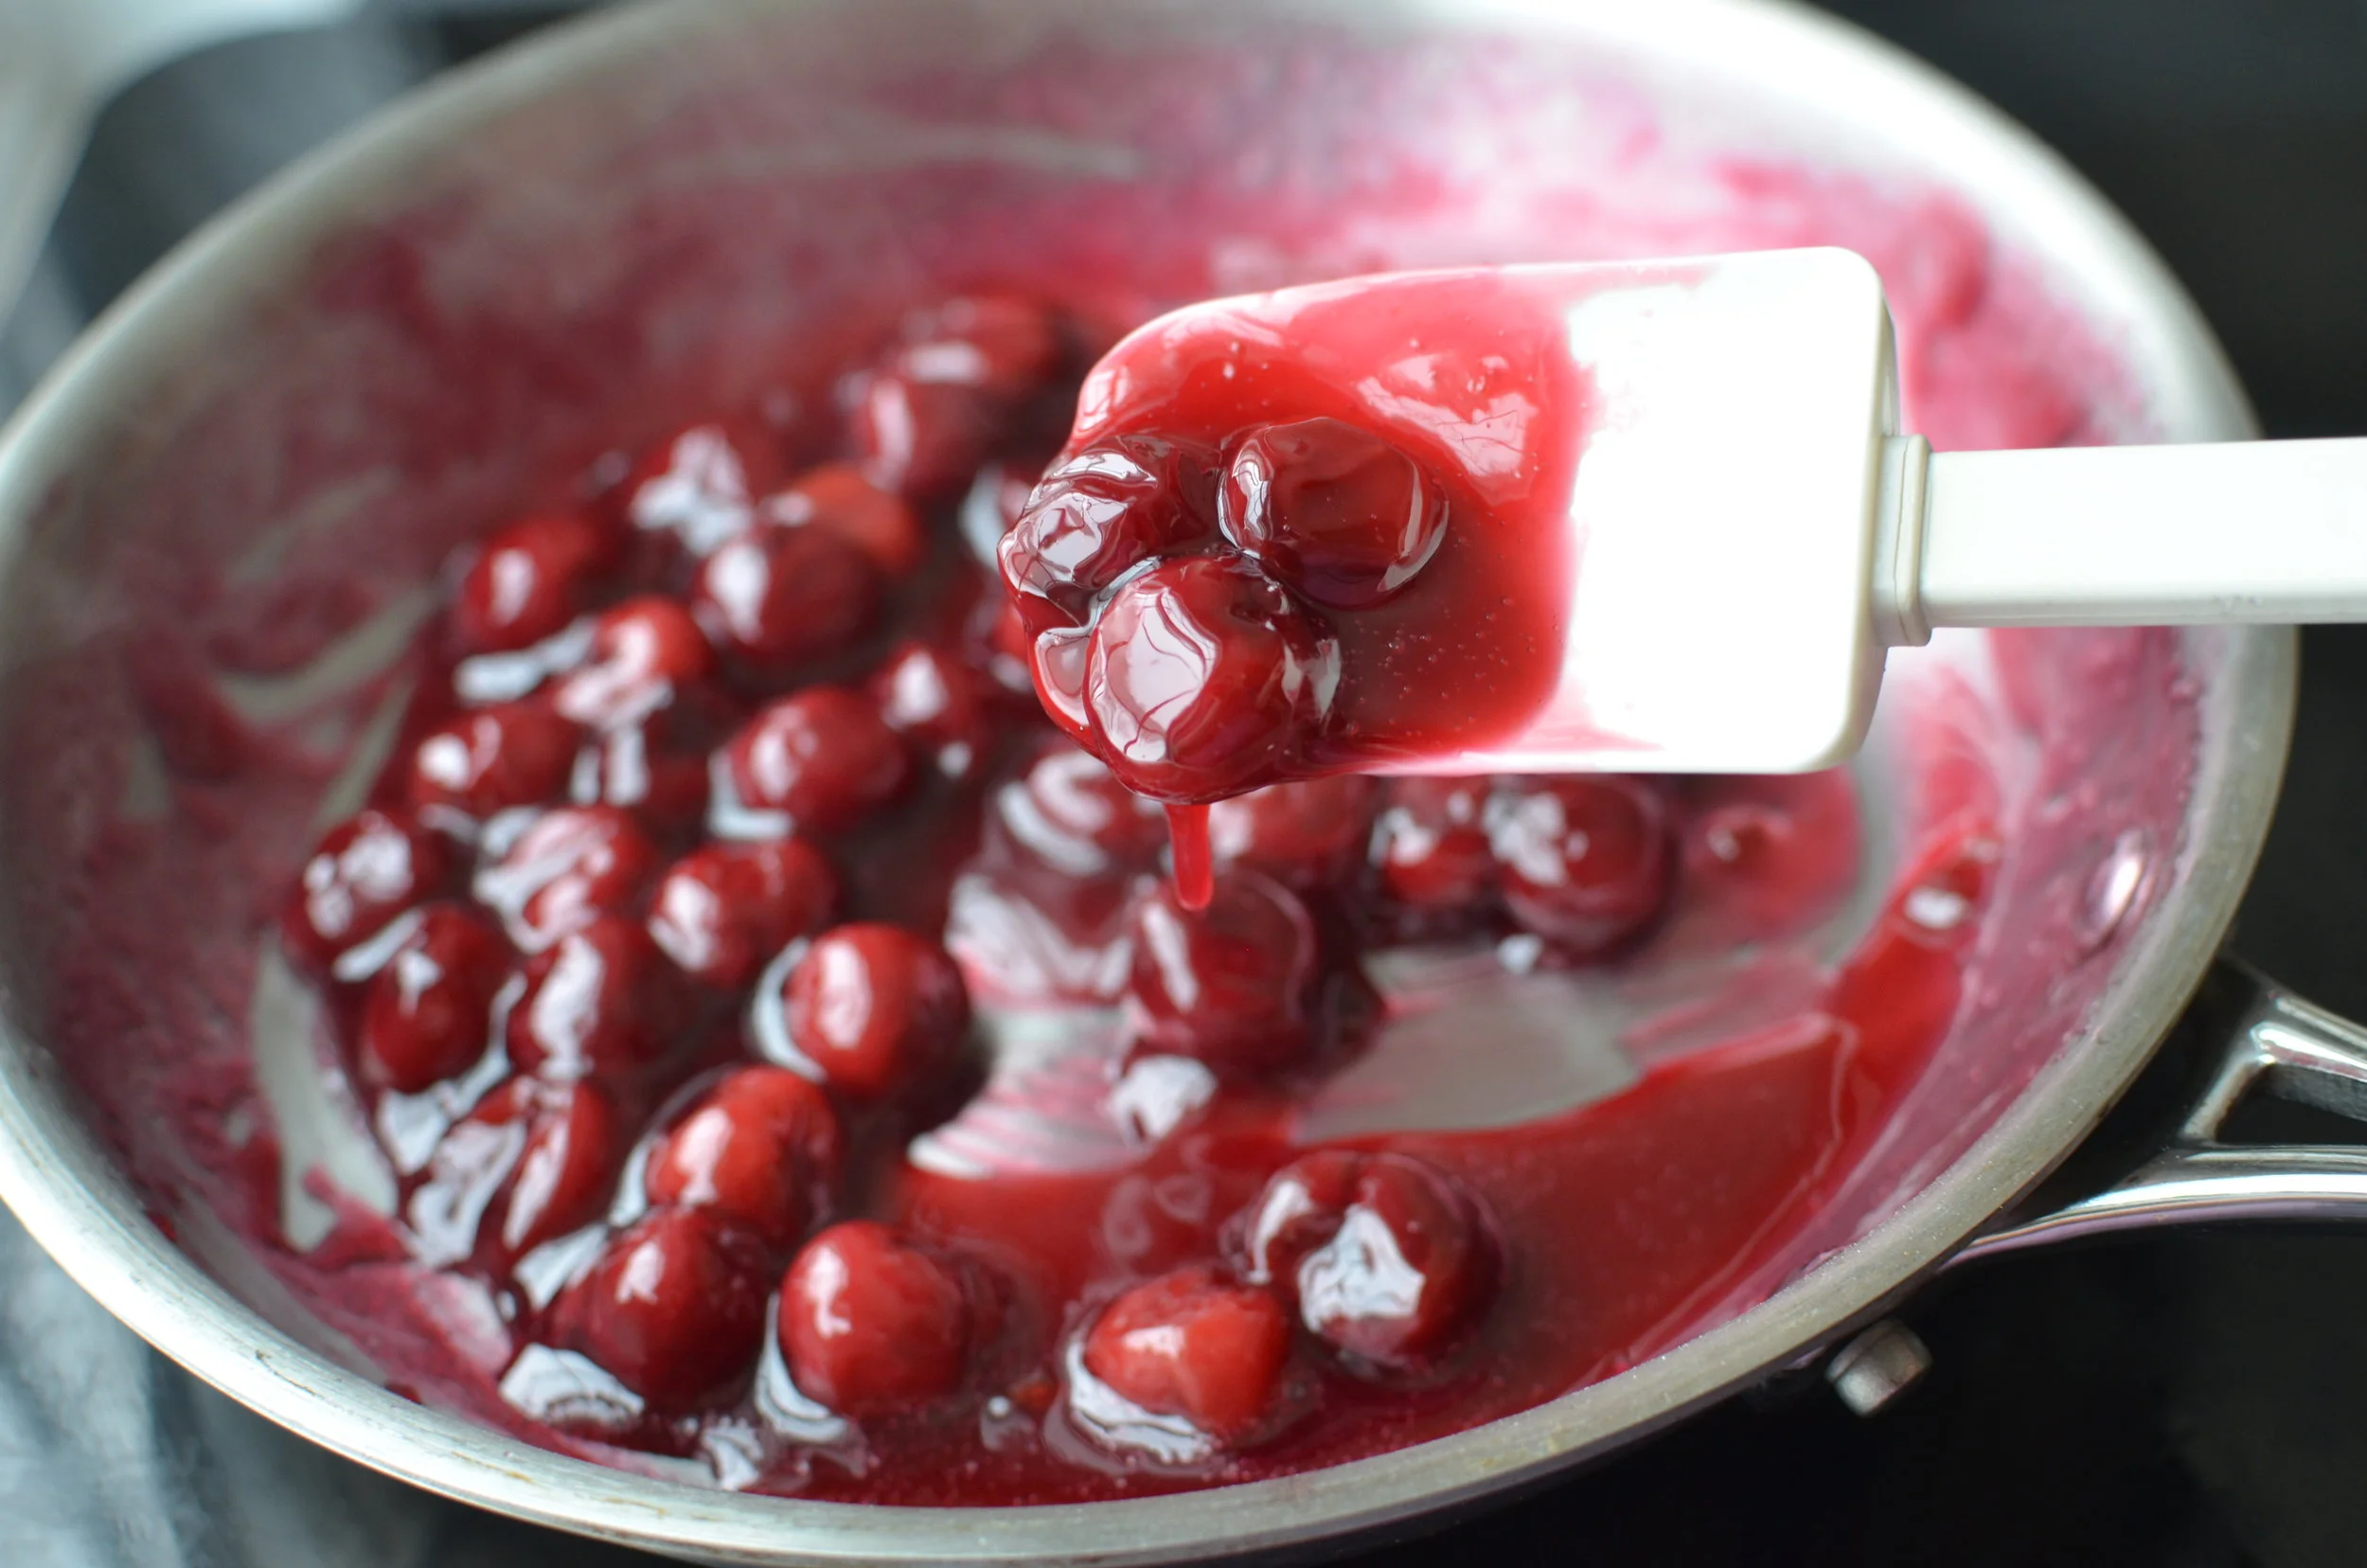
mmmm… set the yummy cherry topping aside until needed.

chocolate-dutch-baby-with-whipped-cream-and-homemade-cherry-topping-chocolate-german-pancake

The Dutch Baby (German Pancake) is really easy to make… just preheat an oven-proof skillet in your hot oven, melt the butter in the skillet and swirl it all around, then pour the excess melted butter into the a blender with all the other dutch baby ingredients, give it a whirl, and pour the batter into the prepared skillet. For some reason I didn’t get any photos while I was making the chocolate dutch baby, but you can see exactly how it’s done here in my Vanilla Dutch Baby post from a few years ago. The only difference, besides this one being chocolate instead of vanilla, is that this recipe is made in a smaller skillet.

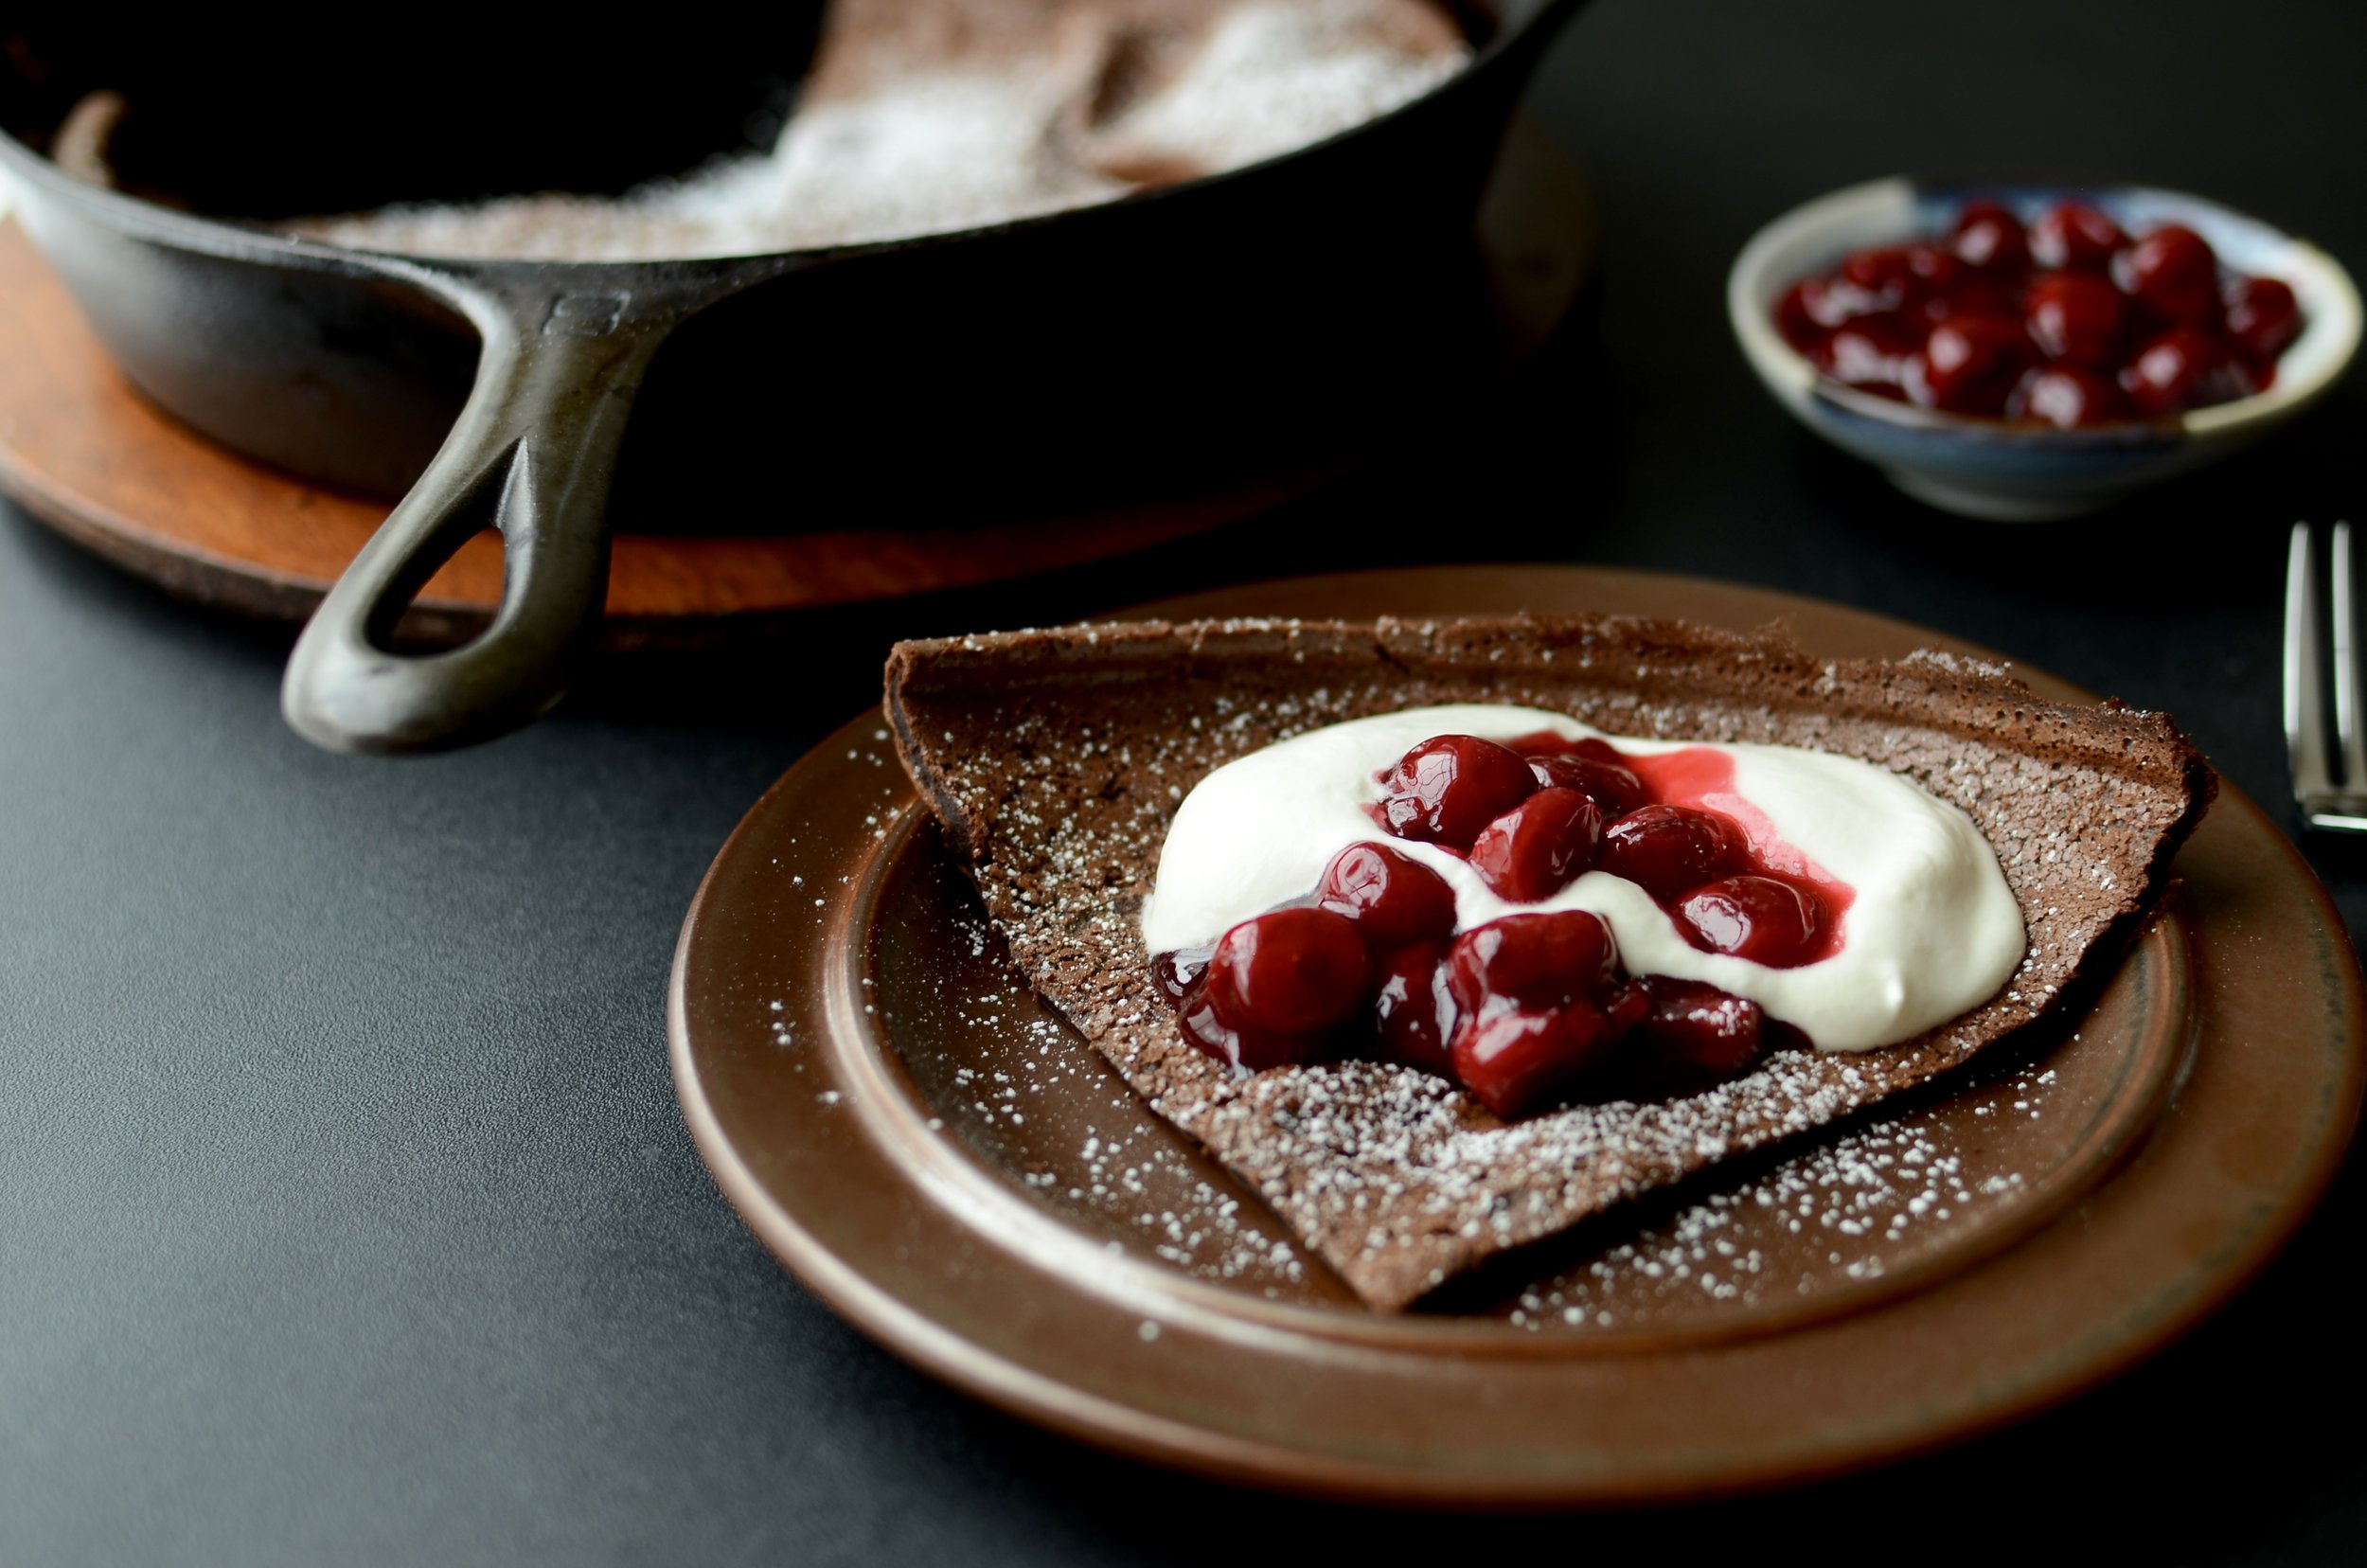
The Dutch Baby will puff up in the oven and collapse almost immediately upon removal. To serve, cut the dutch baby into 4 wedges and top with sweetened whipped cream and the cherry topping. Enjoy!

Items used to make this recipe:

(affiliate links)


Black Forest Dutch Baby

makes one 9-inch skillet, 4 servings

Printable Recipe

Ingredients

Cherry Topping:

  • 1 1/2 cups (140g) tart cherries, fresh or frozen, pitted

  • 1/4 cup (50g) granulated sugar

  • 1 1/2 tablespoons (6g) cornstarch

  • pinch of fine salt

  • 1/16 (6 drops) pure almond extract

Chocolate Dutch Baby:

  • 2 tablespoons (30g) unsalted butter

  • 2 large eggs (100g), room temperature

  • 1 tablespoon (12.5g) granulated sugar

  • 1/4 teaspoon fine salt

  • 3 tablespoons (25g) all purpose flour

  • 1 1/2 tablespoons (7.5g) dutch processed cocoa powder, sifted

  • 1/4 cup (61g) whole milk

Directions

To make the cherry topping:

  1. In a small saucepan over medium-high heat, combine cherries, sugar, cornstarch, and salt; bring to a boil, stirring constantly; continue cooking for a full minute.

  2. Remove from heat and stir in pure almond extract; set aside until needed.

To make the chocolate dutch baby:

  1. Preheat oven and 9-inch cast iron skillet in the center of a 425F oven.

  2. In a blender, combine the eggs, sugar, salt, flour, cocoa, and milk; set aside until the next step.

  3. Carefully remove the hot skillet from the oven and add the butter.

  4. Swirl pan until butter is completely melted and coats the entire pan; pour excess butter into batter and mix to combine.

  5. Slowly pour the batter into the hot, buttered skillet and return to the oven; bake for 12-15 minutes or until the dutch baby puffs up (it will deflate almost immediately when removed from the oven so don’t be alarmed when this happens).

  6. Remove from oven and allow to cool slightly before topping with cherry topping and lightly sweetened whipped cream.

Note

  • Try not to pour all the batter into the skillet in one spot - the force of the pour will remove the butter coating in the pour spot and the pancake will inevitably end up sticking. To avoid this, I like to hold an upside down serving spoon a few inches over the skillet and pour the batter slowly over the back of the spoon while moving the spoon around the skillet. This helps diffuse the force of the pour.

cherry topping adapted from Rose Levy Beranbaum from Real Baking with Rose; chocolate dutch baby adapted from Deb Perelman from Smitten Kitchen.

Chocolate Raspberry Tarts

Patricia @ ButterYum

One of my favorite ways to feature fresh, juicy raspberries is to use them to top decadent individually-sized chocolate tarts.  Such an impressive presentation, but so very easy to pull off.  Let me show you how easy they are to make.

chocolate-tart-cookie-crust-butteryum

First, start with a batch of pate sucree (sweet dough) that's been chilling for about 30 minutes.  Press the pate sucree into mini tart pans (these are the ones I have).  I love individually sized desserts, and these are small enough to enjoy all by yourself, but they're not too small to share with someone special.

Now it's time to "bake them blind", which may sound really weird to someone not familiar with the technique, but basically it's partially baking the pie crust.  We do this by lining the tart crust with crumpled parchment paper (crumpling helps it easily fit the contours of the tart), then fill it with a variety of things that will 1) conduct heat, which will allow the crust to bake, and 2) keep the walls of the tart from slumping during the baking process.  

You can purchase metal or ceramic pie weights made specifically for the purpose of blind baking, but there are several substitutions you can use - dried beans, uncooked rice, or even granulated sugar.  Dried beans that have been used for this purpose can no longer be cooked for consumption, but they can be reused again and again so I let them cool completely, then store them in a jar in the pantry for next time.  Rice and sugar will toast slightly, but can be used for other recipes - they'll get slightly toasted in the oven, which imparts a lovely flavor.

lining-tart-shell-with-crumpled-parchment-paper

See how the crumpled parchment is able to hug the contours of the tart?  Much easier than trying to do the same thing with a piece of flat parchment, believe me!

blind-baking-tart-shells-butteryum

Fill with beans (or rice, sugar, pie weights, etc).  Chill well while the oven preheats.  Chilling the pate sucree before baking helps to keep it from shrinking during the baking process.

blind-baked-chocolate-tart-shell-for-raspberry-tart-butteryum

After 10-15 minutes, the sides of the tart will be set and you can remove the parchment and its contents.  You can see how the sides have lost their shine, but the bottom of the tarts need more time in the oven so return them for another 10 minutes or so.

chocolate-tart-shells-ready-to-fill-butteryum

You'll know they're done when they look dry and are firm to the touch.  Set aside to cool while you make the ganache filling.  

scalding-cream-to-make-chocolate-ganache

To make the ganache, heat cream until just before it begins to boil.

making-chocolate-ganache-butteryum

Pour over your chopped chocolate and let it sit, undisturbed, for a few minutes.  Then whisk together until smooth.

pouring-chocolate-ganache-in-prebaked-chocolate-tart shells

Pour the ganache into the baked tart shells.

ganache-filled-tart-shells-butteryum

Chill for at least 15 minutes before adding the raspberries so they don't sink into the chocolate. 

mini-chocolate-raspberry-tarts-butteryum

When you're ready to serve, sprinkle the berries with a little confectioner's sugar and remove the sides of the tart pan.

unmolding-chocolate-raspberry-tart-butteryum

Place the tart on something elevated, yet small enough for the sides of the tart pan to fit over.  Here I'm using an egg cup.  Using gentle pressure, push the sides of the pan down.  

Enjoy!

Items used to make this recipe:

(affiliate links)


Individual Chocolate Raspberry Tarts

makes 6 mini tarts (or one 9-inch tart)

Printable Recipe

Ingredients

Pate Sucree Crust:

Filling:

Garnish:

  • 3 pints fresh raspberries

  • confectioners sugar

  • mint sprigs

Directions

To Make Pate Sucree:

  1. In the bowl of a stand mixer fitted with a BeaterBlade or flat paddle attachment, combine the ingredients until fully combined and no traces of dry ingredients remain.

  2. Wrap will with plastic and chill for 30-60 minutes.

  3. Divide dough equally between 6 individual tart pans with removable bottoms and press evenly across bottom and up sides; chill for at least 15 minutes (or up to several days if wrapped well with plastic).

  4. Preheat oven to 325F and line chilled tart shells with parchment paper filled with beans, rice, sugar, or pie weights.

  5. Place filled tart shells on silpat-lined sheet pan and bake for 10-15 minutes, or until the sides of the tarts are set; remove parchment and return empty shells to oven to continue baking for another 10 minutes or until the bottom crust is set.

  6. Allow tart shells to cool until while you make the filling.

To Make the Filling:

  1. Place chopped chocolate in a heat-safe bowl; set aside.

  2. In a medium heavy-bottom saucepan, heat cream and butter until just before it reaches the boiling point (small bubbles will form around the edges).

  3. Remove cream/butter mixture from the heat and pour over chocolate.

  4. Let the chocolate and cream steep together for 2-3 minutes.

  5. Add the espresso powder and pure vanilla extract; whisk gently until smooth and shiny.

  6. Divide filling between tart shells, leaving 1/4-inch space at the top of each shell; chill for at least 15 minutes before adding berries.

To Serve:

  1. Top with fresh raspberries and sprinkle with confectioners sugar.

  2. Carefully remove sides of tart pan as shown above, and garnish with fresh mint.