Gluten-Free Fudge Cake
Patricia @ ButterYum

This dense, rich, fudge cake is not only gluten-free, the batter is mixed together in a blender. When have you ever heard of such a thing? This cake takes no time to make at all - the batter is literally ready in a matter of minutes. You can serve this cake warm or at room temperature, but we like it chilled.

Start by lining the bottom of a 9-inch springform pan with parchment paper, then spray the rest of the pan with Baker's Joy to ensure perfect release.

In 30-second bursts the microwave, slowly melt butter and chocolate together, stirring between bursts. When the chocolate is completely melted, stir well to make sure butter is completely incorporated. Set aside until needed. Tip: if your microwave is very powerful, decrease the power to 50%.
Alternatively, you can melt the butter and chocolate together over a double boiler of simmering water, stirring frequently.
Bittersweet vs Semisweet Chocolate
There isn’t much difference between bittersweet and semisweet chocolate, and the sugar level for both varies from one manufacturer to another, so feel free to use which ever one tastes great to you!

Additional ingredients needed are almond meal (finely ground almonds), salt, baking soda, baking powder, espresso, and....

Whole eggs and sweetened condensed milk.

Now for the fun part - we mix all the ingredients together in a blender (this is the brand I love). Start to combining the eggs and sweetened condensed milk on low speed until combined.

Add the chocolate/butter mixture, almond meal, baking soda, baking powder, salt, and coffee. Blend again on low speed until combined.
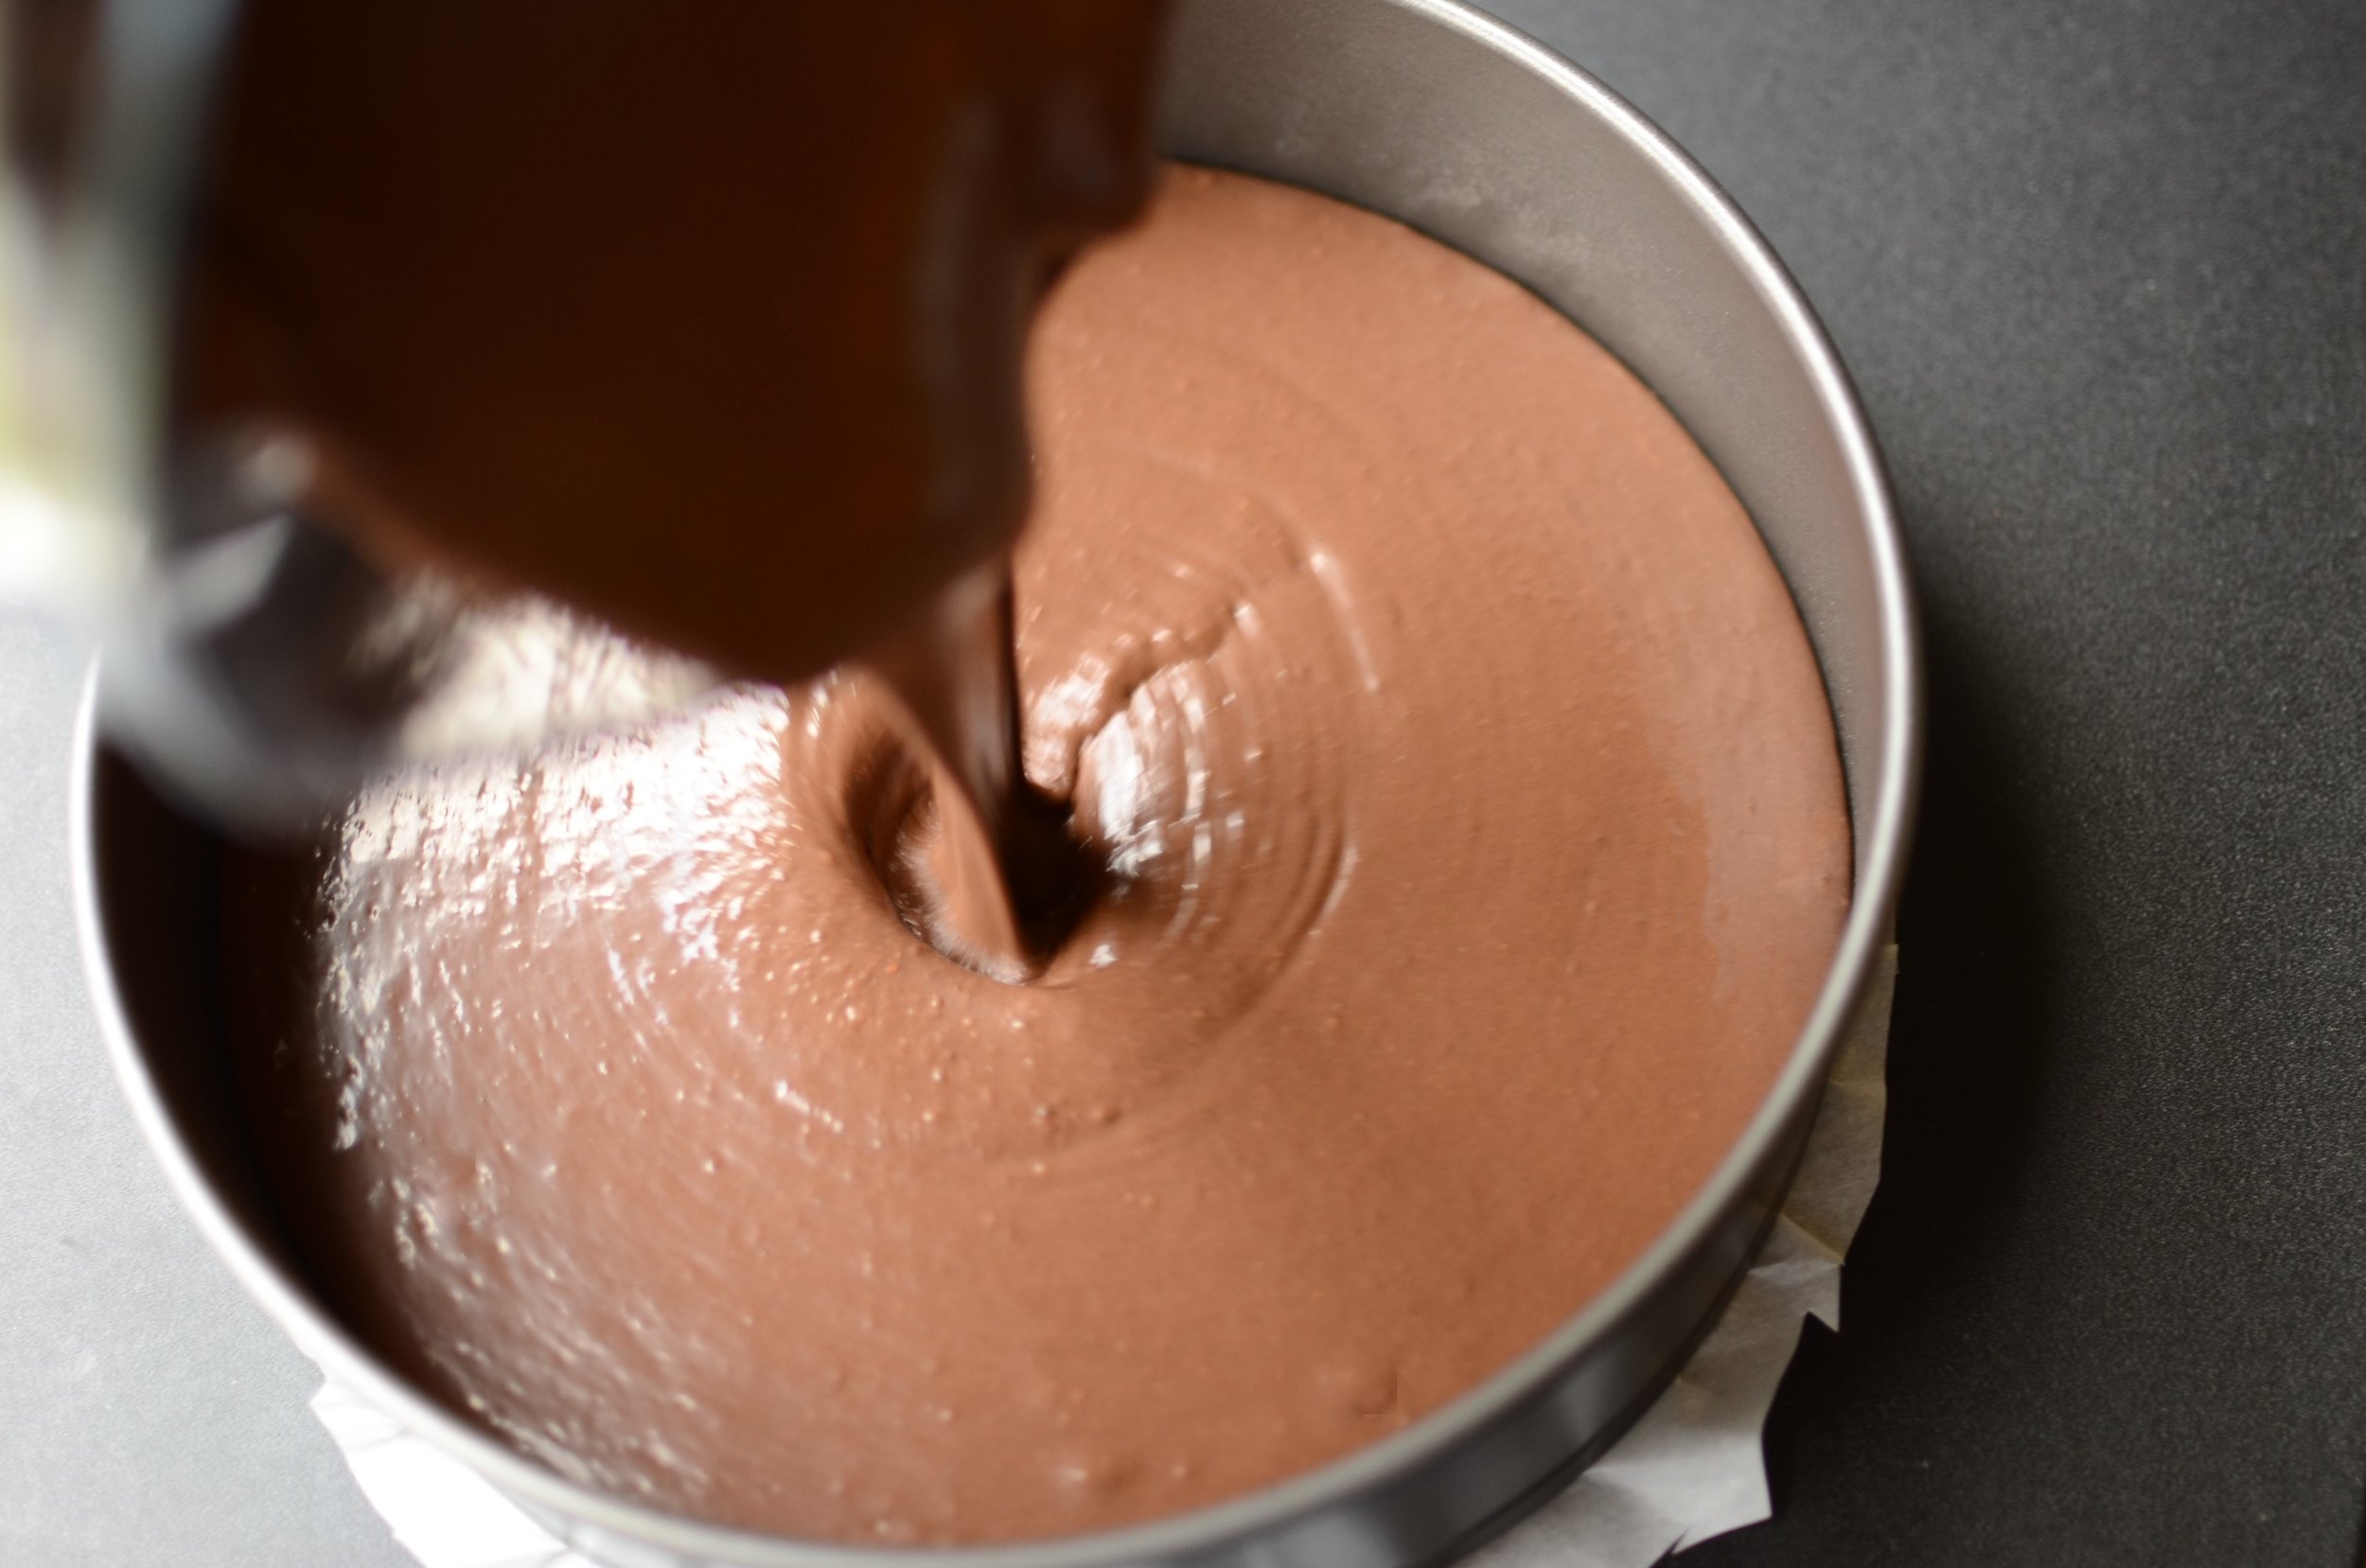
Pour the mixture into the prepared pan and bake for about 40 minutes in a preheated oven.
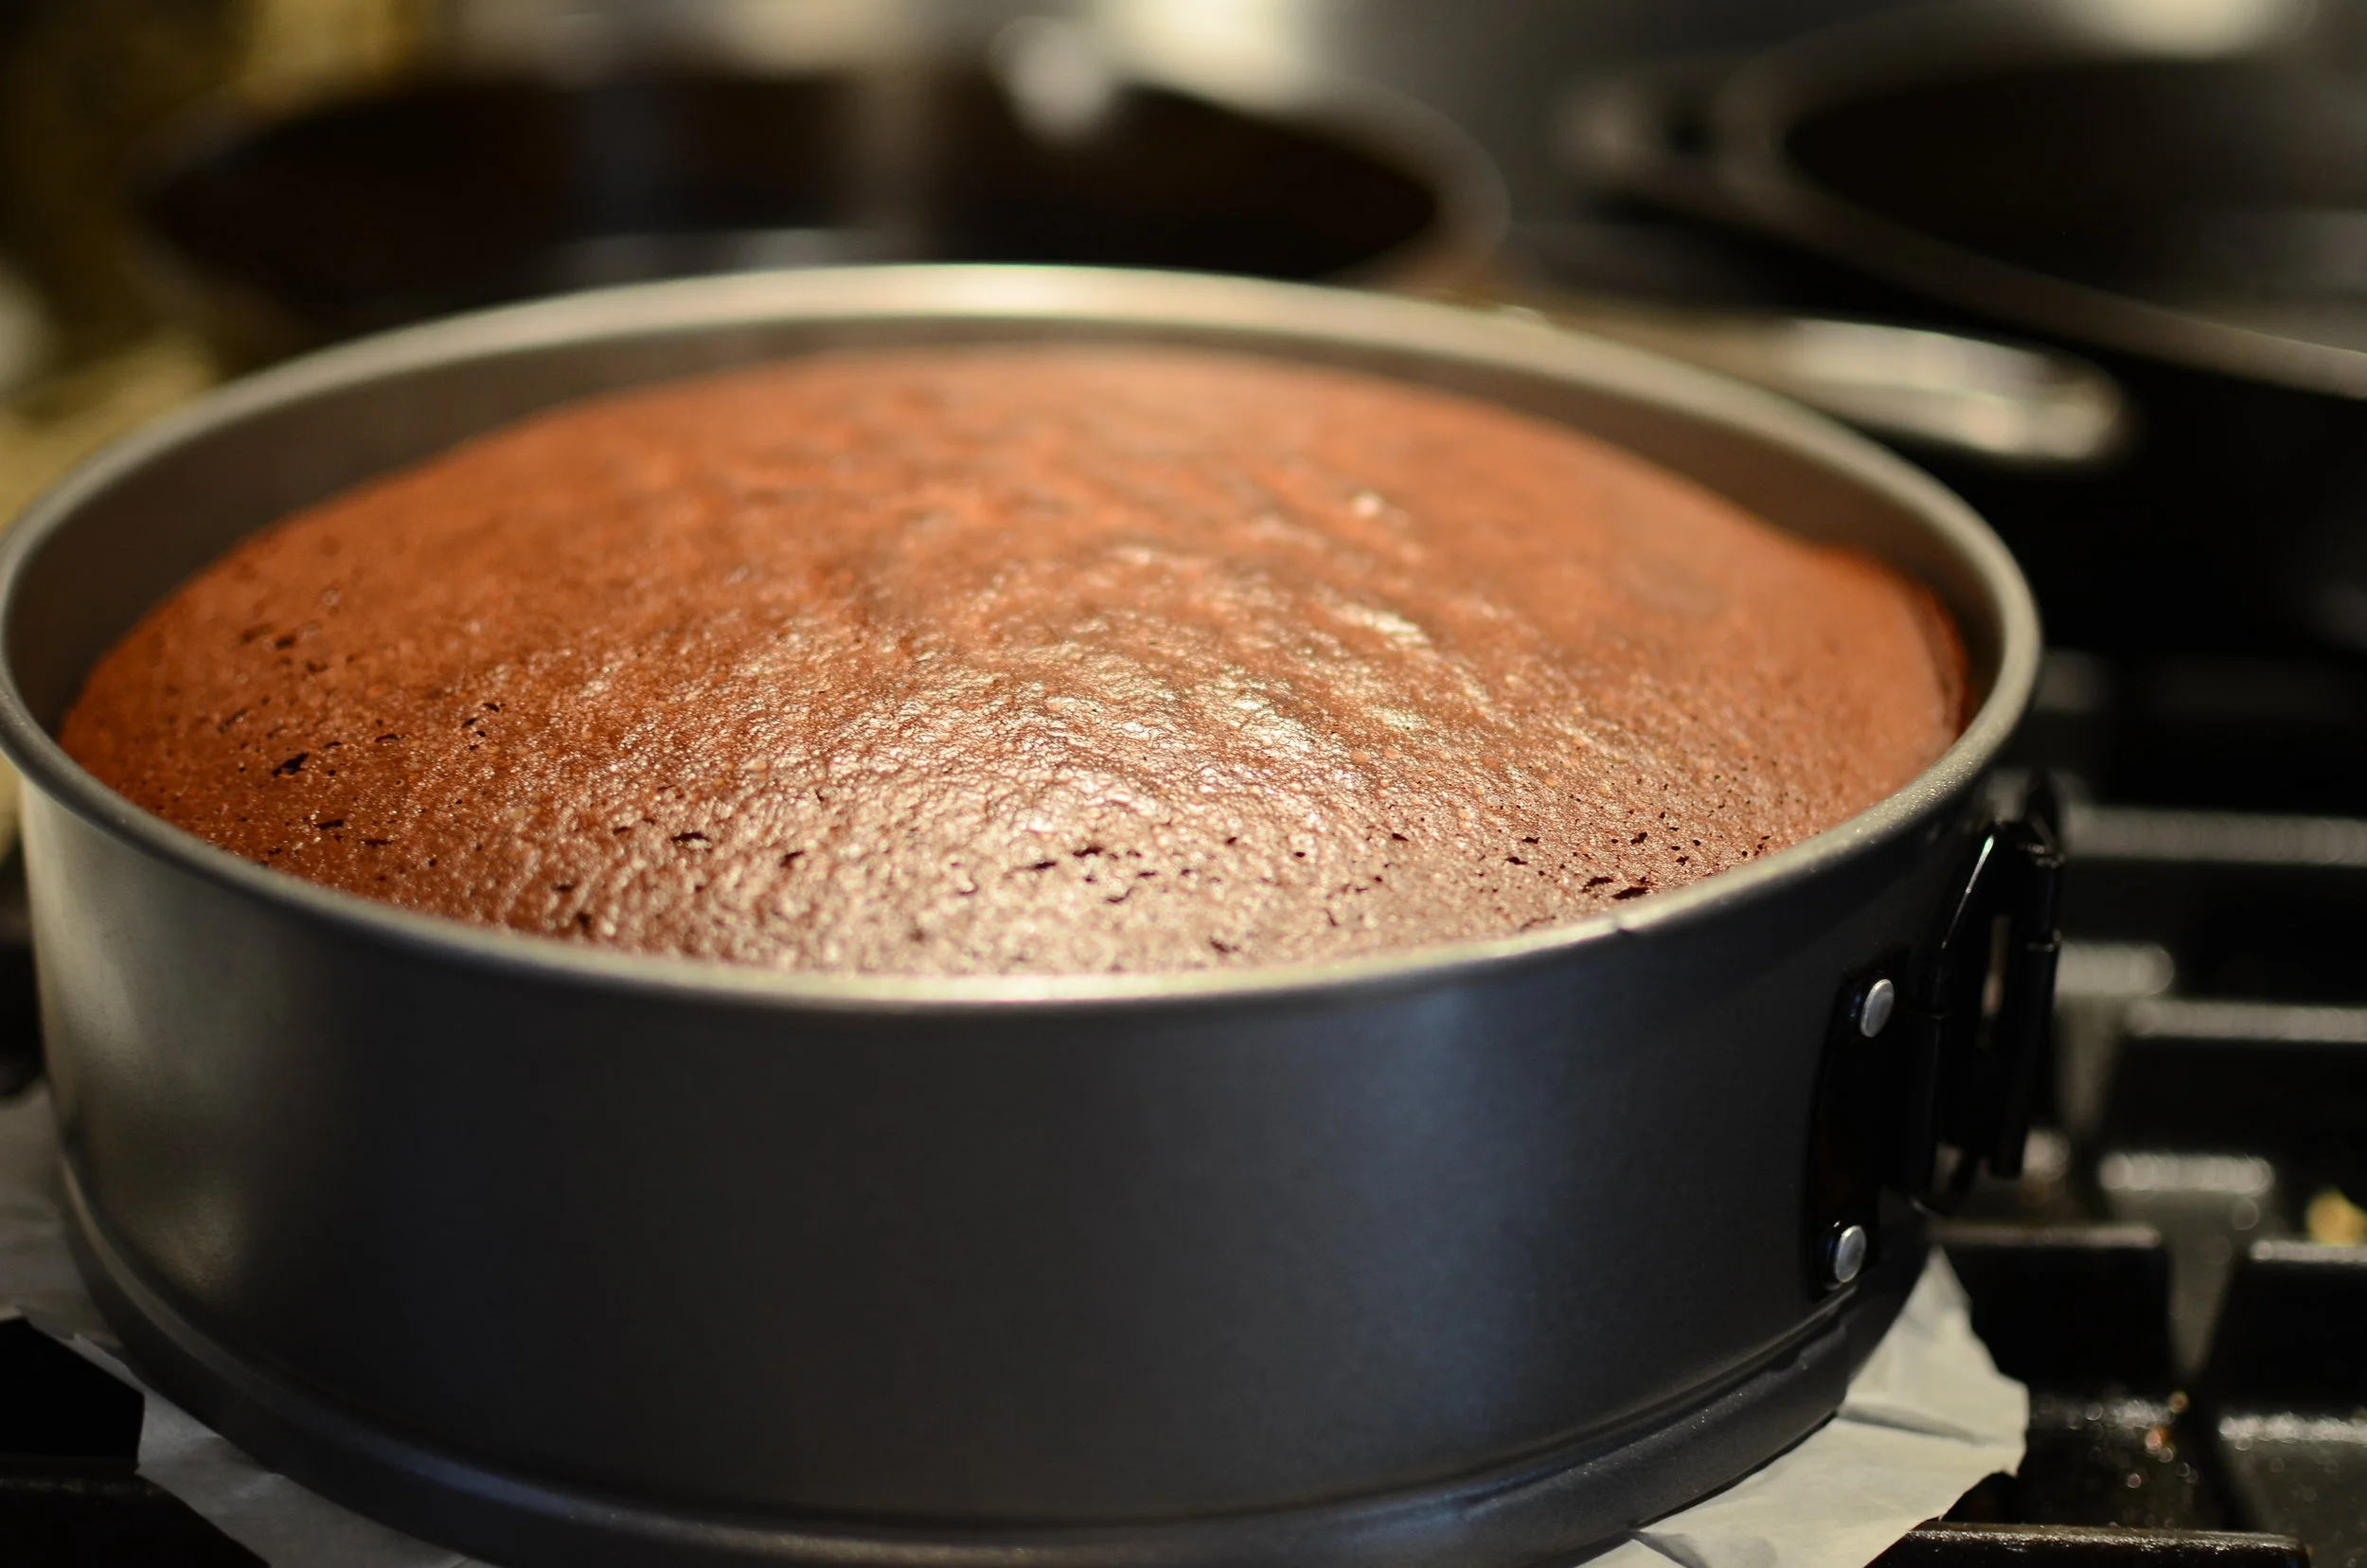
The cake will come out of the oven puffed up in the center.

Allow the cake to cool for 1 hour before chilling for at least 2 additional hours. The cake will fall in the center as it cools - this is normal so don't be alarmed.

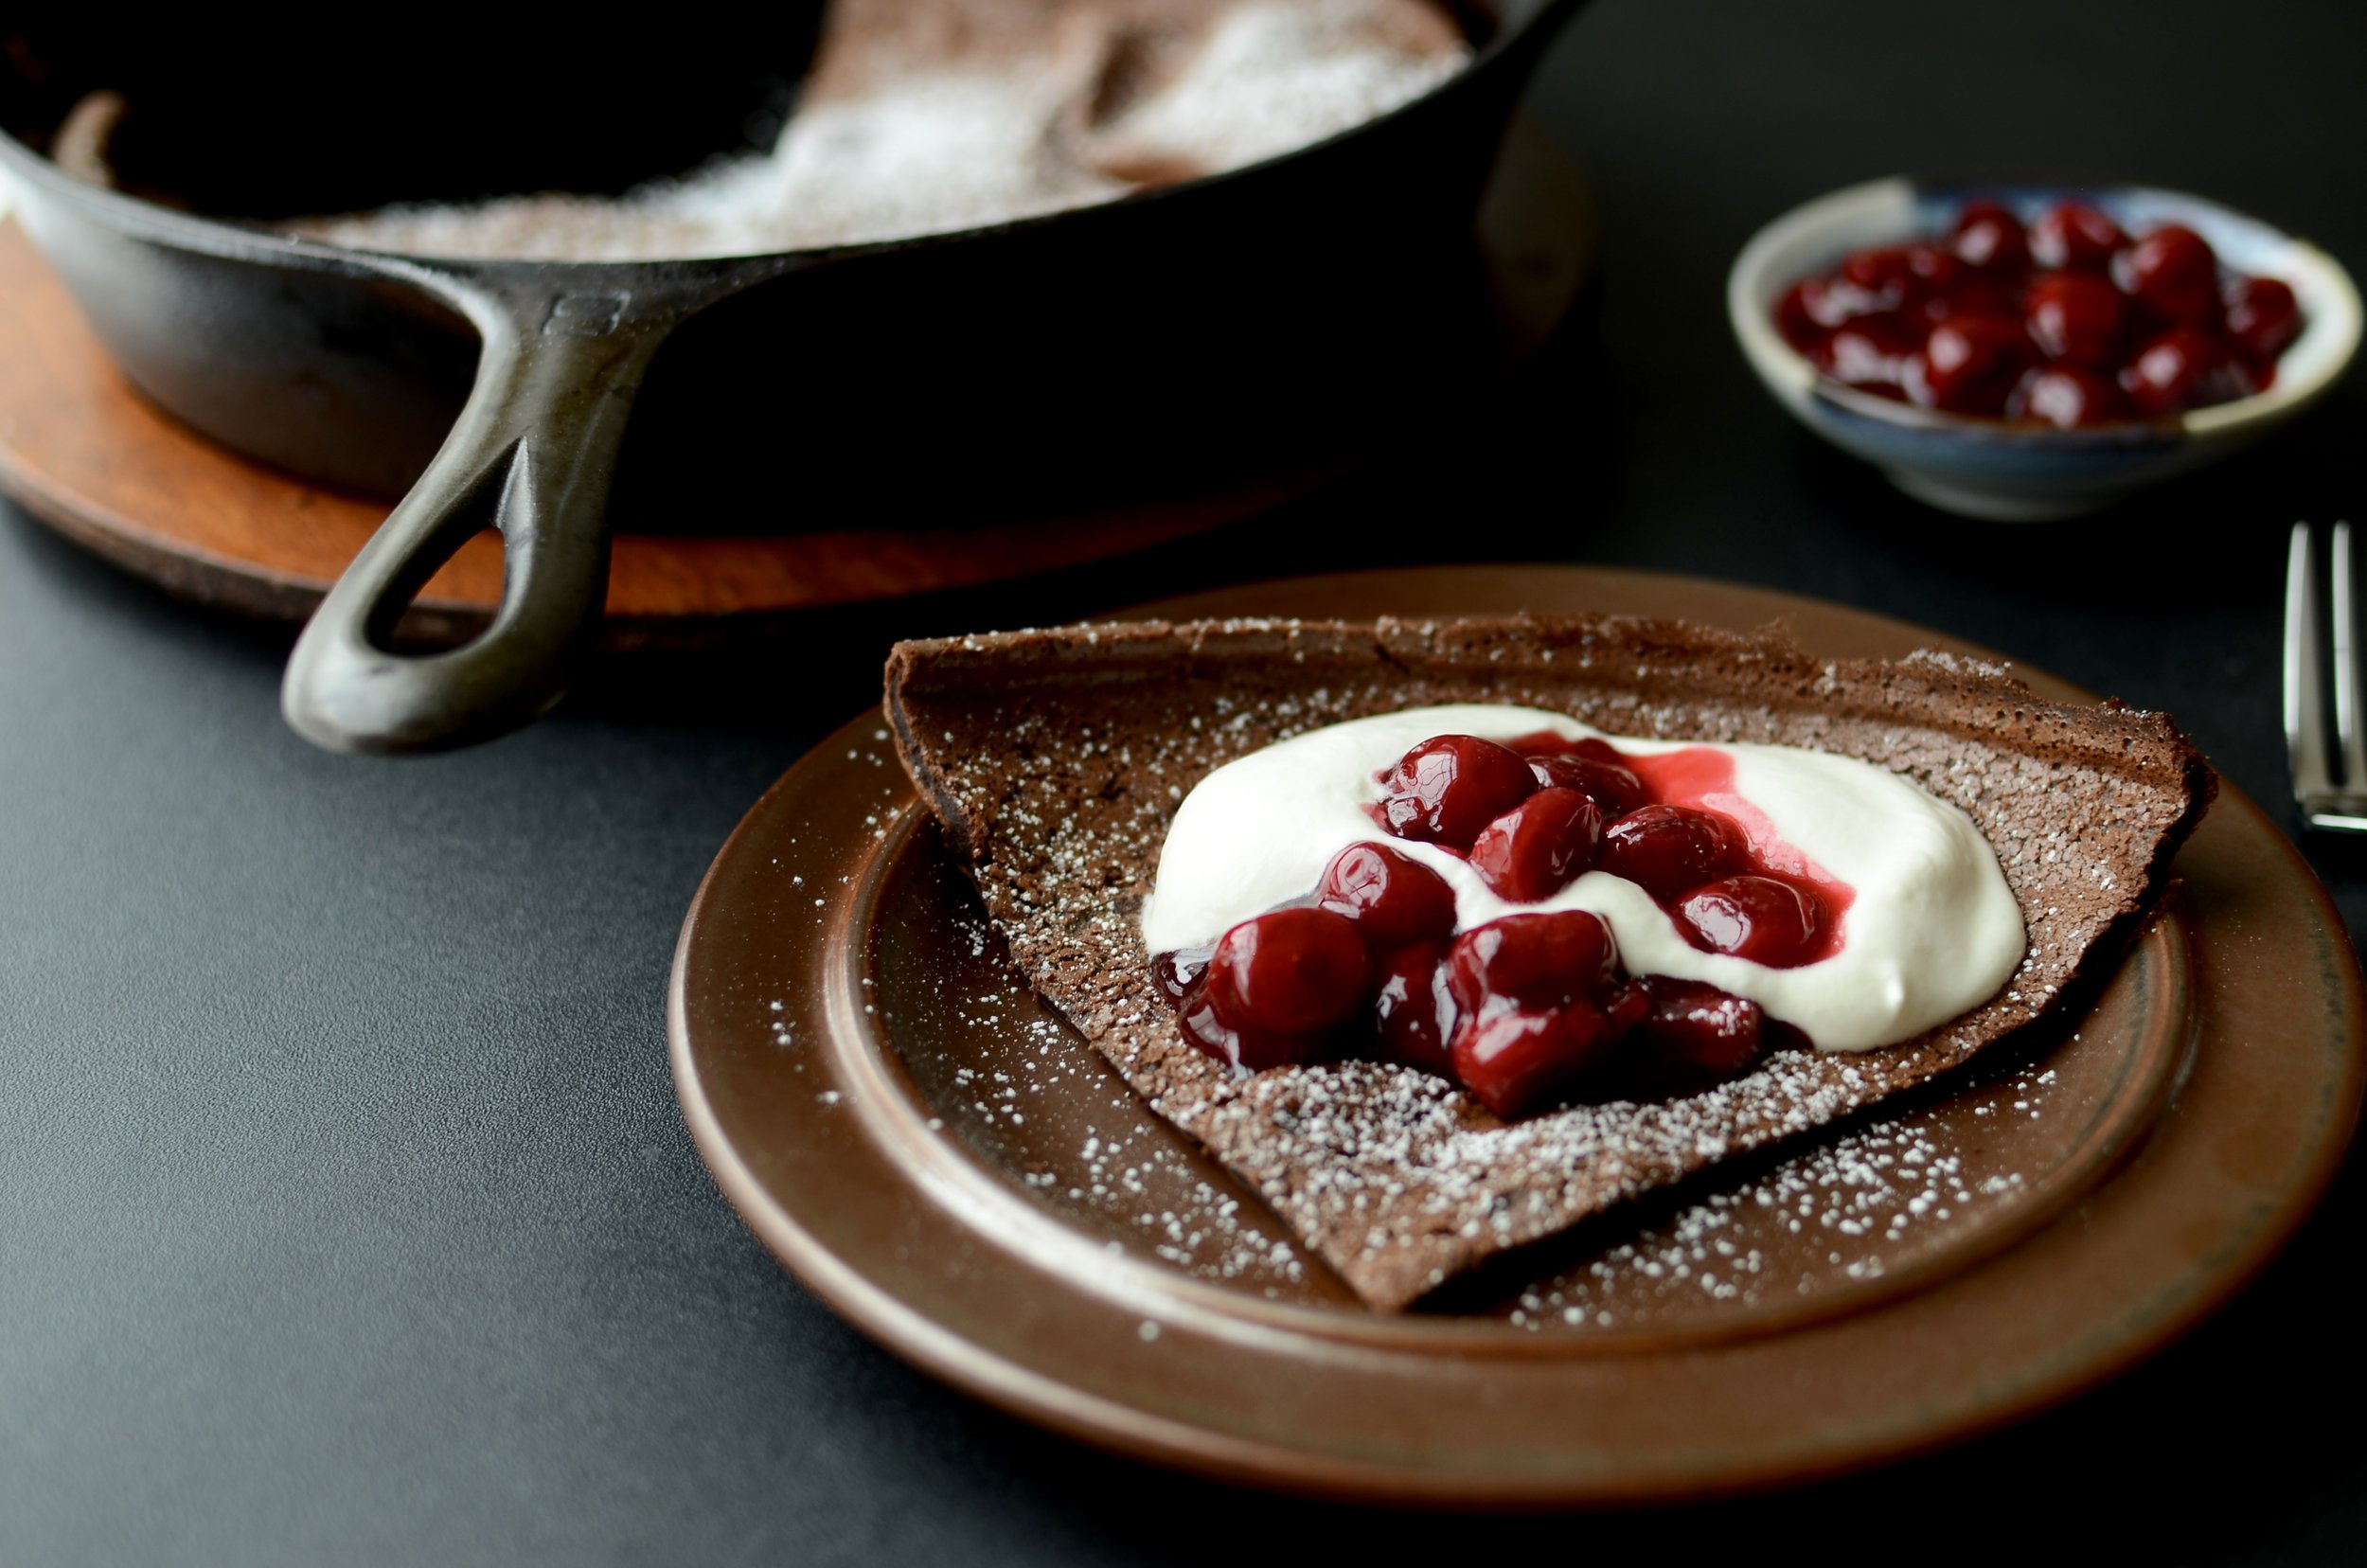
Remove the sides of the springform pan and cut into 16 slices with a hot, sharp knife (long, thin, non-serrated blades work best - like this one). This cake is very moist so if you want to sprinkle it with confectioner's sugar, use the non-melting variety.


Items used to make this recipe:
(affiliate links)
9-inch springform pan https://amzn.to/3GH3IGZ
parchment paper https://amzn.to/3ozM16b
Baker's Joy https://amzn.to/3HCnCVd
almond meal https://amzn.to/3CV7v40
my favorite blender https://amzn.to/3uzhtoO
Moser-Roth 85% chocolate https://amzn.to/3gBj7hH
high quality espresso powder https://amzn.to/3Ln25lF
non-melting confectioner's sugar https://amzn.to/46oEETr
thin, sharp knife https://amzn.to/3suJqeK
Gluten-Free Fudge Cake
makes 16 servings
Ingredients
16 tablespoons unsalted butter
6 ounces bittersweet or dark chocolate
4 large eggs
14 ounce can of sweetened condensed milk, plus 1/4 cup
1 1/2 cup finely ground almond flour (or meal), sifted
1/2 teaspoon baking soda
1/2 teaspoon baking powder
1/4 teaspoon fine salt
1/4 cup hot espresso (or see note below)
Optional: non-melting confectioner's sugar
Directions
Preheat oven to 350F and place rack in center position.
Line bottom of a 9-inch springform pan with parchment paper and spray pan with Baker's Joy.
In 30-second bursts the microwave, slowly melt butter and chocolate together, stirring between bursts; set aside until needed. NOTE: if your microwave is very powerful, decrease power to 50%, or you can melt the butter and chocolate together in a double boiler over simmering water.
In the jar of a blender, combine eggs and sweetened condensed milk on low speed until combined.
Add chocolate/butter mixture; mix on low speed until combined.
Add almond meal, baking soda, baking powder, salt, and espresso; mix on low until combined.
Pour batter into prepared pan and bake for 40 minutes until a toothpick inserted in the center of the cake tests done (a few crumbs sticking to the toothpick are ok).
Cool cake in pan on a rack for 1 hour; cover with plastic and chill for at least 2 hours.
Remove sides of springform pan and slide cake off of parchment base.
Use a hot knife to cut cake into 16 slices. Leftovers should be stored in an airtight container in the refrigerator.
Note
To make espresso, combine 1/4 cup boiling water with 1/2 teaspoon high quality espresso powder.
recipe adapted from Pati Jinich


