contact us

Use the form on the right to contact us.

You can edit the text in this area, and change where the contact form on the right submits to, by entering edit mode using the modes on the bottom right.


123 Street Avenue, City Town, 99999

(123) 555-6789

email@address.com


You can set your address, phone number, email and site description in the settings tab.
Link to read me page with more information.

Blog

Butteryum food blog recipes

Filtering by Category: christmas recipes

Embossed Spice Cookies with Butter Rum Glaze

Patricia @ ButterYum

fullsizeoutput_3f90.jpeg

Fall is officially here! That means holiday baking is just around the corner. Today I’m sharing with you a delicious recipe for Spice Cookies with Butter Rum Glaze that I know your friends and loved ones are going to devour! Not only because they taste amazing, but because they look so elegant…. and you don’t have to be a pastry chef to achieve these results. Let me show you how to make them.

A big Thank You to Jessica at Embossed for providing the paisley embossed rolling pin used in this post.

how.to.make.embossed.cookies.jpeg

After making the cookie dough, roll it between two layers of wax paper (or parchment) to 1/4-inch thickness. I like to use rolling guides to ensure all the cookies are the exact same thickness.

fullsizeoutput_3f96.jpeg

Remove the top layer of wax paper…

DSC_1733.JPG

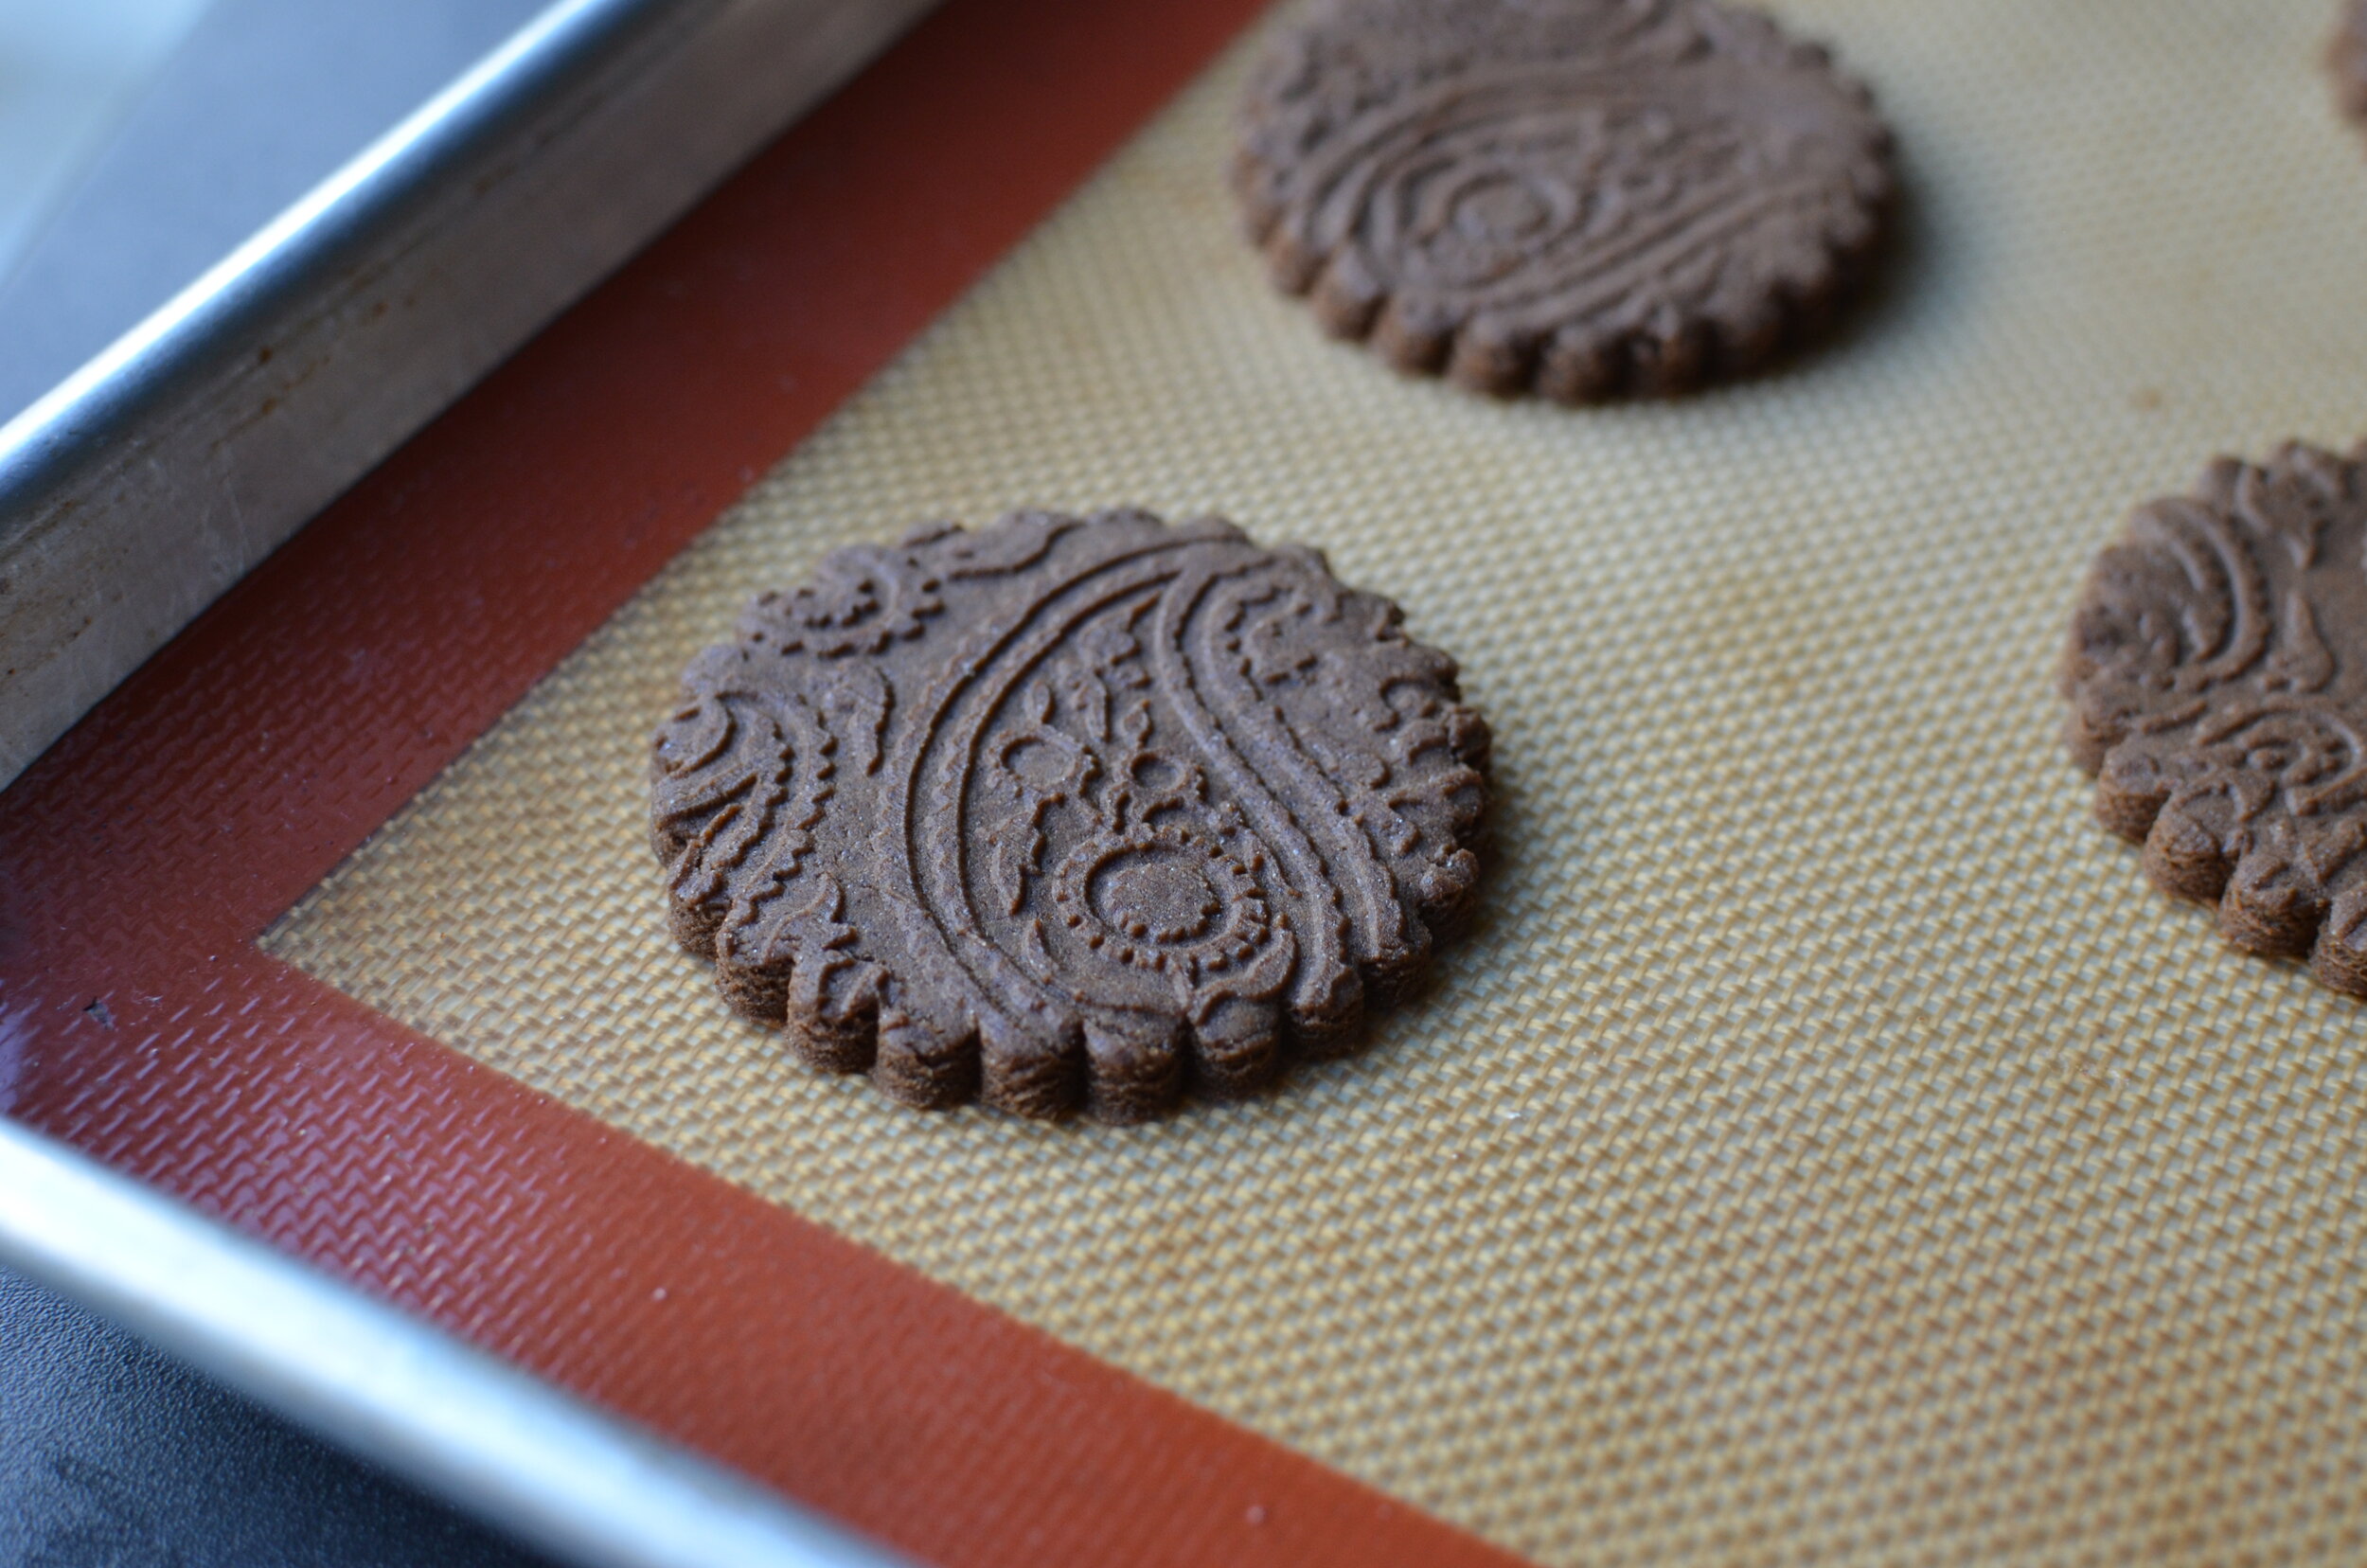
And use an embossed rolling pin to imprint the cookie dough with the pattern. No need to dust the pin or cookie dough with extra flour.
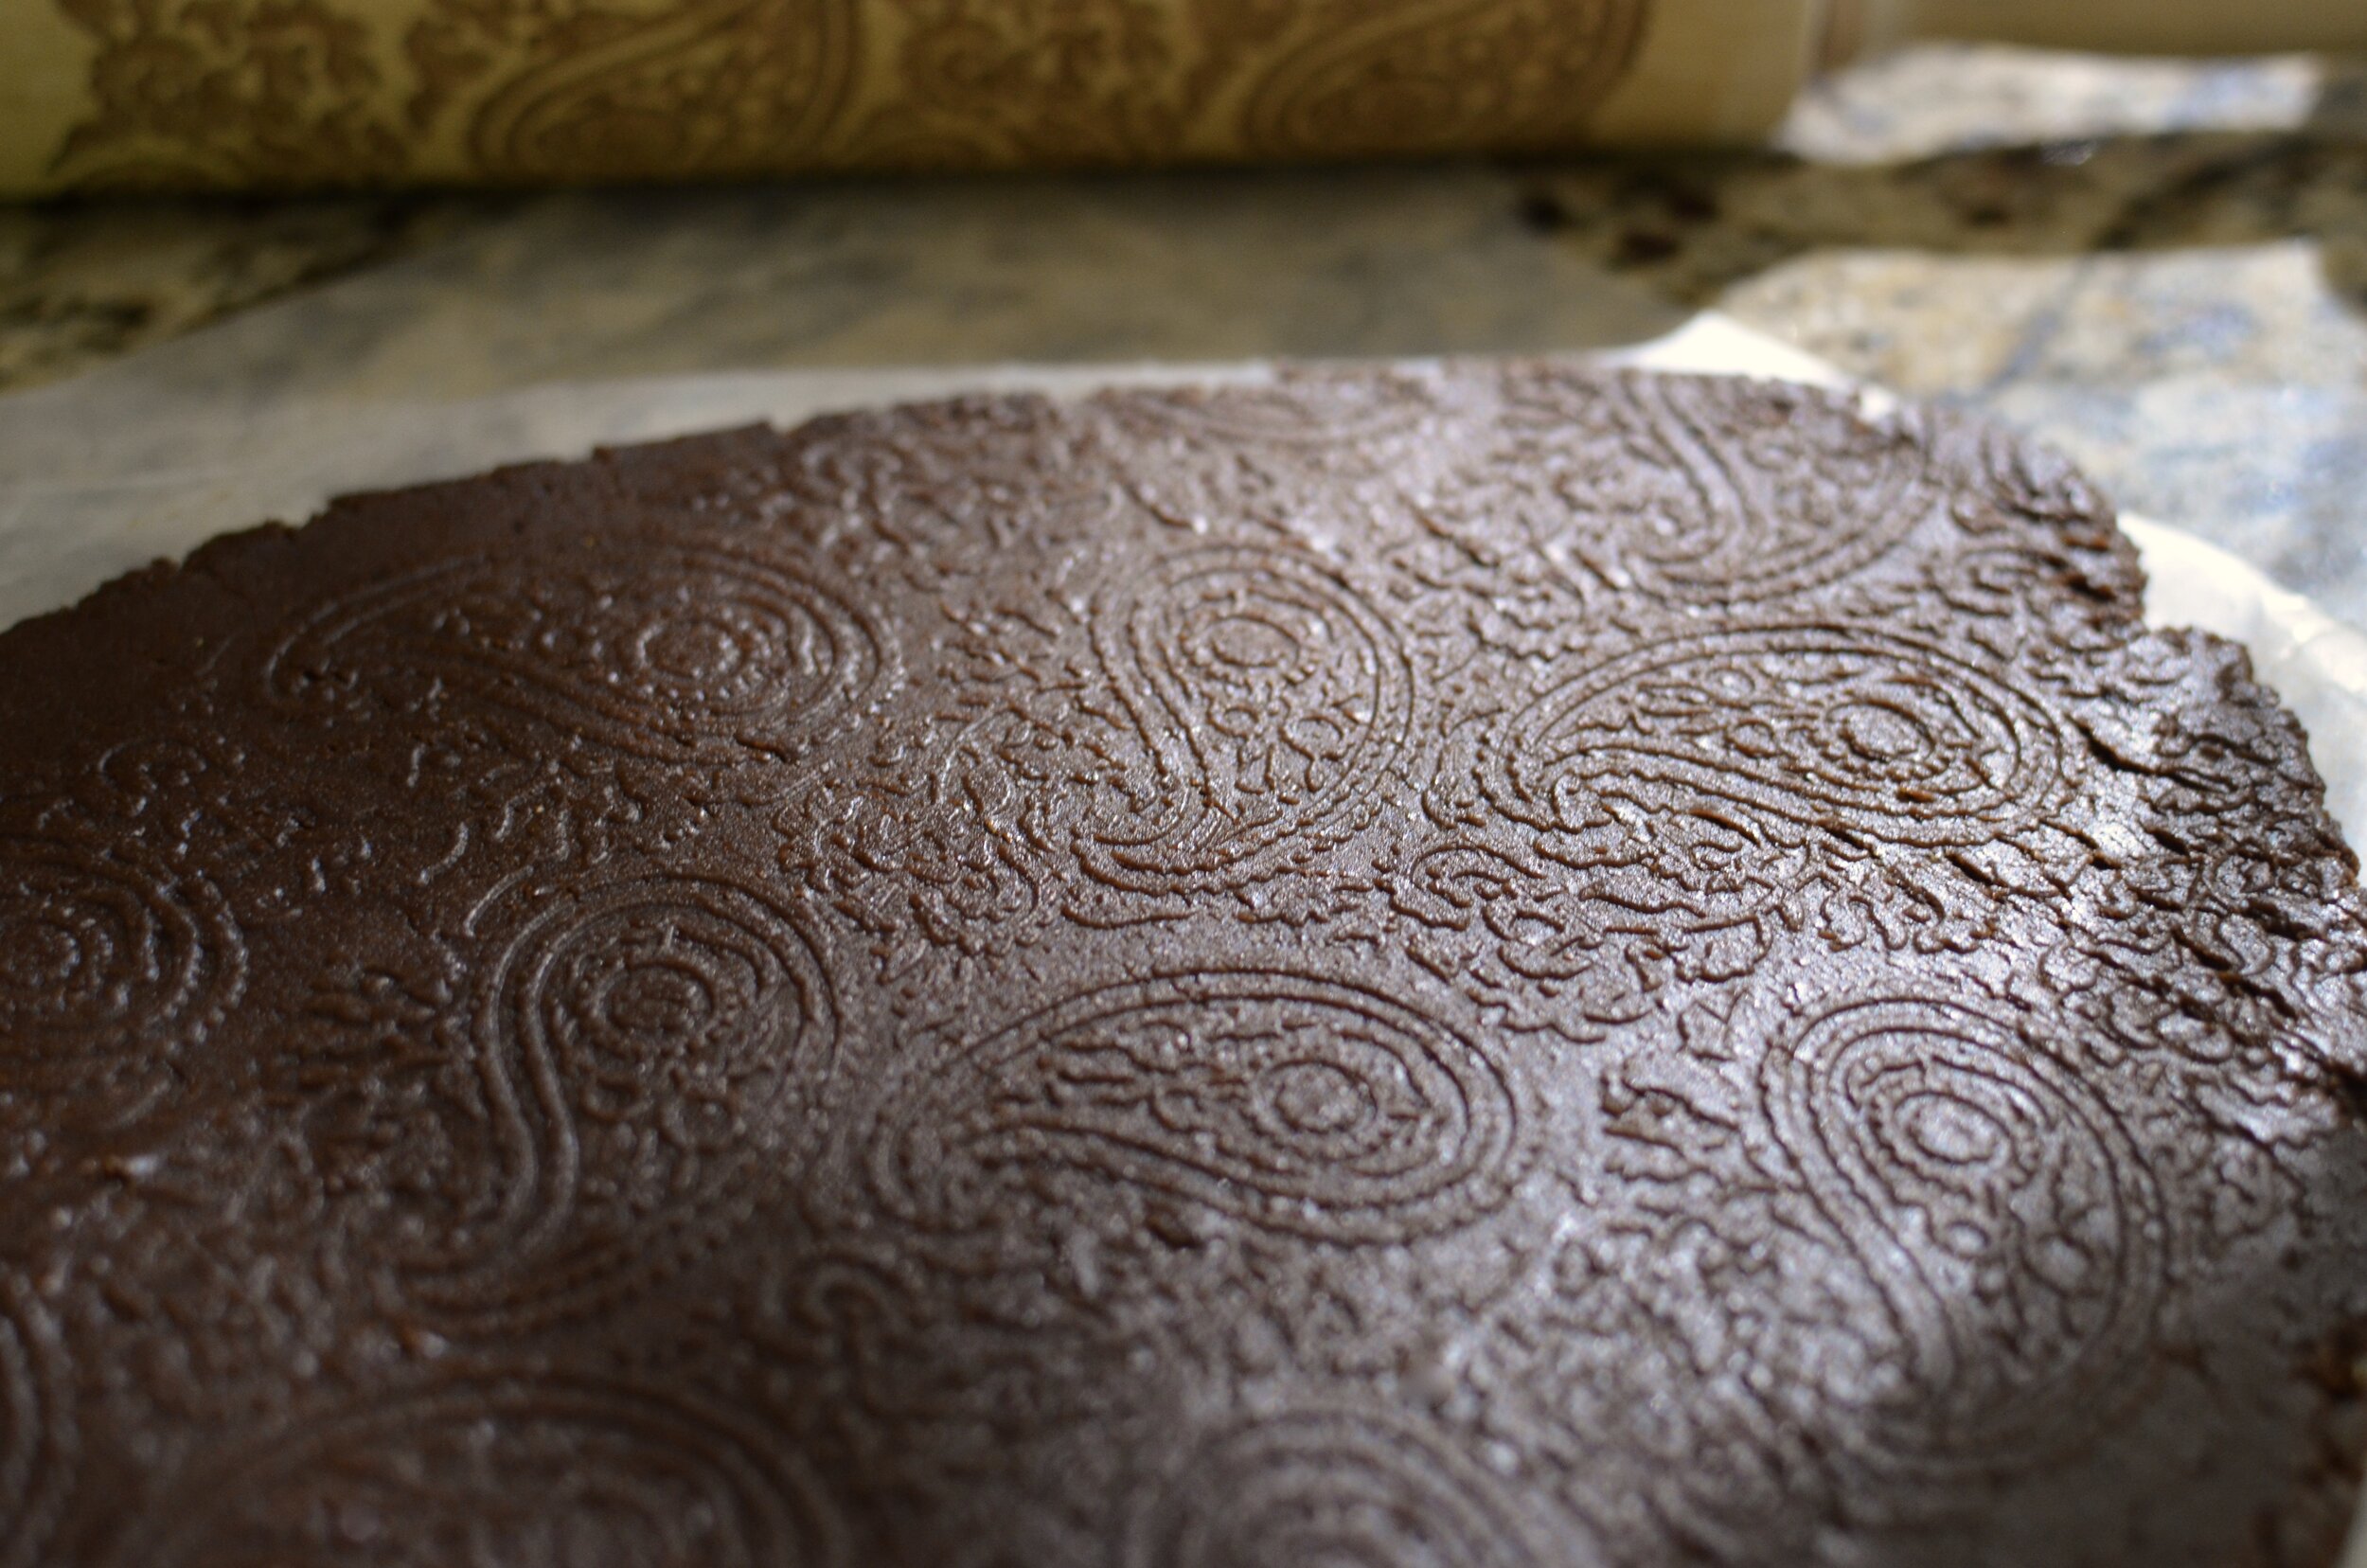
fullsizeoutput_3f97.jpeg

Pretty!

DSC_1742.JPG

Use a cookie cutter to cut the dough. I’m particularly fond of double-sided scalloped cutters.

embossed.cookie.recipe.jpg

Place the cookie cutouts on a silpat or parchment-lined half sheet pan. I tested both baking surfaces and both work well, but the silpat produced a slightly nicer finished appearance on the bottom of the cookies.

fullsizeoutput_40ae.jpeg

Now here’s the important part - chill the dough for at least 30 minutes before baking. This is a good time to preheat the oven.

embossed.cookie.glaze.jpg

While the cookies are baking, make the glaze and keep it covered with a wet paper towel when not using (to keep it from crusting over).

DSC_1776.JPG

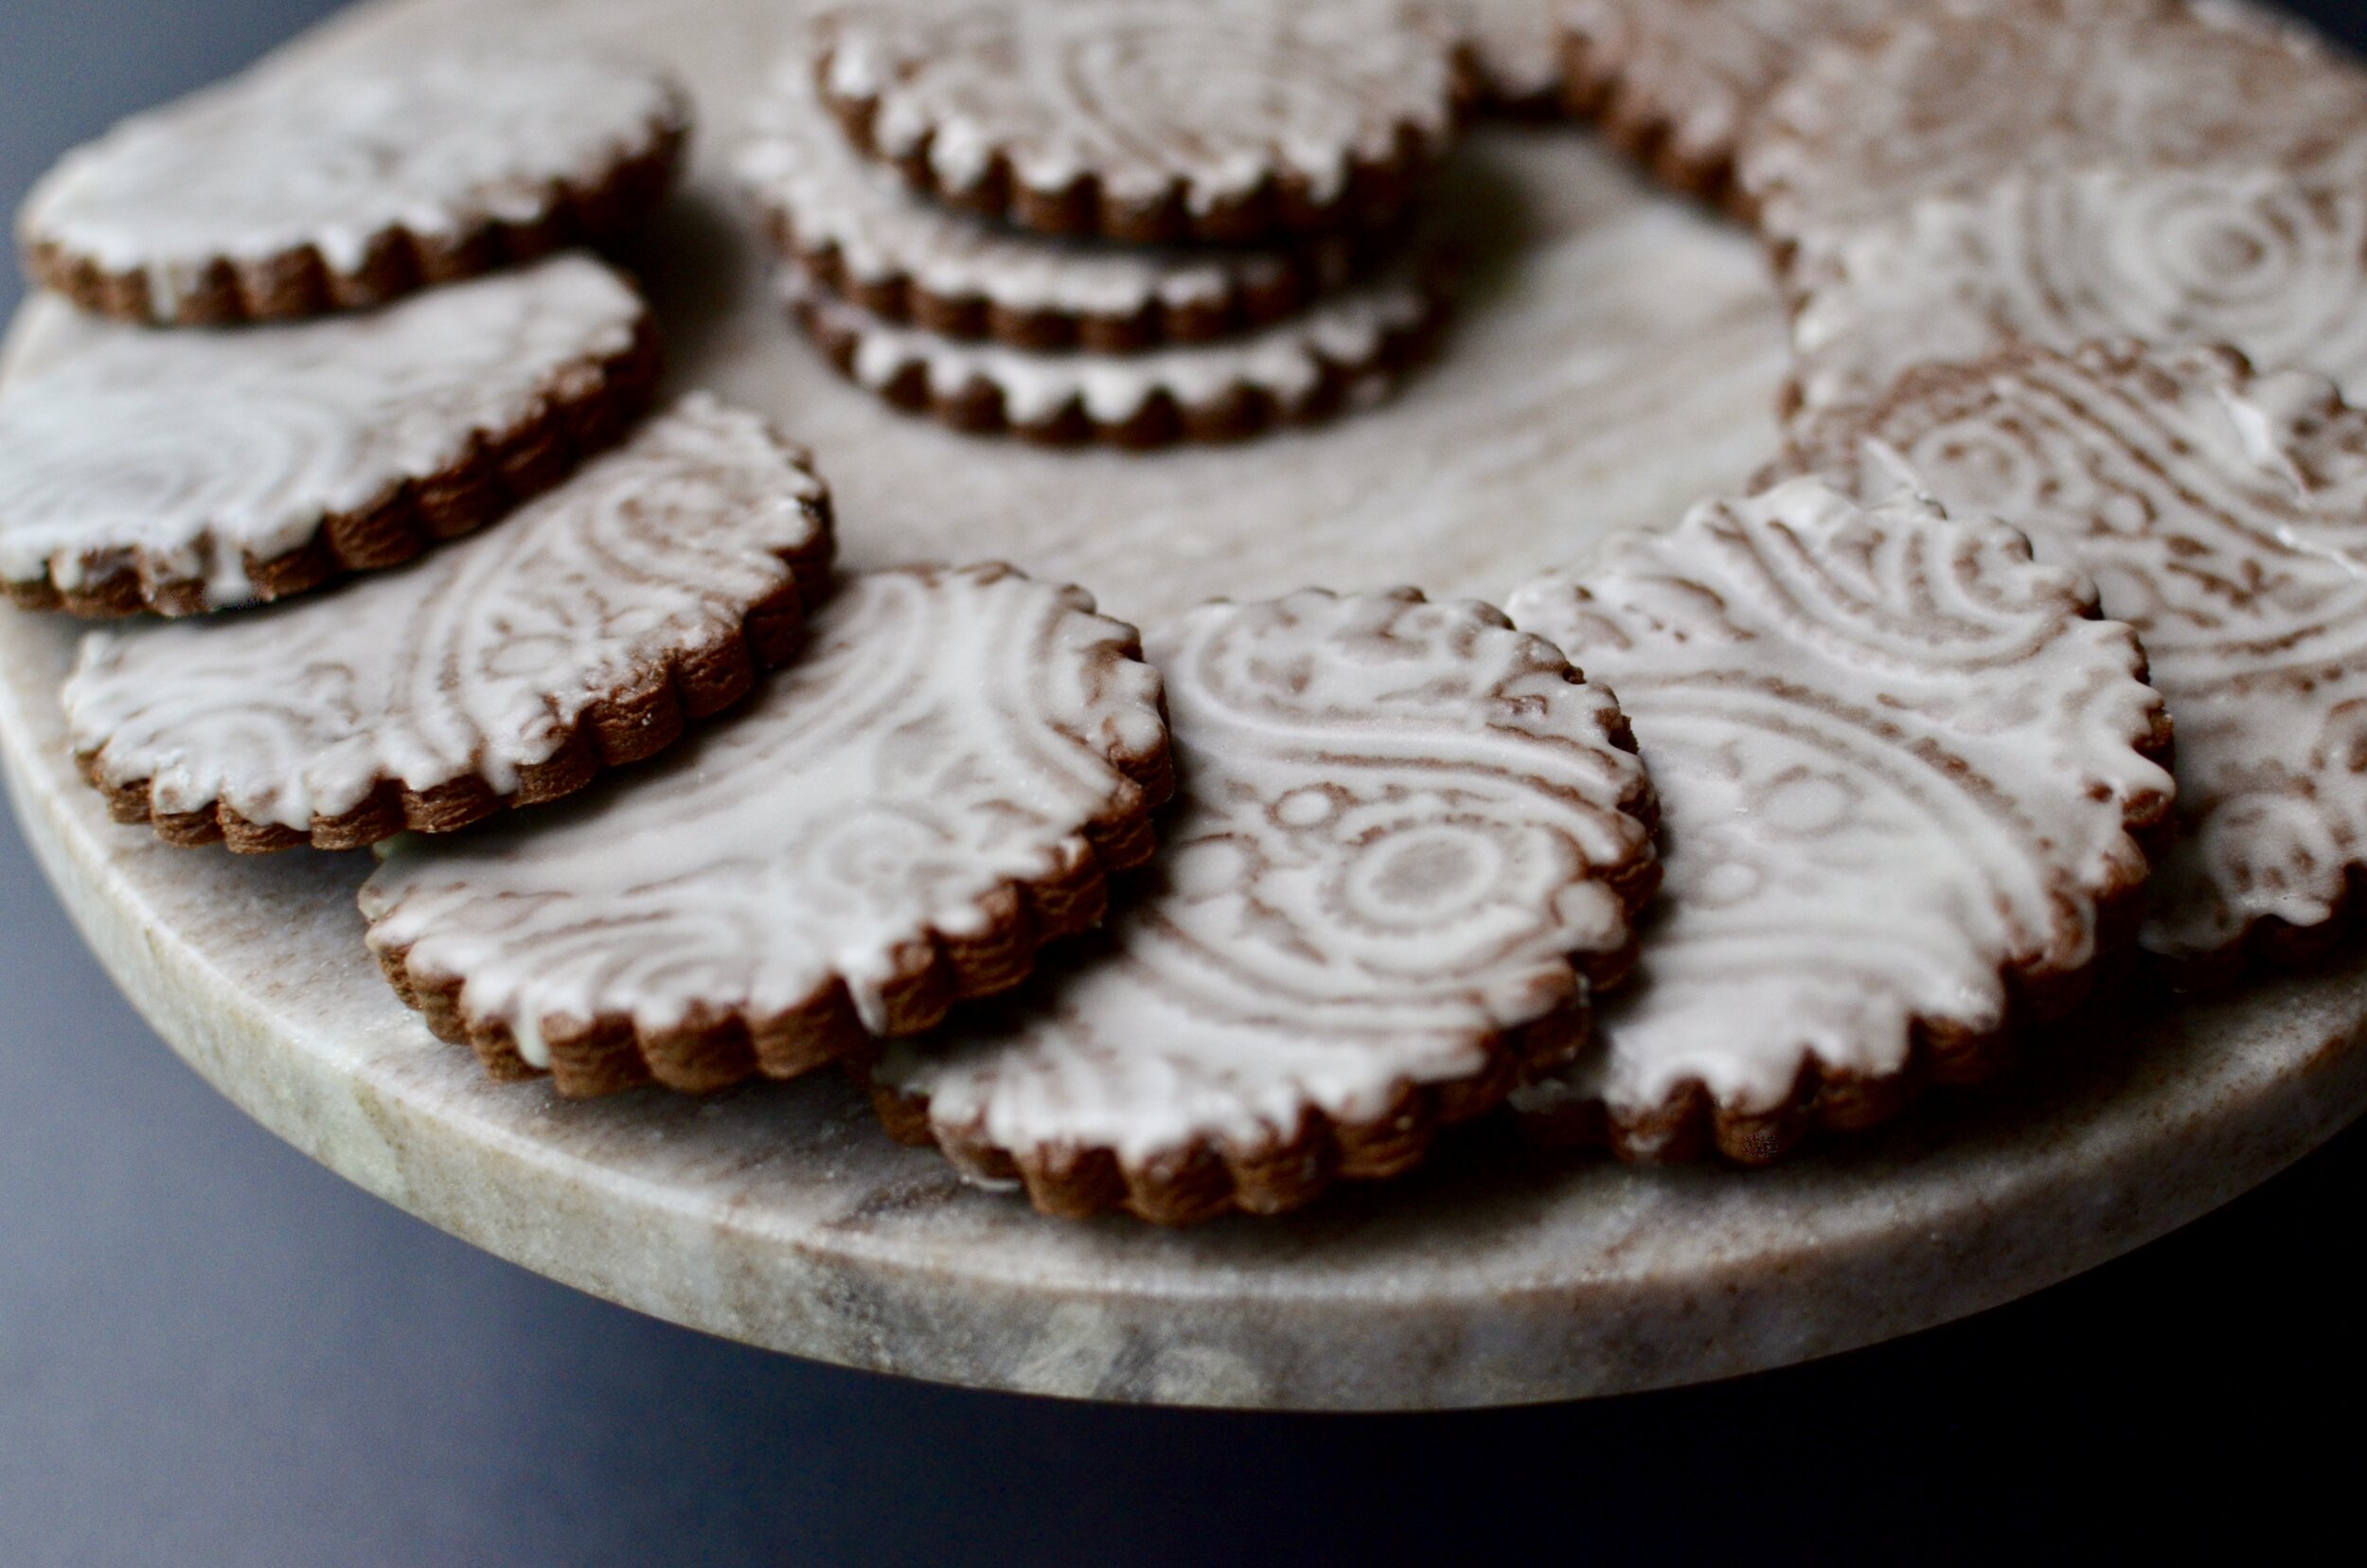
Remove the baked cookies from the oven and brush on the glaze while the cookies are still warm.

rum.glaze.recipe.jpg

Since the cookies are still warm, the marks left in the glaze by the pastry brush will melt into a smooth finish. Allow glaze to dry for an hour or two before serving. These cookies are best served within 24 hours.

embossed.spice.cookies.butter.rum.glaze.recipe_butteryum

Items used to make this recipe:

(affiliate links)


Embossed Spice Cookies with Butter Rum Glaze

makes 25 cookies (2.75-inch or 7cm round)

Printable Recipe

Ingredients

Cookies:

  • 6 tablespoons unsalted butter, room temperature

  • 1/3 cup PLUS 2 tablespoons packed brown sugar

  • 1/4 cup molasses

  • 1 large egg

  • 1 3/4 cups PLUS 2 tablespoons all purpose flour 

  • 1 tablespoon dutch-processed cocoa powder, sifted

  • 1 teaspoon ground ginger

  • 1 teaspoon ground cinnamon

  • 1 teaspoon ground cardamom

  • 1/2 teaspoon baking powder

  • 1/4 teaspoon ground cloves

  • 1/4 teaspoon ground nutmeg

  • 1/4 teaspoon finely ground black pepper

  • 1/4 teaspoon fine salt

Glaze:

  • 2/3 cup confectioners sugar, sifted

  • 1 tablespoon melted butter

  • 1 tablespoon rum

  • 1/2 teaspoon pure vanilla extract

Directions

To make the cookies:

  1. In a stand mixer fitted with the paddle attachment, cream the butter, brown sugar, and molasses on medium speed for 2 minutes, until light and fluffy, scraping bowl as needed; add egg yolk and mix until fully combined.

  2. In a mixing bowl, whisk together all the remaining cookie ingredients (do not add the glaze ingredients).

  3. Slowly add the dry ingredients to the mixer set on low speed and mix until no traces of dry ingredients remain.

  4. Roll dough to 1/4-inch thickness between two sheets of wax paper, then peel the top layer of waxed paper off and use embossed roller to imprint pattern.

  5. Use desired cutter to cut shapes, then carefully remove scraps but don’t attempt to move the cutouts (place scraps into an airtight container or zip-top bag until you have enough to reroll).

  6. Carefully place waxed paper with cutouts onto sheet pan and chill for at least 30 minutes. 

  7. Preheat oven to 325F and place rack in center position.

  8. Remove chilled cutouts from refrigerator place cutouts on prepared sheet pans; bake for 9-10 minutes, leaving at least 1-inch of space between cookies (12 cookies per sheet).

  9. Bake for 9-10 minutes; remove from oven and rest for 5 minutes before glazing.

To make the glaze:

  • While the cookies are baking, make the glaze by whisking confectioners sugar, melted butter, rum, and pure vanilla extract together in a small bowl; cover with wet towel to keep from drying.

  • Brush an even layer of glaze on cookies while they’re still warm (about 5 minutes after the cookies are removed from the oven).

  • Allow glaze to set before serving cookies, about 30 minutes.

Notes

  • Instead of dusting your counter and rolling pin with flour (which can make the dough scraps too dry to reuse), roll the cookie dough between layers of wax paper (or parchment paper).

  • Cookie dough can be made ahead and chilled in an airtight container for a day or two or frozen for up to a month. Allow the dough to come to room temperature (in its storage container) before rolling (don’t forget to chill cutouts for 15-20 minutes before baking).

  • To bake cookies ahead, do not glaze. Store unglazed cookies in airtight container between layers of waxed paper and chill or freeze. Thaw overnight in container, then gently reheat cookies in warm oven before glazing.

  • Cookies are best served within 24 hours of glazing (after that, the glaze will either turn gooey or it will crystalize and look chalky).

adapted from embossedco.com

Turkey Pot Pie

Patricia @ ButterYum

turkey.pot.pie.recipe_butteryum

What’s your favorite way to use up leftover turkey? My all-time favorite way is to make Turkey Pot Pie. No time to make pie crust, no problem, serve this easy-to-make filling over biscuits, rice, or egg noodles.

DSC_2983.JPG

In a really good quality pan (this is the one I used), start by sauteing diced onions, salt, and pepper in a little butter. Butter makes everything taste better!

DSC_2990.JPG

Cook, stirring frequently, for several minutes until the onions smell divine and make your mouth water.

Next add flour to the pan.

DSC_2992.JPG

The flour is going to help thicken things up for us.

DSC_2995.JPG

Whisk the flour into the butter and cook for 1-2 minutes to cook off the raw flour flavor - stir constantly so the mixture doesn't burn.  I love using a flat whisk for this job.

Technical stuff:  this step is called making a "roux" (roo).  A roux will thicken a sauce, in this case, a "veloute" (vuh loo tay).  Veloute is one of the 5 classic mother sauces (the other 4 are bechamel, hollandaise, espagnole, and tomat).  Info you may not care to know, but there you go. 

DSC_2997.JPG

Back to our veloute - once the flour has bubbled away for a minute or two, add cold chicken stock (try my easy recipe) and milk. You could use turkey stock instead of chicken stock, but I actually like the flavor of chicken stock better.

DSC_1530.JPG

Now whisk constantly until the mixture boils.  The flour will reach its greatest thickening potential when it reaches a full boil. 

Professional tip - to reduce the risk of developing lumps in your sauce, add cold liquid to hot roux.  

DSC_3013.JPG

… and a full boil has been reached!

DSC_3019.JPG

See how the mixture thickened?  You should be able to see a trail when you pull a wooden spoon across the bottom of your pan.  

Depending on how flavorful (salty) the chicken stock you used was, you may need to add more salt and pepper so taste it carefully and adjust if necessary.

DSC_3015.JPG

Remove the sauce from the heat and stir in the cubed turkey and frozen vegetables. The frozen veggies will instantly cool down the filling - this is good because we want the filling to be cool when we fill the pie crusts.

DSC_3026.JPG

Set the filling aside until needed (or chill in an airtight container for several days).  Taste the filling again, just to be on the safe side.  

For a busy weeknight option, forgo making pie crust and serve this filling over biscuits, rice, or egg noodles.  Just heat it on the stovetop for a few minutes, stirring frequently, until the veggies are warmed through.

fullsizeoutput_33f4.jpeg

Here’s a link to my All-Butter Pie Crust recipe. It’s amazing, but I won’t be upset if you use store-bought crust. One double-crust recipe will be enough to make one 9-inch pie or two 5-inch pies (double the filling recipe below to fill a 9-inch pie).

DSC_3049.JPG

For a shiny, golden brown crust, make an egg wash by whisking together an egg with a tablespoon of water.

Use a pastry brush to brush the egg wash all over the crust. Cut a few vent holes in the top crust and place the pie(s) on a silicone-lined half sheet pan. The silicone liner will keep the pie(s) from sliding on the pan (long story, don’t ask).

DSC_3061.JPG

Bake until the crust is golden brown and the filling is hot and bubbly.

DSC_3098.JPG

Rest for 15 minutes before digging in. Enjoy!

Items used to make this recipe:

(affiliate links)


Turkey Pot Pie

makes two 5-inch pies (double filling for 9-inch pie)

Printable Recipe

Ingredients

  • double pie crust recipe (check out my all-butter crust here - lots of how-to photos)

  • 3 tablespoons minced onion

  • 3 tablespoons unsalted butter

  • 1/4 teaspoon kosher salt

  • 1/4 teaspoon ground black pepper

  • 1/4 teaspoon ground dried sage (optional)

  • 3 tablespoons all purpose flour

  • 3/4 cup plus 2 tablespoons (7 fluid ounces) low sodium chicken stock (try my homemade)

  • 1/3 cup whole milk

  • 1 cup diced cooked turkey (or chicken)

  • 1 cup frozen mixed vegetables

  • 1 large egg

  • 1 tablespoon water

Directions

  1. In a large, heavy-bottomed pan, saute onions, butter, salt, and pepper together for several minutes until the onions soften.

  2. Add the flour and stir for 1-2 minutes.

  3. Add the cold milk and chicken stock, whisking constantly until the mixture comes to a full boil; taste carefully and adjust seasoning if needed.

  4. Remove from heat and stir in cubed turkey and frozen mixed vegetables; set aside until needed (or chill for several days).

  5. Preheat oven to 325F and place rack in lower third of oven.

  6. Divide a double pie crust recipe into 4 portions; roll two of them into 8-inch rounds and line two 5-inch pie plates; fill each with half of the filling mixture.

  7. Roll the remaining two portions of crust into 6-inch rounds and use them to top the pot pies; tuck under and crimp the edges.

  8. Chill pies for at least 10 minutes before baking.

  9. Make and egg wash by whisking together the egg and water; brush on top crust and cut several vent holes.

  10. Place pie plates on silicone lined sheet pan and bake in preheated oven for 30-35 minutes until the crust is golden brown and the filling is bubbly.

  11. Remove from oven and cool for 15 minutes before serving.

Notes

  • To make a 9-inch deep pie pot pie, double the filling ingredients.

  • To make a 9x13-inch casserole, quadruple filling ingredients and use double pie crust recipe to top the casserole (no bottom crust). Increase baking time until filling bubbles, 45-60 minutes.

  • All chicken stock is not created equally so be sure to taste the filling and add salt and pepper, if needed, before filling pie shells.

  • For a really nice crust variation, add 2 teaspoons of whole celery seed to a double crust recipe.

  • To make chicken pot pie, substitute chicken for the turkey.