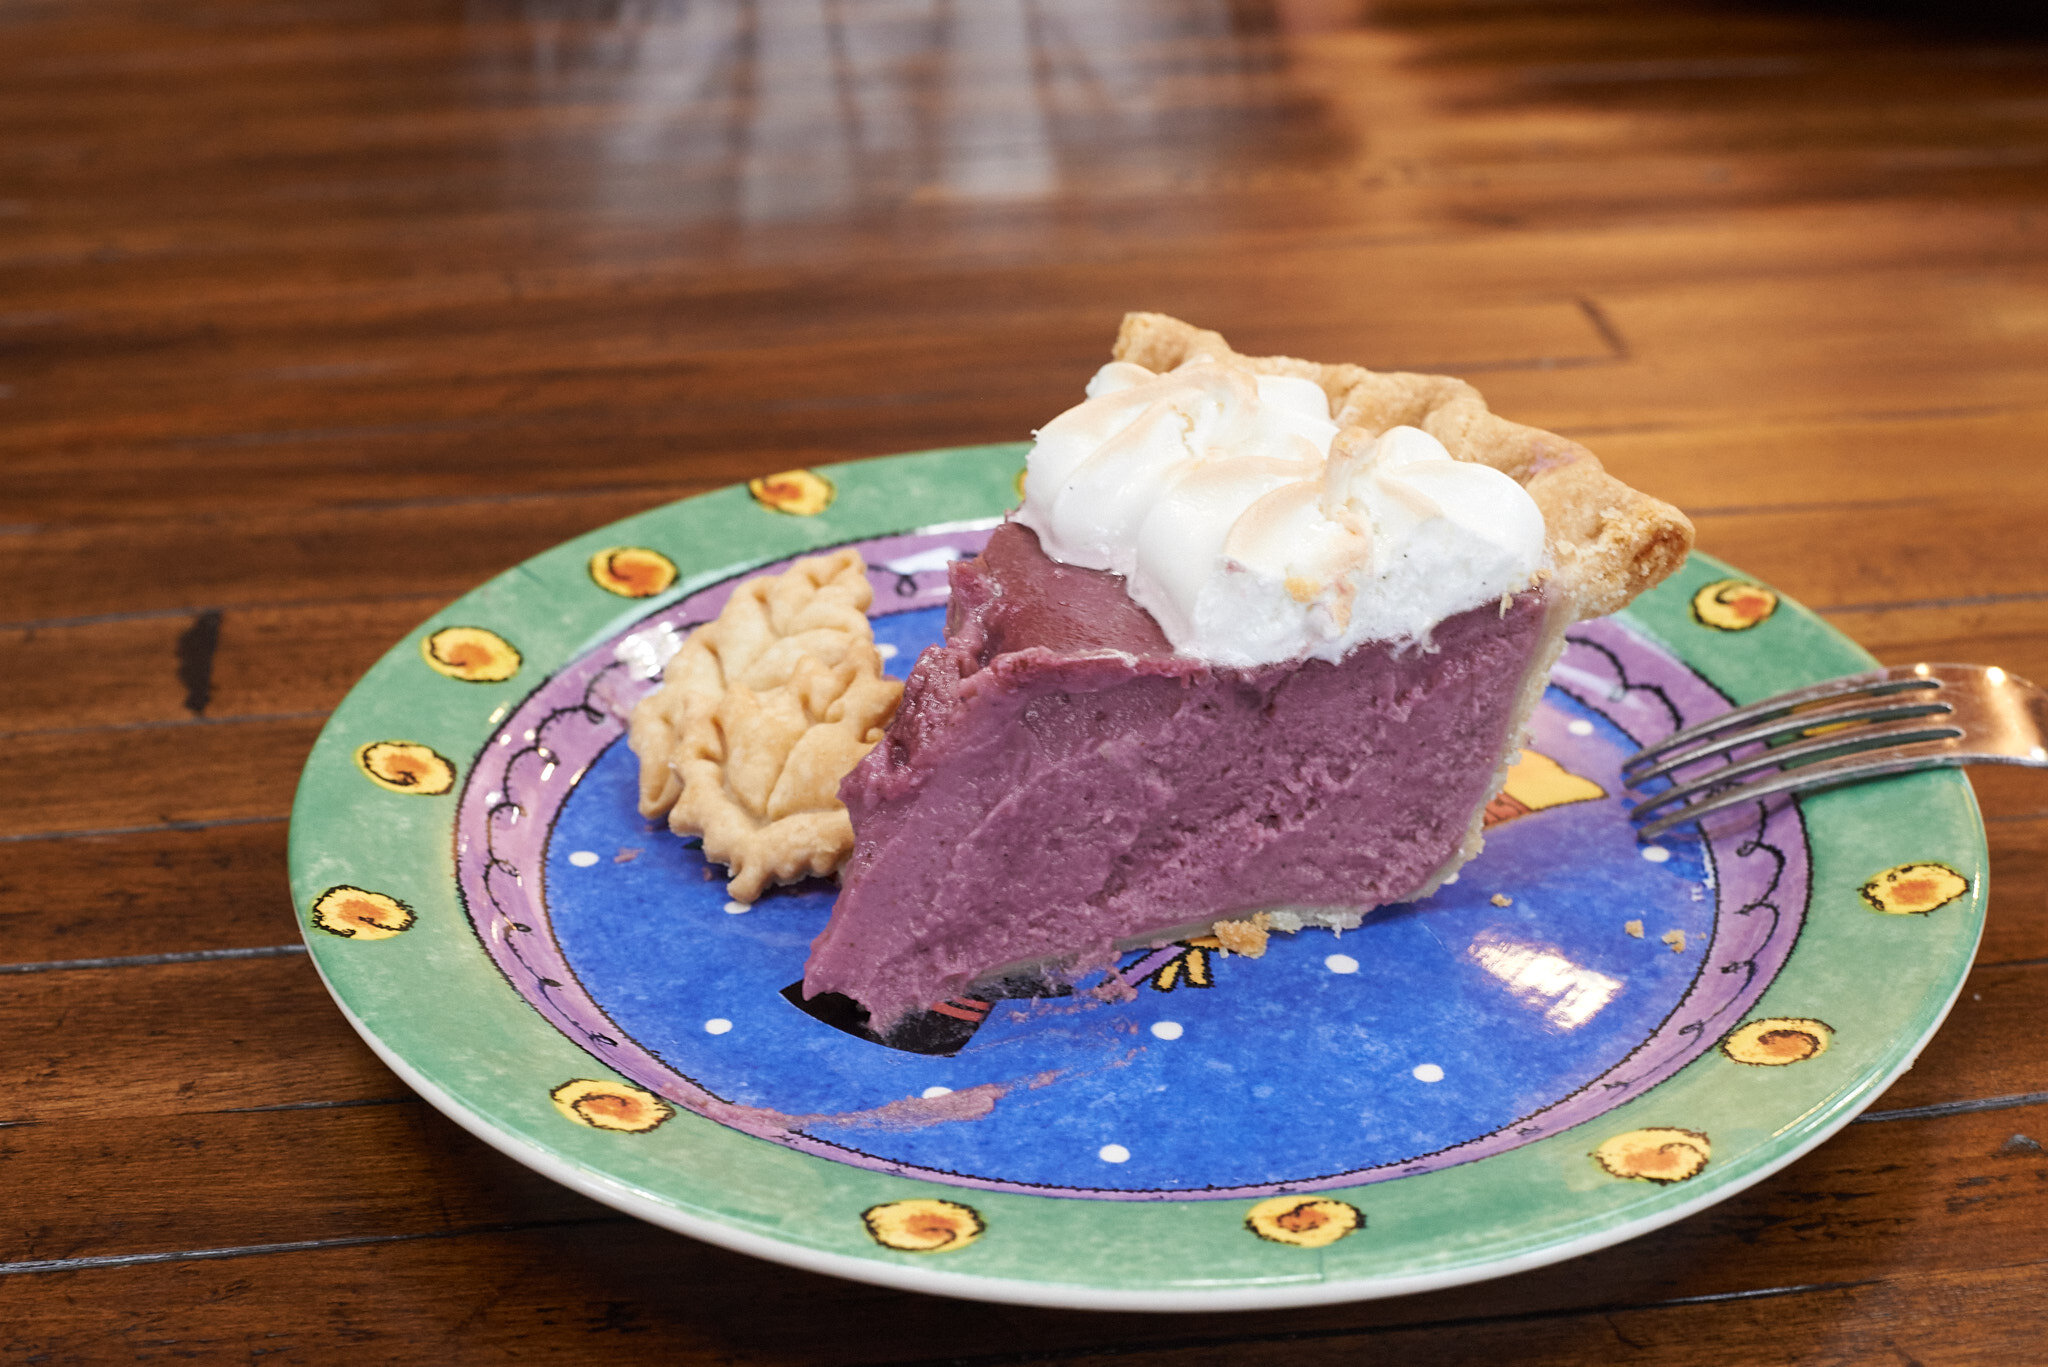
Old Fashioned Cushaw Pie (aka Crenshaw Pie)
Patricia @ ButterYum
Move over Pumpkin Pie - make way for Old Fashioned Cushaw (aka Crenshaw) Pie!
Read MoreUse the form on the right to contact us.
You can edit the text in this area, and change where the contact form on the right submits to, by entering edit mode using the modes on the bottom right.
123 Street Avenue, City Town, 99999
(123) 555-6789
email@address.com
You can set your address, phone number, email and site description in the settings tab.
Link to read me page with more information.
Butteryum food blog recipes
Filtering by Tag: pie recipes
Move over Pumpkin Pie - make way for Old Fashioned Cushaw (aka Crenshaw) Pie!
Read MoreI absolutely love when tart (aka sour) cherries are in season. Not only do they make the most delicious cherry pies, check out that vibrant ruby red color! Wow.
When I visited my local farm stand, I purchased a pound of tart cherries. I didn’t have enough to make a full-blown cherry pie today, so I thought I’d make some hand pies instead. They’re so much fun to make. Let’s do it…
Start with enough pie dough for a single crust. I always use my all-butter pie crust recipe. It’s infinitely better than premade crust, and it’s so easy to make. Check out my step-by-step photos here to make with a food processor and here to make it by hand.
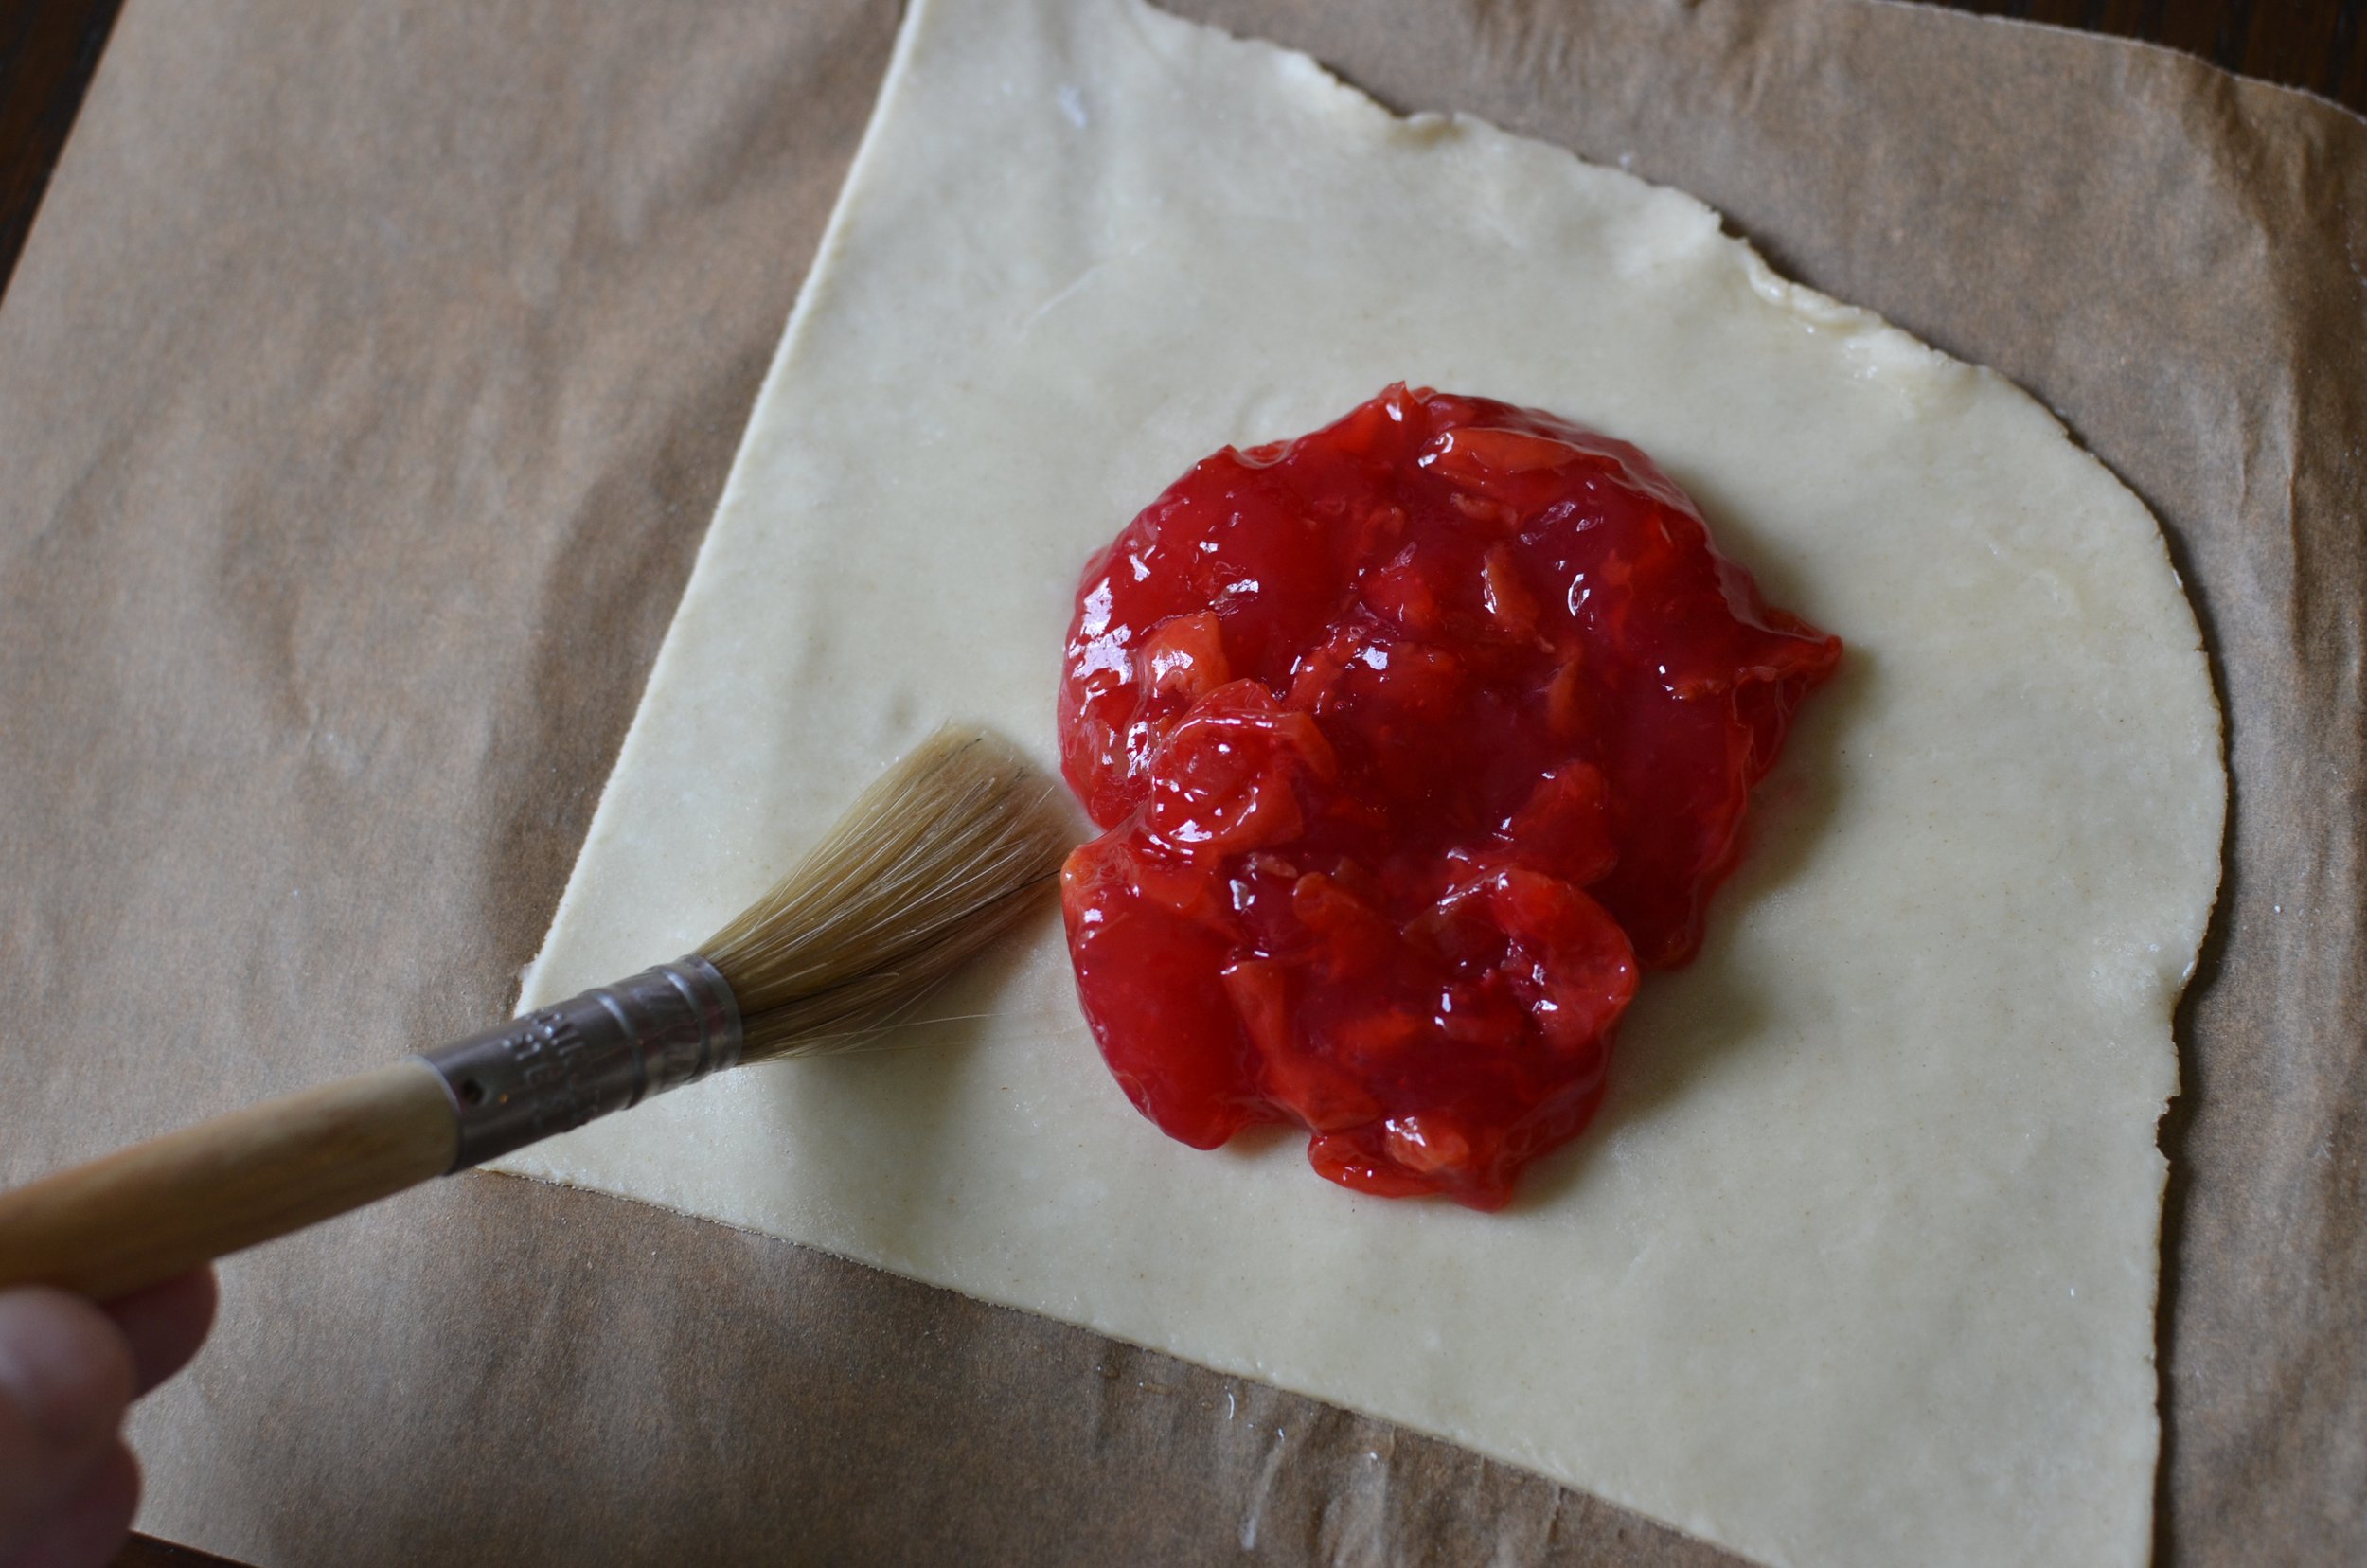
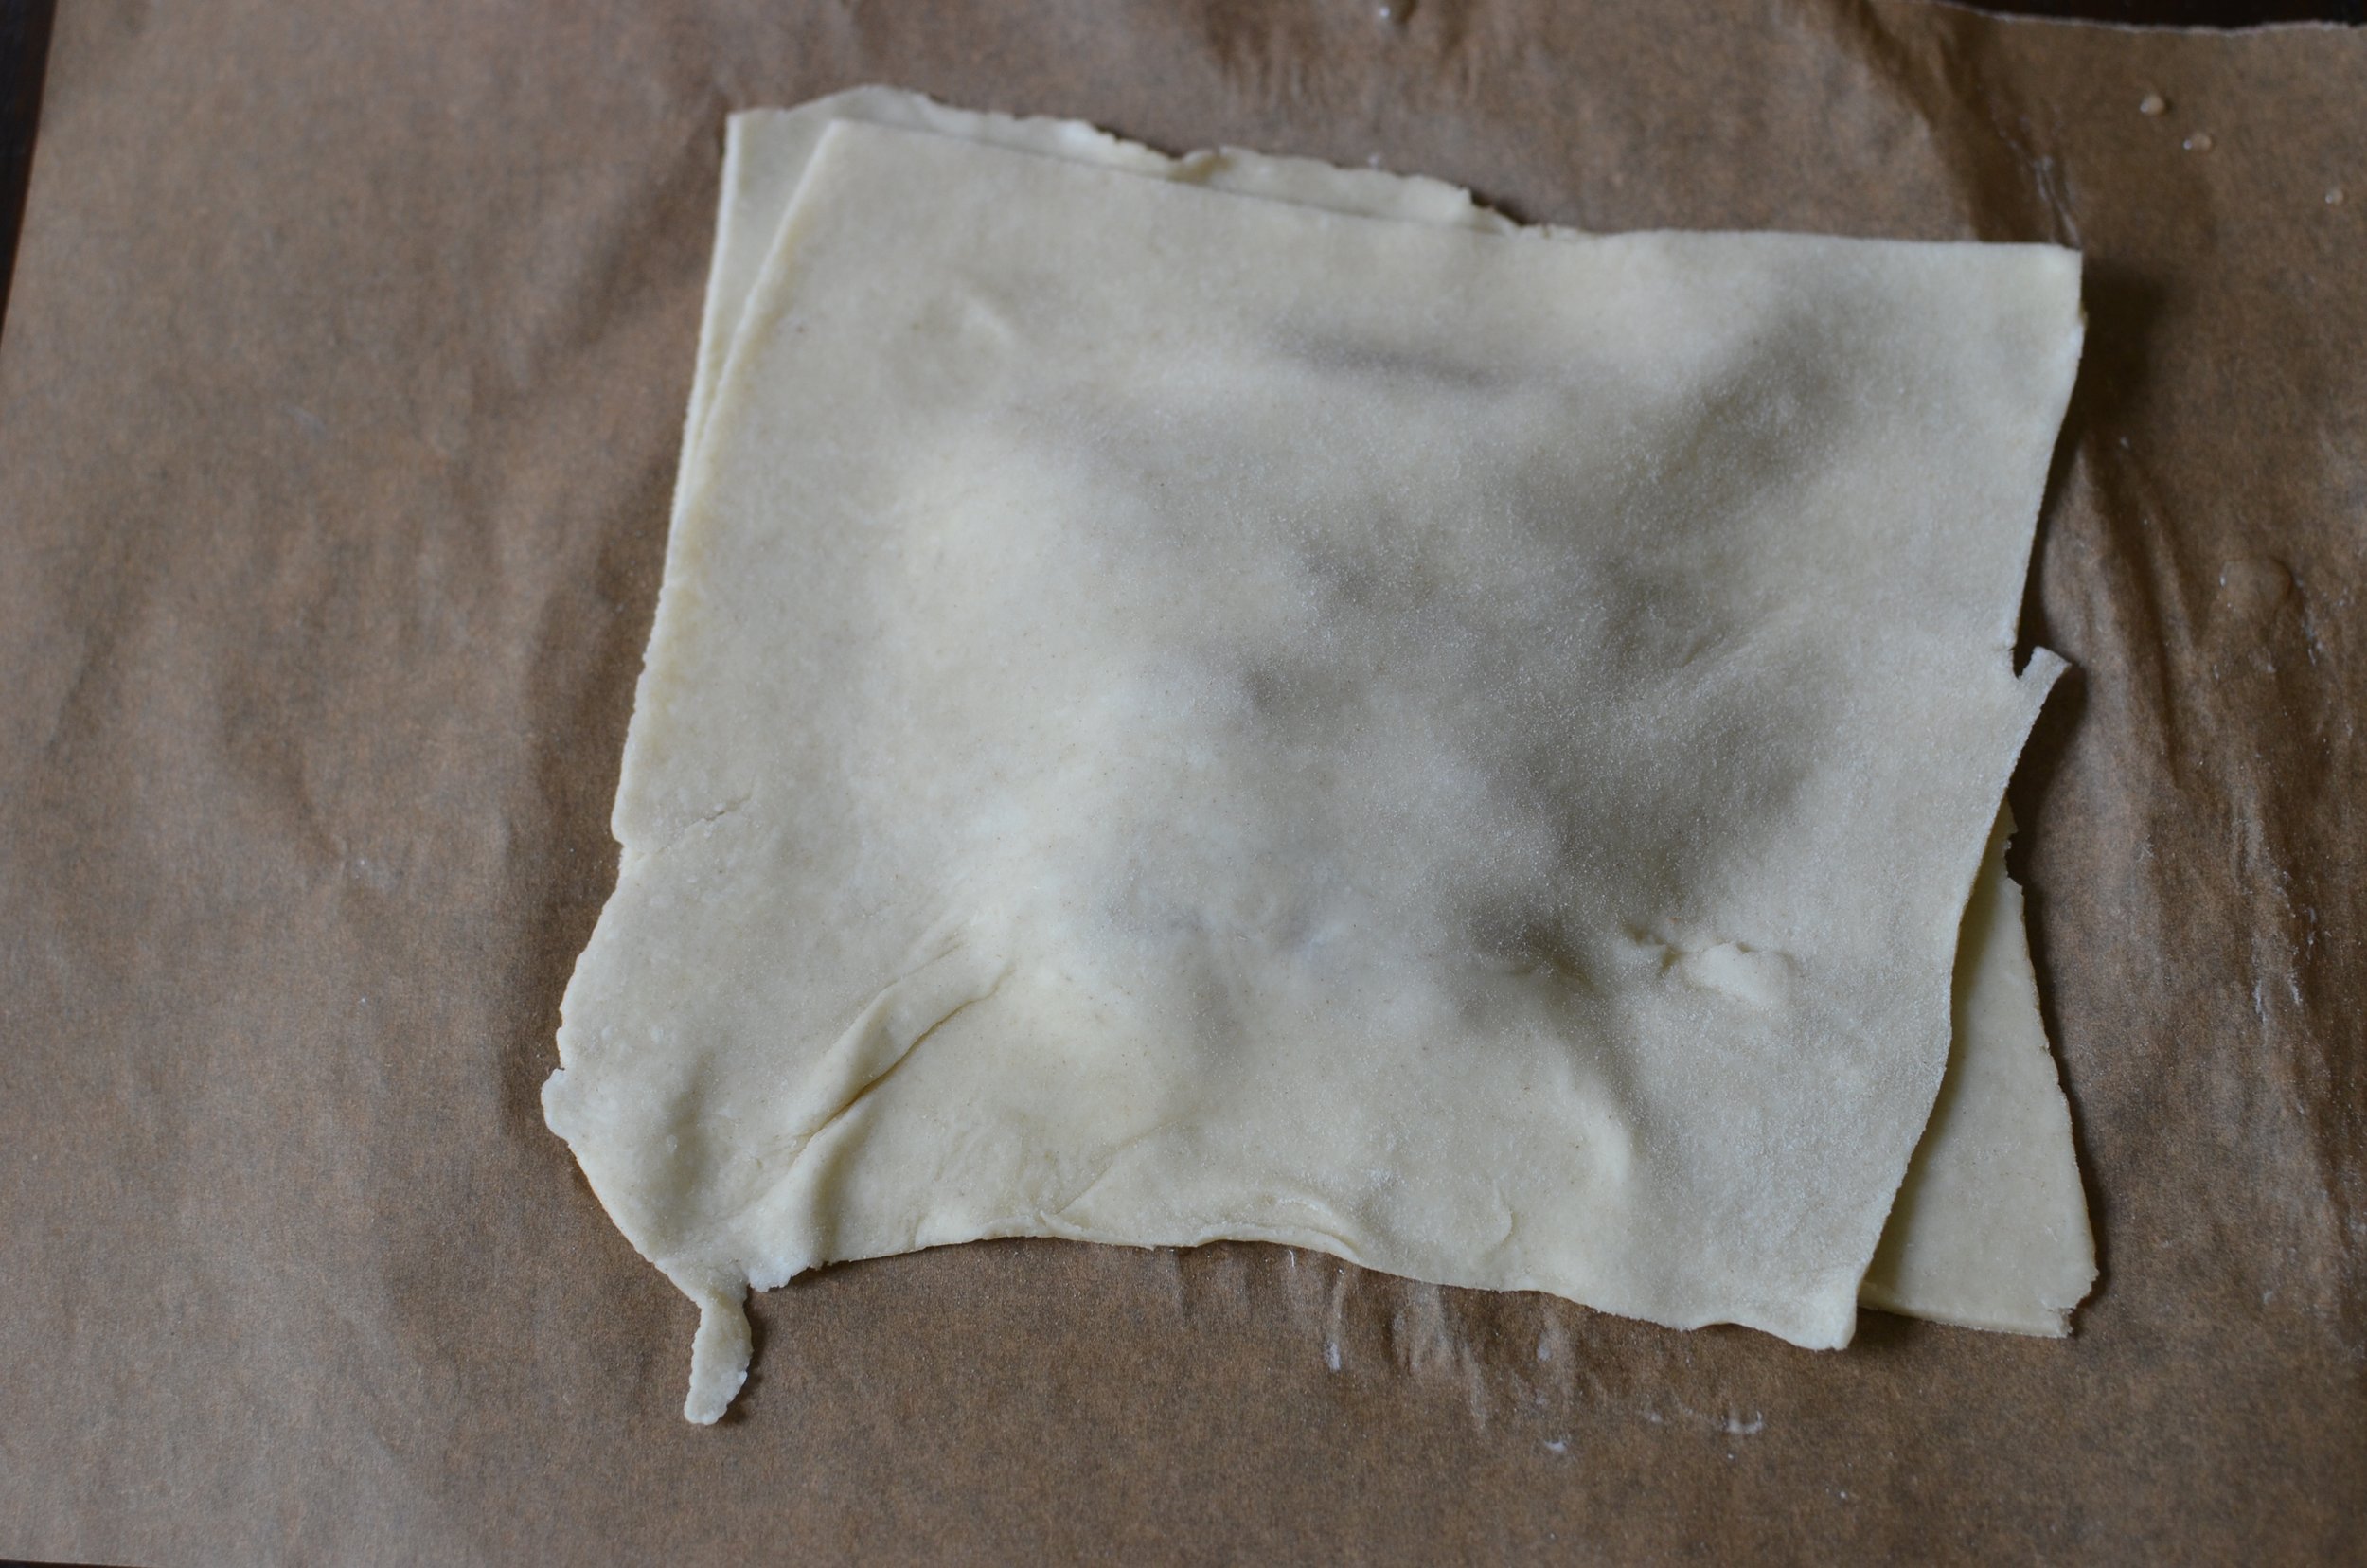
Roll the pie dough until it reaches a thickness of 1/8-inch. Cut rectangular shapes that are a bit larger than the cutter you plan to use. Transfer the precut dough to a piece of parchment paper and brush with water. Fill with 2 tablespoons of premade filling.
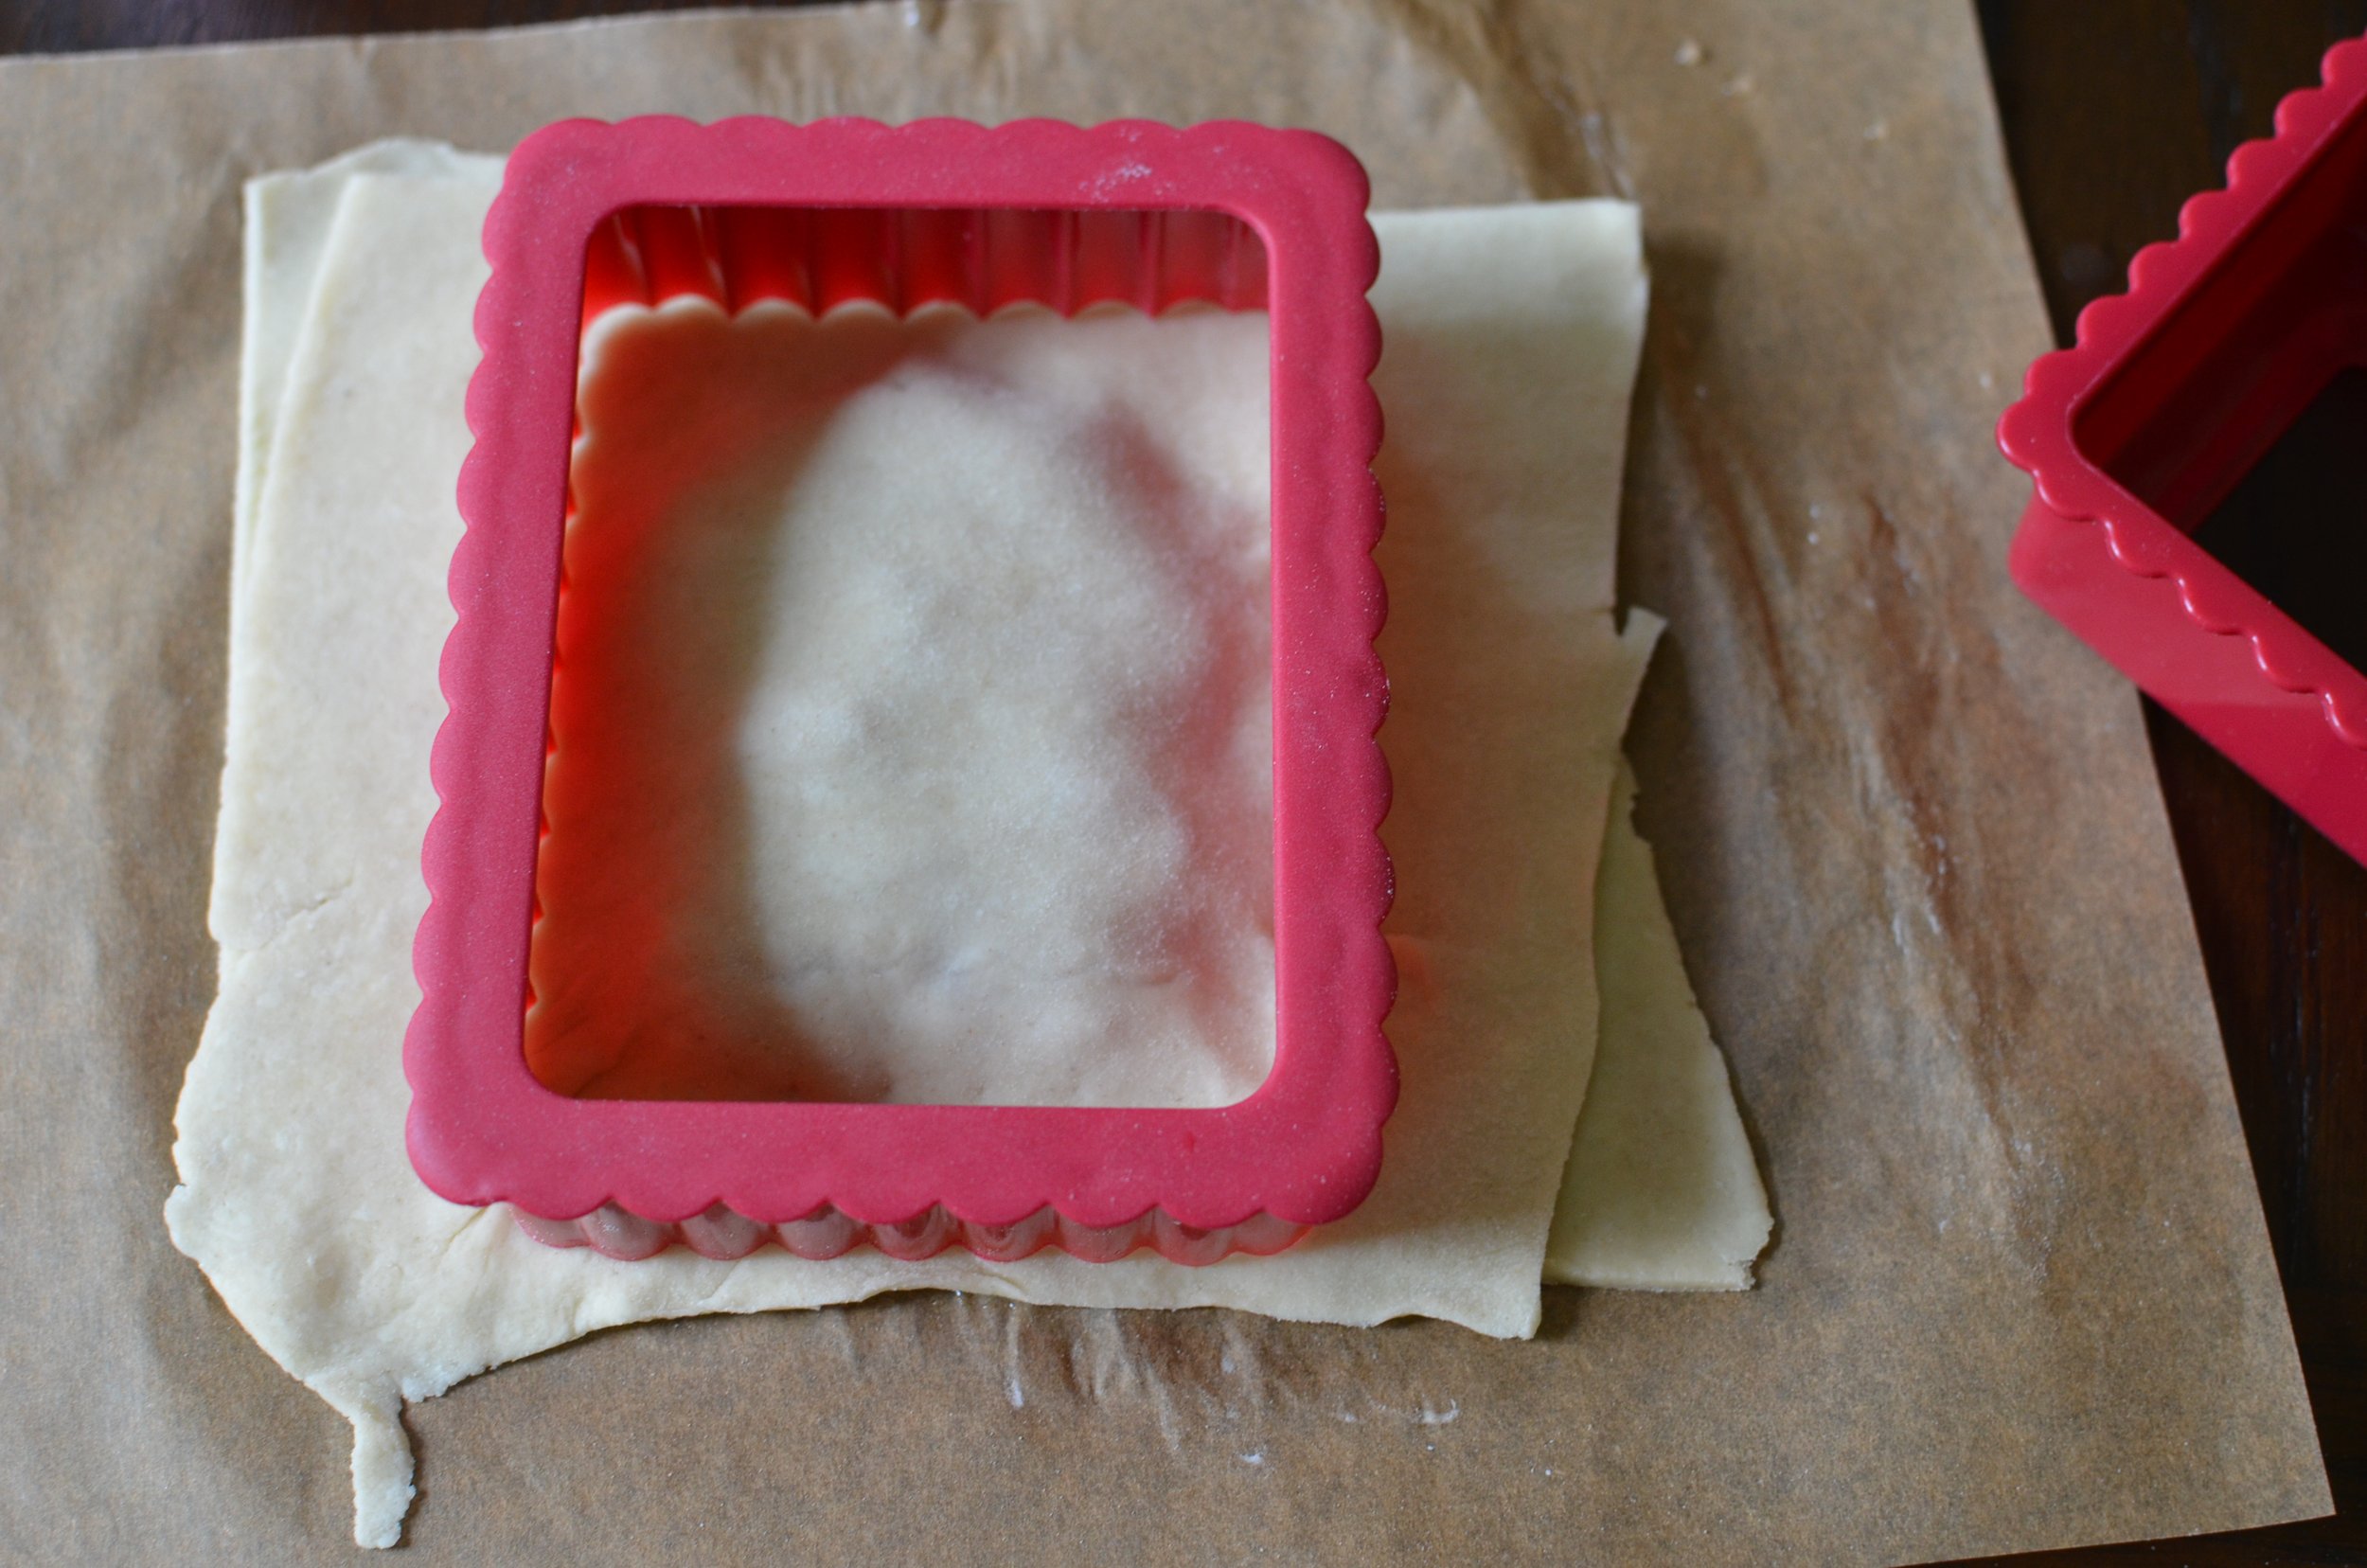
Top with a second piece of dough and press well to seal. Take care in this step to prevent leaking in the oven.
Use scalloped cutter to make the hand pies nice and neat.
Side Note - If you’d like to freeze the hand pies, this is the time to do it. Just flash-freeze them for a few hours before transferring to an airtight container to store in the freezer for up to 3 months (I like to vacuum seal mine). See my notes below for baking directions for frozen hand pies.
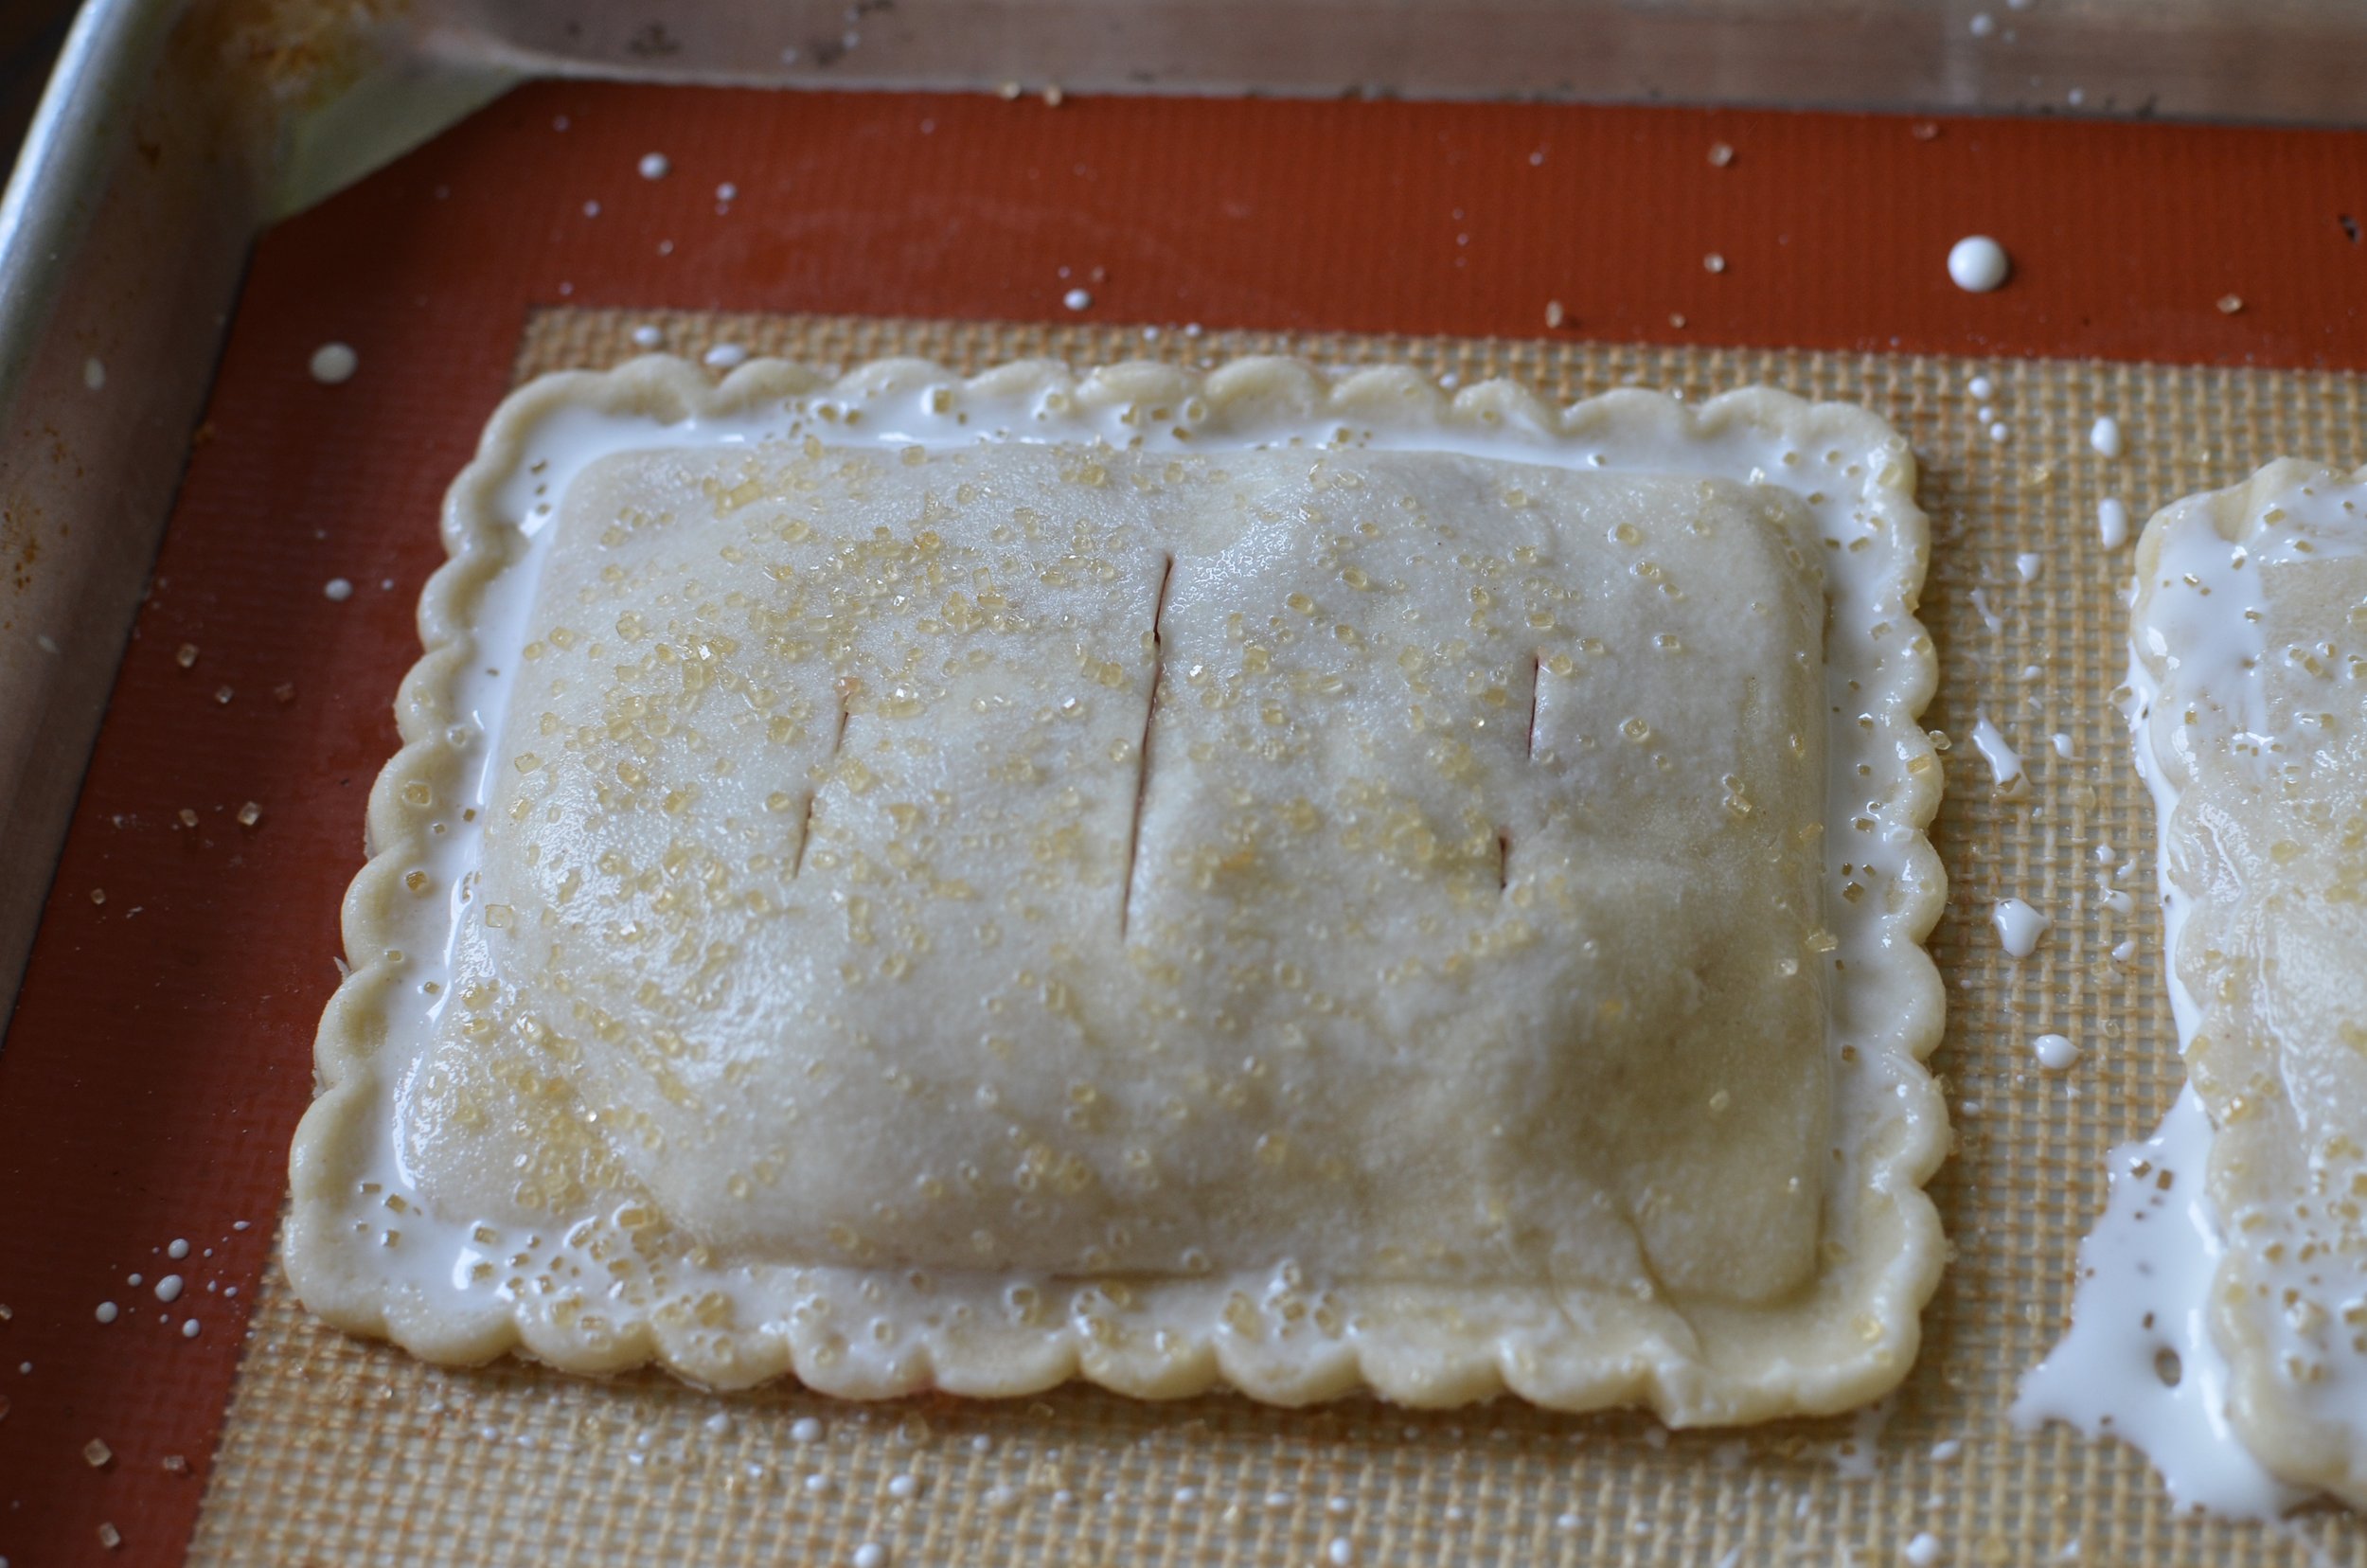
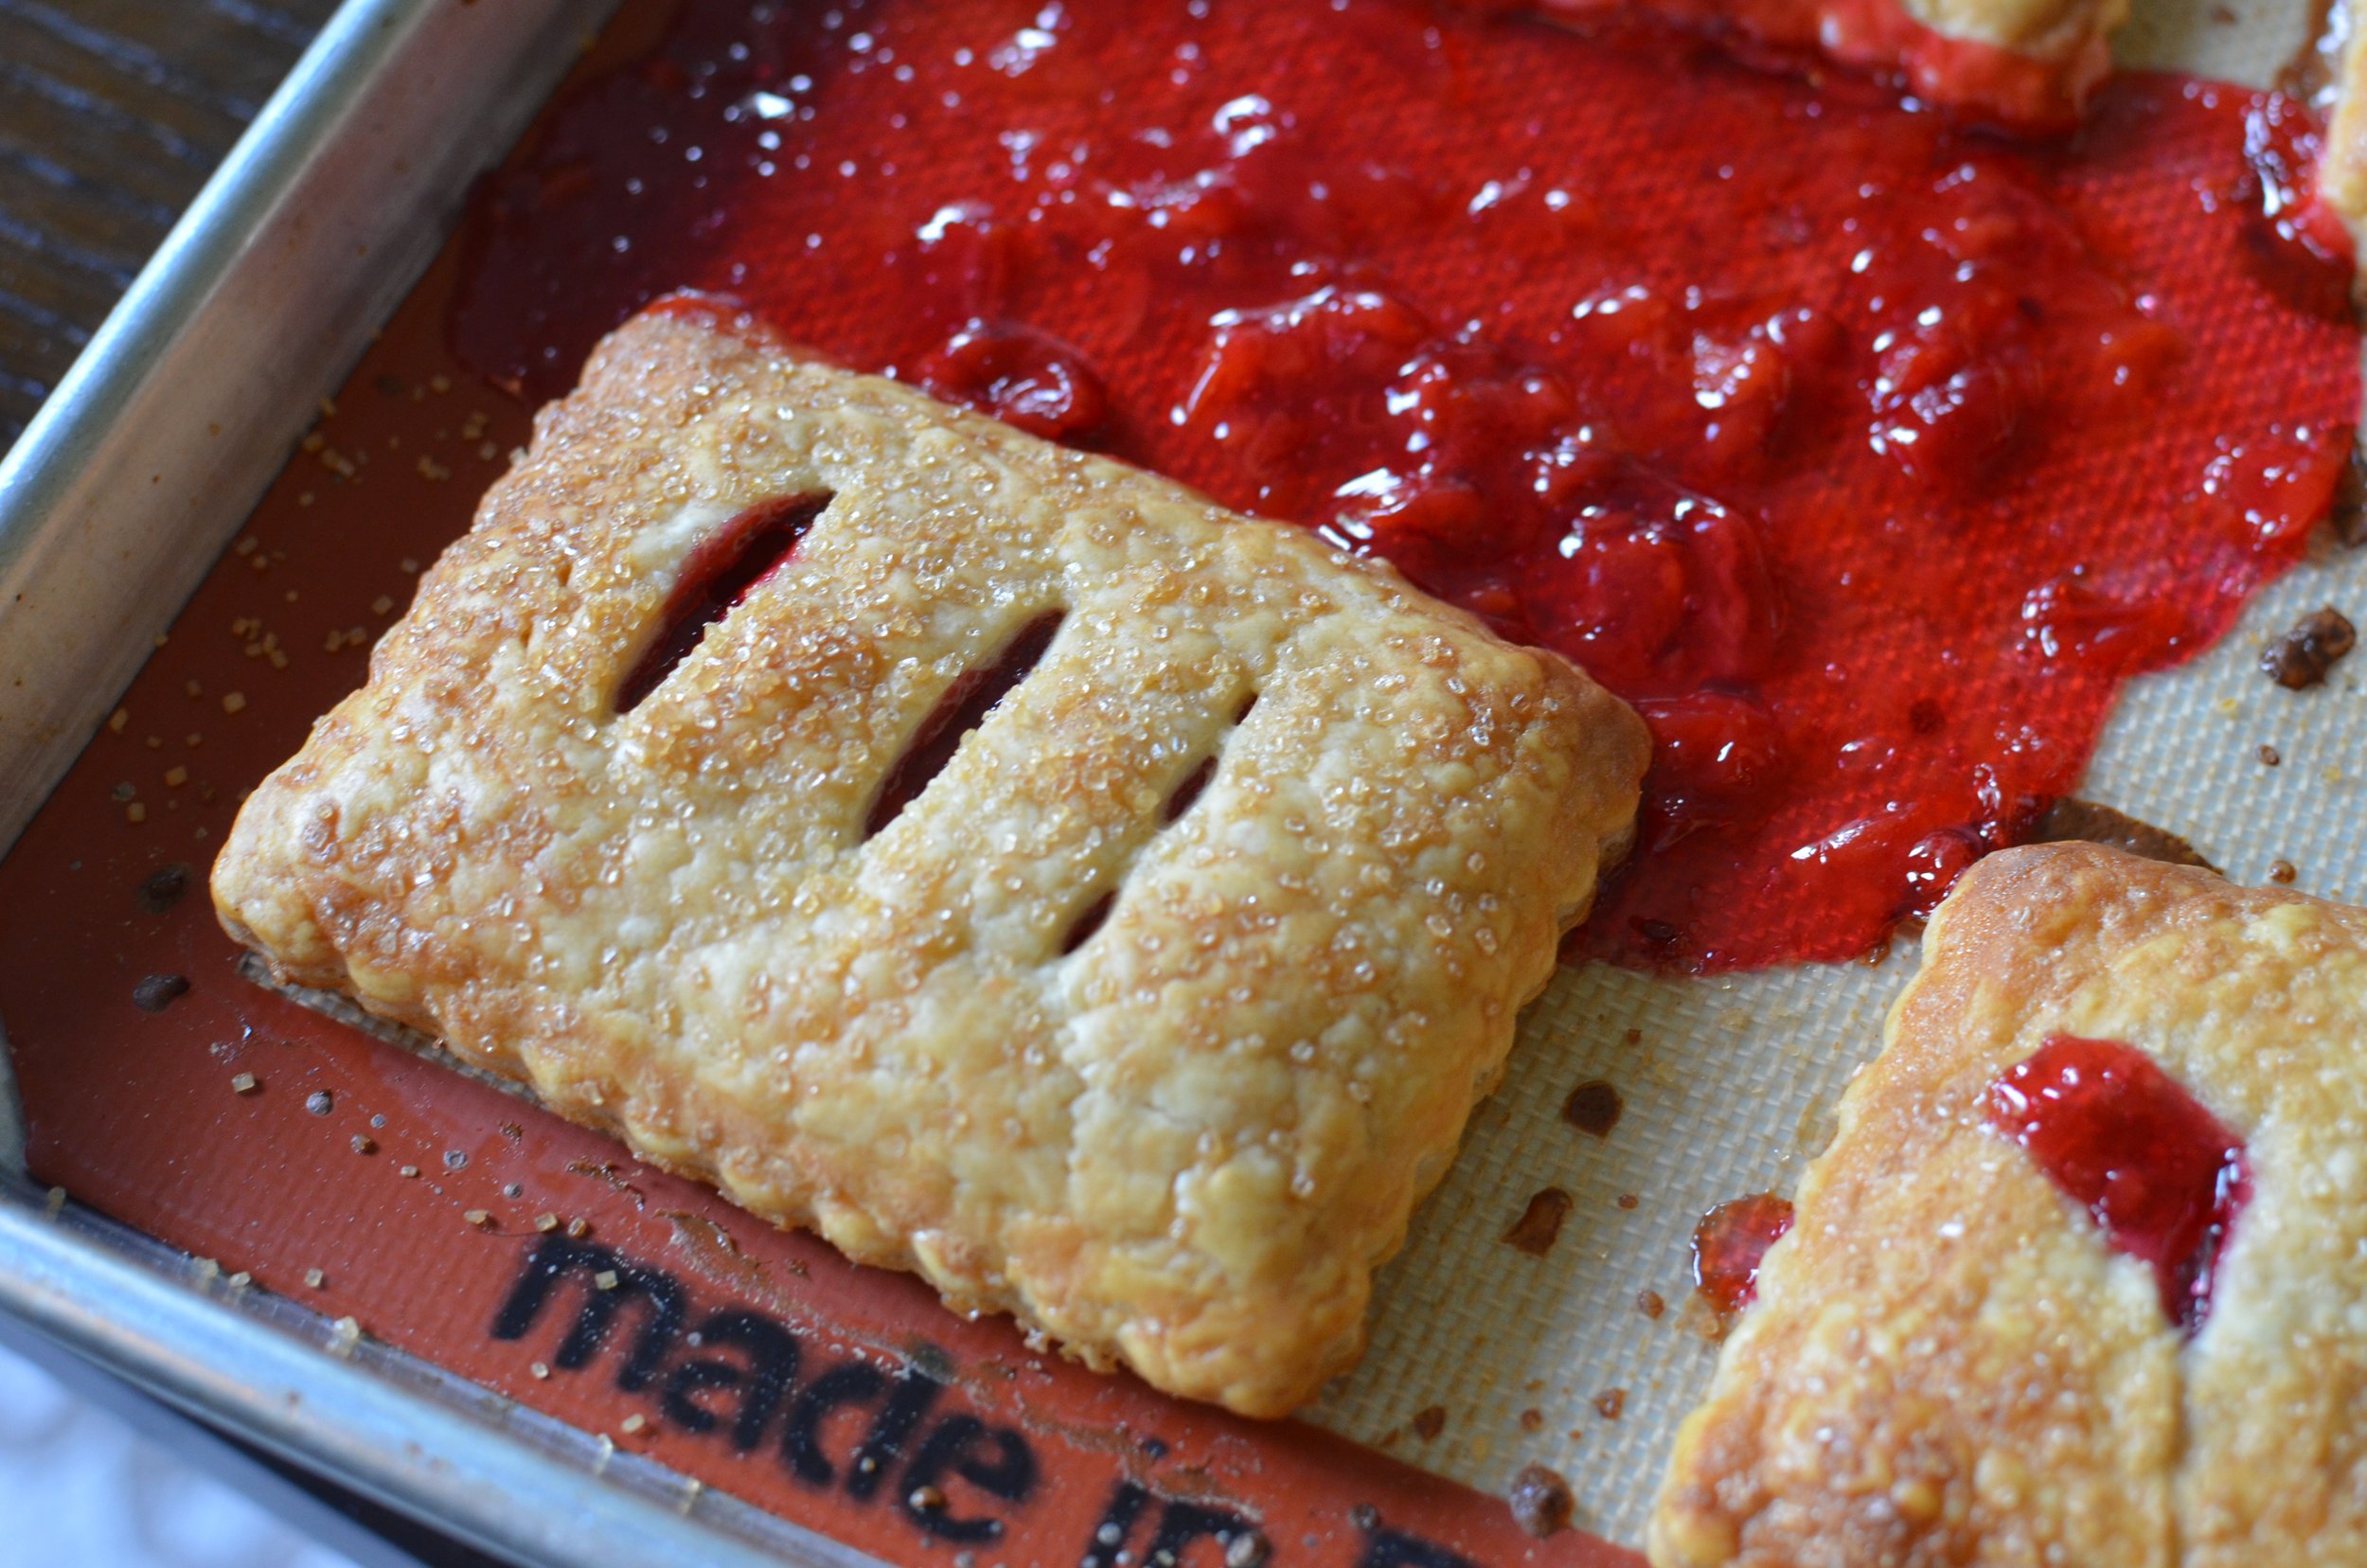
Transfer hand pies to silpat-lined half sheet pan and chill while oven preheats. Just before baking, brush with milk, sprinkle with sugar, and cut vents in top of each hand pie, being careful not to cut through the bottoms.
Bake for 20-25 minutes or until golden brown.
Oops, you can see I obviously didn’t seal one of the hand pies very well and it leaked all over. Darn, it still tasted good and it was easy to cleanup because of the nonstick silicone liner.
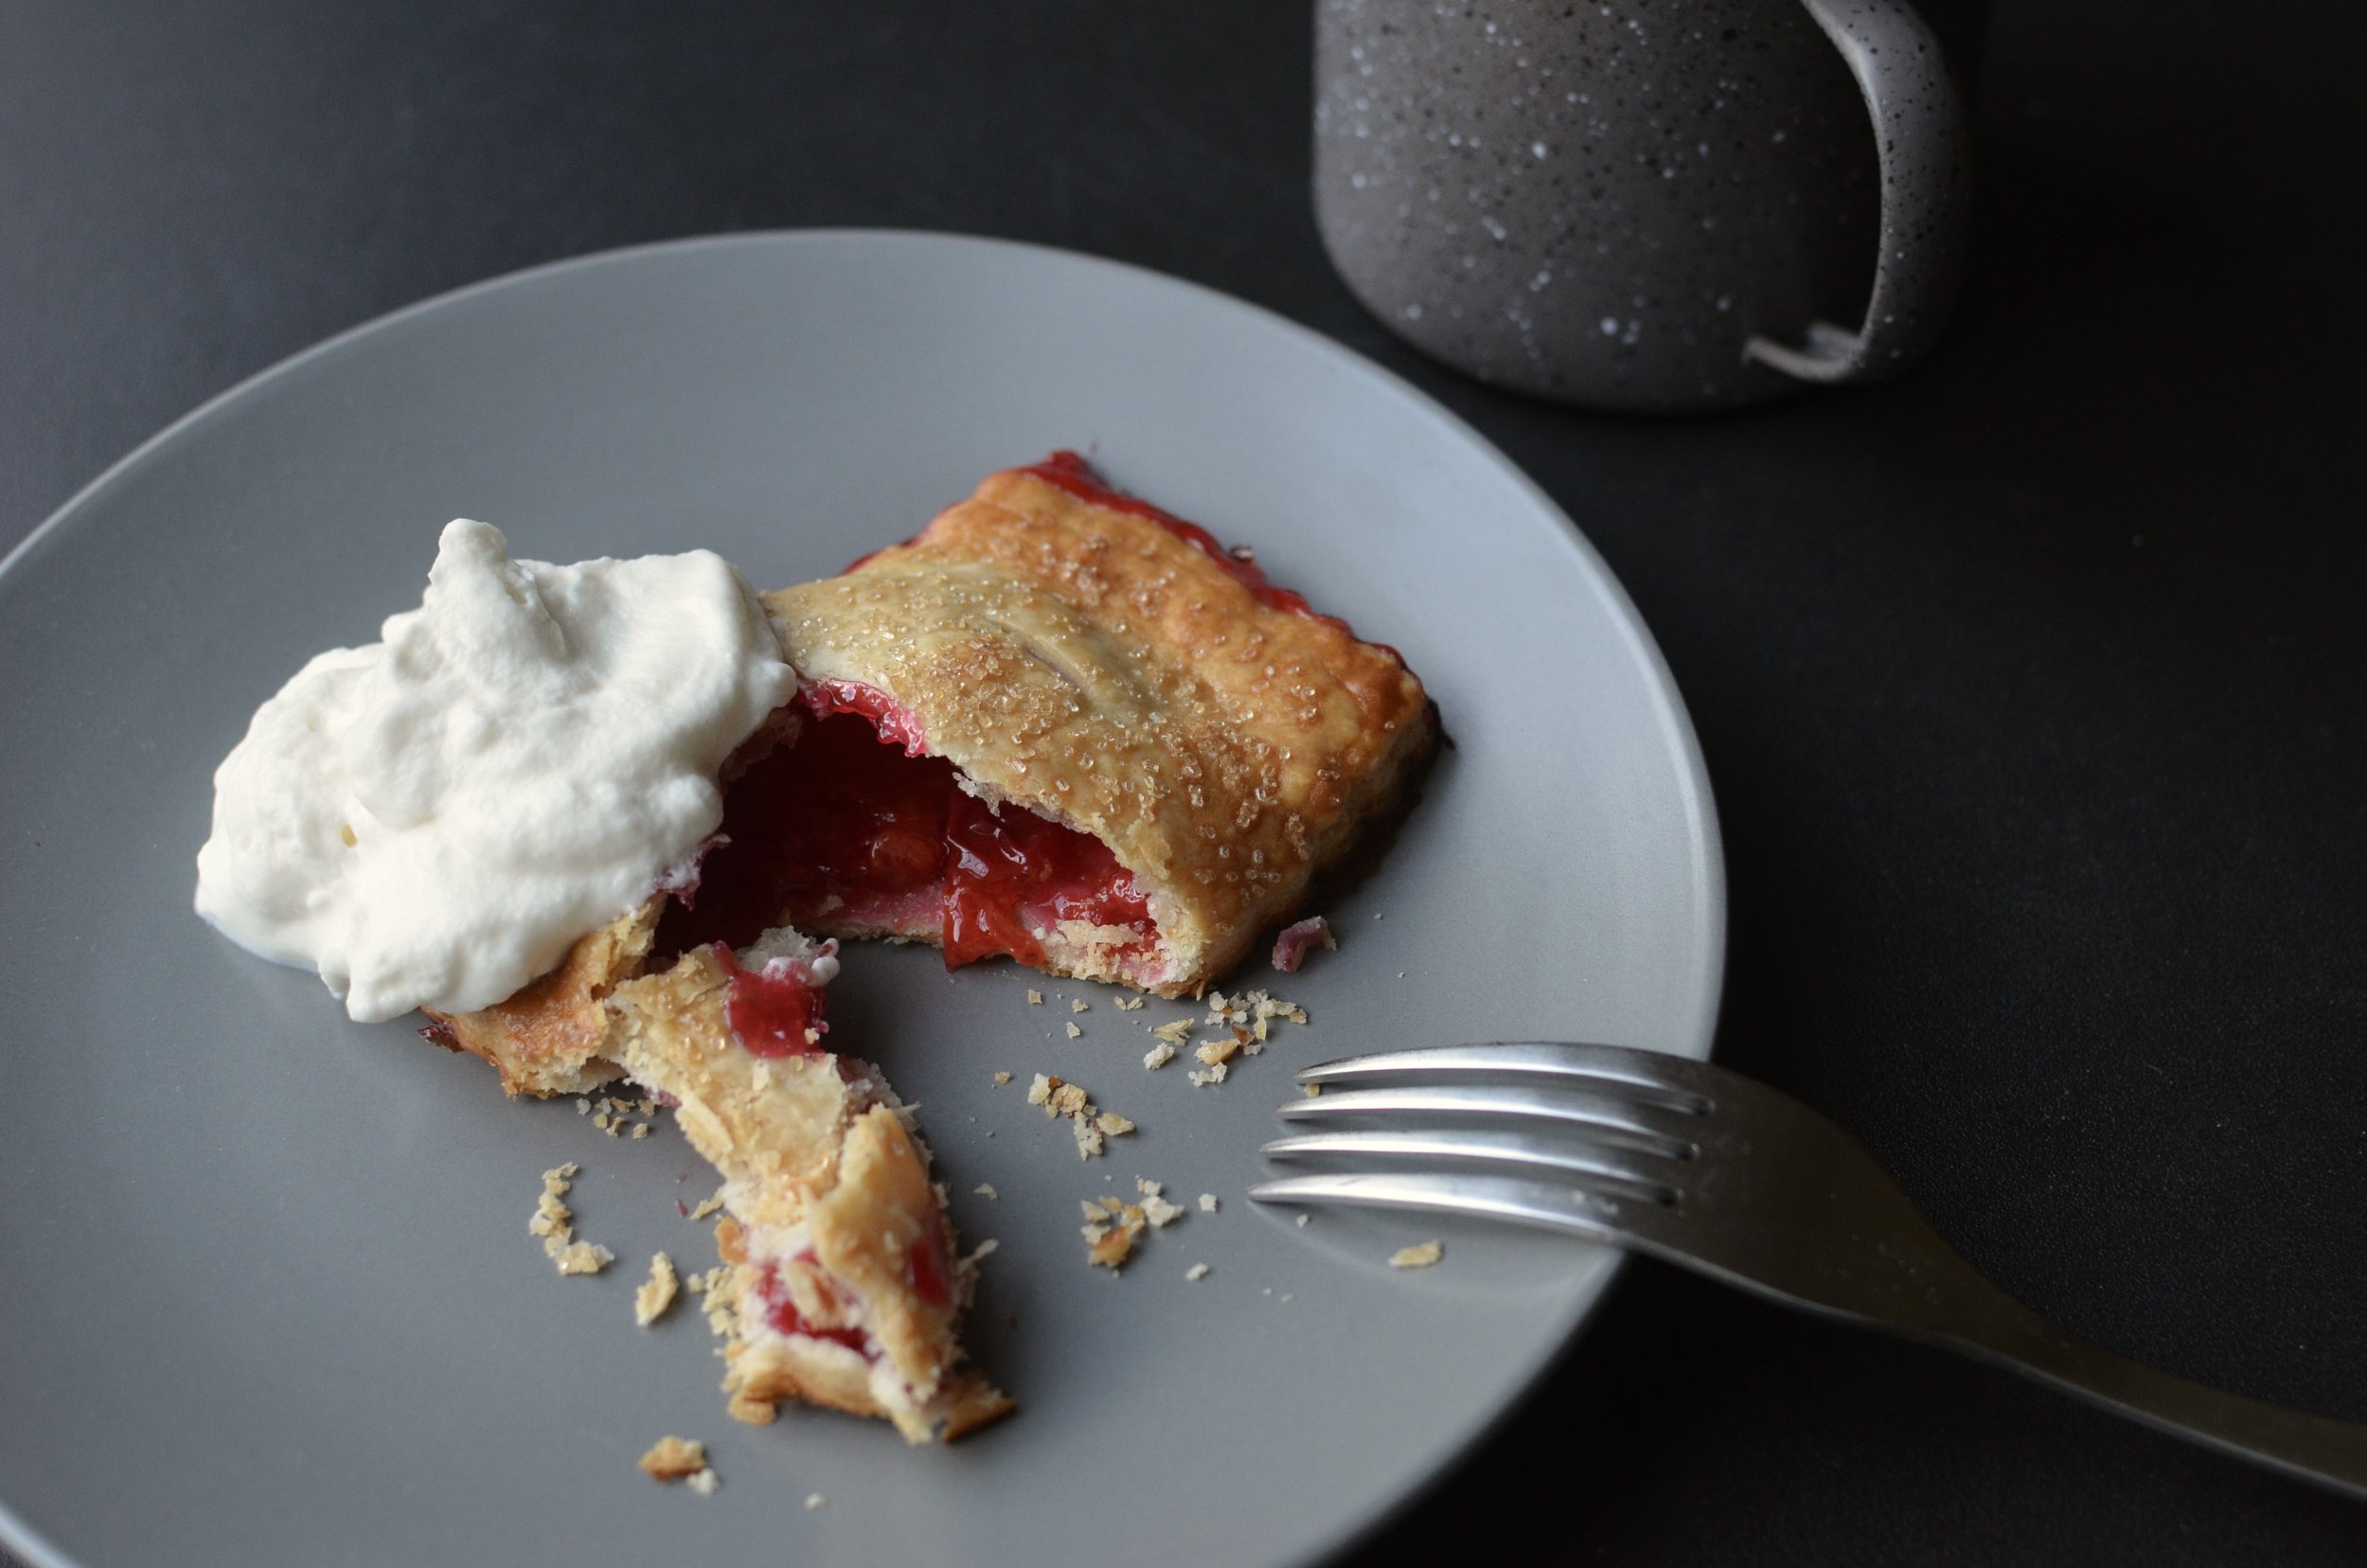
Serve warm or at room temperature. I like to enjoy my hand pies with a dollop of whipped cream, but a scoop of ice cream would be great as well. These hand pies are best served within 24 hour of baking. Check out my notes below for storage tips.
(affiliate links)
pastry cloth https://amznhttps://amzn.to/44ECSf7to/44ECSf7
ball-bearing rolling pin (my new favorite) https://amzn.to/3XMetSI
rectangular cutter https://amzn.to/3JSS2Wf
professional half sheet pan https://https://amzn.to/46FWEZv/46FWEZv
professional silicone baking mat https://amzn.to/3O9Q6LF
turbinado sugar https://amzn.to/3pFQY19
pure almond extract https://amzn.to/43fMr3a
tapioca start/flour https://amzn.to/3O9CZdd
makes 8 hand pies
chilled single all-butter pie crust (food processor recipe here, or make-by-hand recipe here)
1 pound pitted tart cherries, fresh or frozen (aka sour cherries)
1/2 cup granulated sugar (or more to taste)
2 1/2 tablespoons tapioca starch/flour (see notes below)
zest of 1/2 lemon
1 tablespoon lemon juice
1/4 pure almond extract (use the good stuff)
1/4 teaspoon table salt
milk for brushing on crust (see notes below)
turbinado sugar for sprinkling (aka sugar in the raw)
Place pitted cherries, granulated sugar, tapioca starch/flour, lemon zest, and lemon juice in a heavy-bottomed saucepan.
Over high heat, cook, stirring constantly, until mixture thickens; remove from heat and stir in pure almond extract and salt.
Taste the cherry filling and add more sugar if needed; set aside to cool (spread on a sheet pan to speed the process up).
On a floured pastry cloth, roll the chilled pie dough into a 1/8-inch thin layer.
Cut rectangles of pie dough that are a bit larger than the cutter you plan to use.
Place 2 tablespoons of filling in the center of one rectangle of dough, then brush the edges with water and top with a 2nd dough rectangle; press edges to seal well.
Use scalloped cutter to trim the hand pies into neat shapes and transfer to a silpat-lined half sheet pan; chill hand pies for at least 10 minutes while oven preheats.
Preheat oven to 400F with the rack in the center position.
Brush hand pies with milk and sprinkle with turbinado sugar; cut 3 small slits in the top of each hand pie, being sure not to pierce the bottoms..
Bake center of preheated oven for 20-25 minutes. Remove from oven and allow to rest on pan until cool enough to handle.
Cherry filling can be made up to 5 days ahead; store refrigerated in an airtight container.
An equal amount of cornstarch can be substituted for the tapioca starch/flour, but cornstarch will break down upon freezing so be sure to use tapioca if you plan to freeze these hand pies.
The crust can be brushed with milk, cream, half-and-half, or a beaten egg mixed with a splash of water.
To freeze unbaked hand pies - Prepare them through step 7 above, then flash freeze for a couple of hours before transferring to an airtight container (I like to vacuum seal them). Keep frozen up to 3 months.
To bake frozen hand pies - Place frozen pies on silpat-lined half sheet pan, brush with milk or half-and-half, sprinkle with turbinado sugar, and bake in a preheated 400F oven for 25-30 minutes.
These hand pies are best served within 24 hours of baking. Leftovers should be stored at room temperature, NOT in an airtight container. Storing in an airtight container will result in the crust losing its crisp, flaky texture.
To make a 9-inch cherry pie, double the crust and cherry filling given in the recipe. The filling for this recipe should not be cooked before baking a pie - just mix the filling ingredients well, pour into crust-lined 9-inch pie plate, cover with strips of pie crust to form a lattice top. Brush crust with milk or half-and-half and sprinkle with turbinado sugar. Place pie plate on a half sheet pan before baking for 60-75 minutes in a preheated 400F oven. Allow pie to cool before serving.