contact us

Use the form on the right to contact us.

You can edit the text in this area, and change where the contact form on the right submits to, by entering edit mode using the modes on the bottom right.


123 Street Avenue, City Town, 99999

(123) 555-6789

email@address.com


You can set your address, phone number, email and site description in the settings tab.
Link to read me page with more information.

Blog

Butteryum food blog recipes

Filtering by Category: gluten free recipes

Freezer-Friendly Peach Crisp

Patricia @ ButterYum

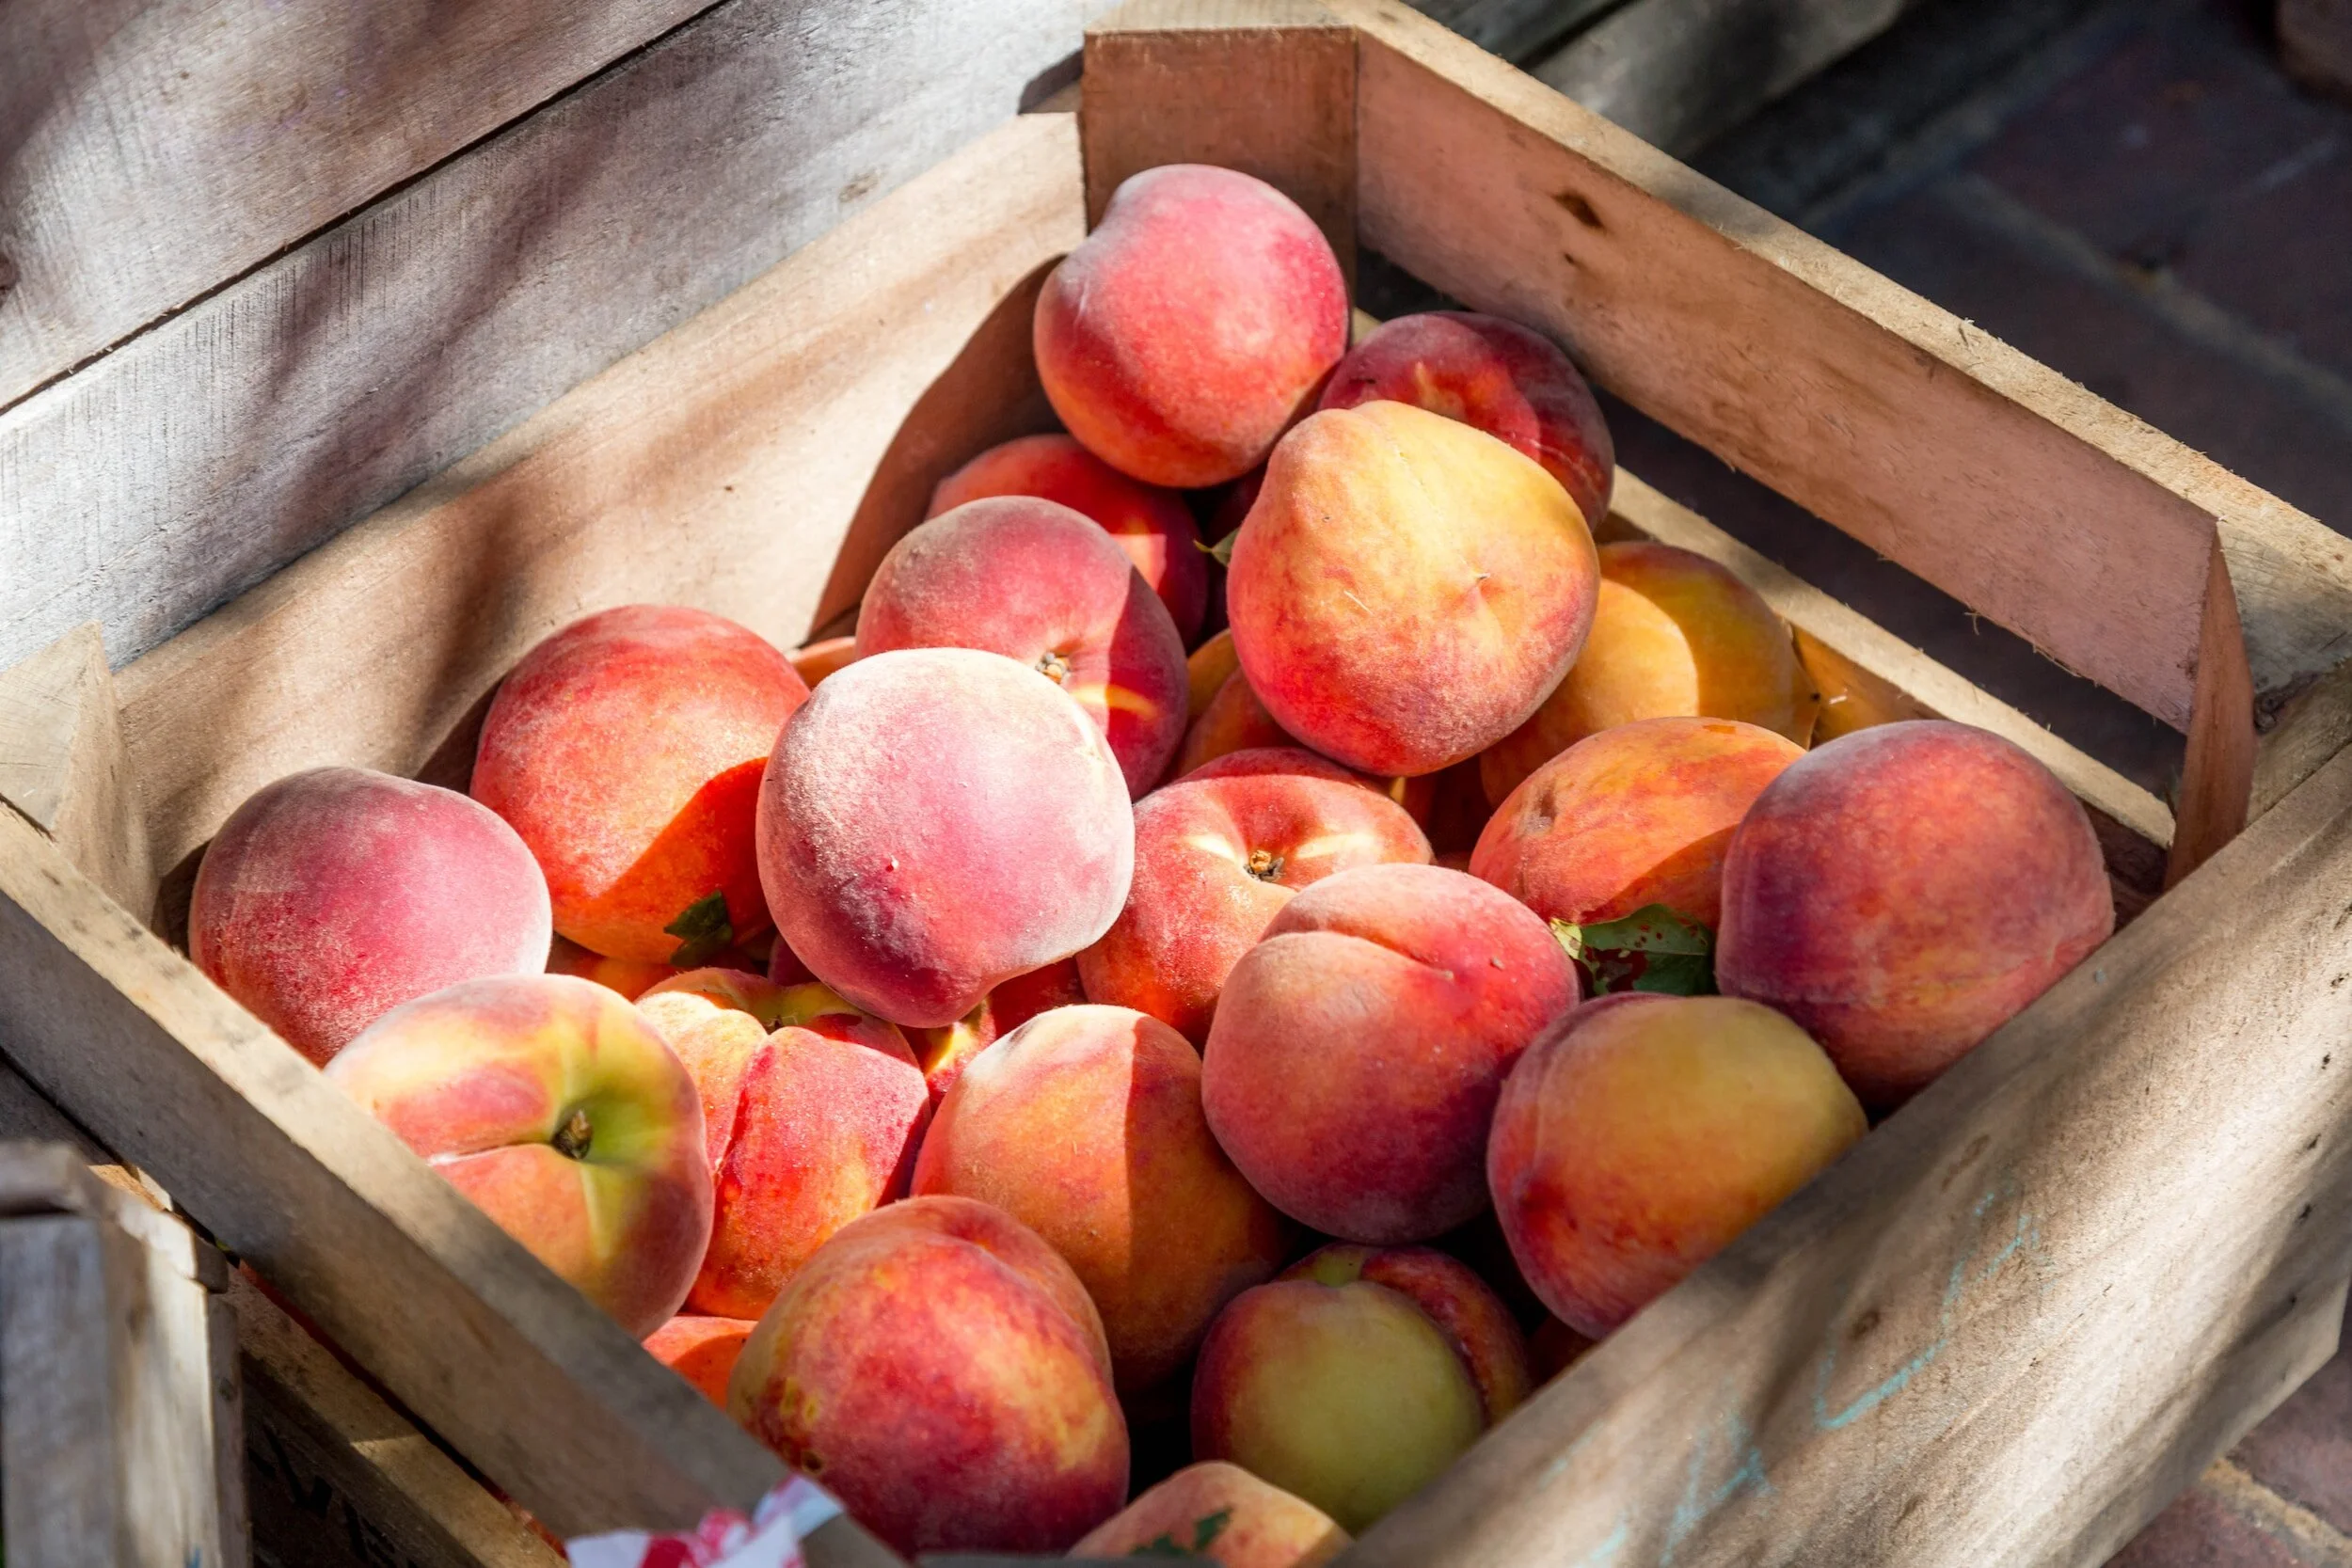
Want to enjoy fresh summer peaches long after peach season is over? Stock your freezer with enough Freezer-Friendly Peach Crisps to carry you through whenever you’re feeling kinda peachy. Great to pop in the oven when you have last-minute guests or you want a homemade dessert but didn’t plan ahead.

Items used to make this recipe:


Freezer-Friendly Peach Crisp

makes one 9x9 pan

Printable Recipe

Ingredients

For the Filling:

  • 4 cups thinly sliced peaches

  • 3 tablespoons tapioca flour

  • 1 1/2 tablespoons granulated sugar (more if peaches are tart)

  • 1/4 teaspoon ground cinnamon

  • 1/4 teaspoon pure almond extract

  • pinch of table salt

  • 1 1/2 tablespoons butter, cut into small cubes

For the Crisp:

  • 1 1/2 cups quick cooking oats

  • 2 teaspoons all purpose flour

  • 3 tablespoons light brown sugar

  • 1 teaspoon ground cinnamon

  • 6 tablespoons butter, melted

Directions

To make the filling:

  1. In a medium mixing bowl, stir together the sliced peaches, tapioca flour, almond extract, sugar, cinnamon, and salt; set aside until needed.

To make the crisp topping:

  1. In a small mixing bowl, combine all the crisp ingredients together until no traces of dry ingredients remain; set aside until needed.

To assemble crisp:

  1. Butter a 9x9 disposable baking dish or coat with nonstick cooking spray.

  2. Pour peach filling evenly into prepared baking dish.

  3. Spread crisp topping evenly over peaches.

  4. Seal baking dish with heavy duty foil and freeze for up to 3 months (or vacuum seal for longer storage).

To Bake Crisp:

  1. Preheat oven to 350F with rack in center position.

  2. Place frozen peach crisp on a rimmed sheet pan and bake, covered, for 30 minutes, then uncover and bake an additional 20 minutes or until the filling bubbles.

Notes

  • To freeze for longer than 3 months, store completely frozen unbaked crisp in Vacuum sealed bag. If the foil pan gets a little misshapen during the vacuum process, simply reshape it before baking.

  • The thickener of choice in this recipe is tapioca flour because it’s remains thick after freezing, unlike some other thickeners. If you only have tapioca pearls on hand, you can grind them into flour using a grain mill, spice grinder, nutribullet, etc.

  • This recipe calls for a very small amount of almond extract, which accentuates and elevates the flavor of peaches. Be sure to use the good stuff.

Lemon Bars

Patricia @ ButterYum

It’s a good thing citrus season falls in the middle of winter because right about now, I could use a little sunshine (and a good hit of Vitamin C). This recipe is extremely easy to make so if you need to put a little happy in your day, grab a bag of lemons and start baking.

Items used to make this recipe:

(affiliate links)


Lemon Bars

makes one 9x13 cake pan

Printable Recipe

Ingredients

Shortbread Crust:

  • 1/2 pound (16 tablespoons) unsalted butter, room temperature

  • 2 cups all purpose flour (or gluten-free flour)

  • 1/2 cup granulated sugar

  • 2 teaspoons pure vanilla extract

  • 1/4 teaspoon fine sea salt

Filling:

  • 3 cups granulated sugar

  • 1 cup all purpose flour (or gluten-free flour)

  • 6 large eggs, room temperature

  • 1 cup freshly squeezed lemon juice

  • 1/2 teaspoon pure vanilla extract

  • 1/4 teaspoon fine sea salt

Garnish:

Directions

To make the crust:

  1. Preheat oven to 350F and place rack in center position,

  2. In the bowl of a stand mixer fitted with the paddle attachment, combine all the crust ingredients until no traces of dry ingredients remain.

  3. Press dough evenly into bottom of uncoated 9x13 aluminum cake pan.

  4. Bake for 15-20 minutes, then remove from oven and reserve while you make the filling.

To make the filling:

  1. In a medium mixing bowl, whisk together the sugar and flour until no lumps remain.

  2. Add the remaining filling ingredients and whisk until smooth.

  3. Pour filling over prebaked crust and return to oven for 30-35 minutes or until the filling is set.

  4. Allow to cool completely in pan (chill if desired) before serving.

To serve:

  1. Just before serving, sprinkle with a layer of confectioner’s sugar, then cut and serve. In humid climates, consider non-melting confectioner’s sugar. Bars are best served the day they’re baked as the shortbread crust will become chewy after that.

  2. Store leftovers in an airtight container in the refrigerator for up to a week. They can safely be kept at room temperature, but chilling keeps the filling firm and easy to handle.

Notes

  • This recipe can easily be made gluten free by using gluten-free flour instead of all purpose flour. Substitute equally.

  • Serve these bars the same day they are baked. You can still eat them a few days later, but the crust will absorb moisture from the lemon filling and become chewy.

  • Wait until the bars are completely cool before dusting with confectioner’s sugar. If you live in a humid climate, you might prefer dusting with non-melting confectioner’s sugar.