Momma's Southern Green Beans
Patricia @ ButterYum
Story Time. Years ago, while living in Missouri, I had a friend named Missy. Missy had just moved to Missouri from Mississippi, and Missy missed her Momma! Now, Missy was a new momma herself, but she wasn’t afraid to tell anyone and everyone how much she looooooved her Momma, and her Momma’s home cookin’. When I asked Missy what recipe she missed most, her immediate response was, “Momma’s green beans”. I don’t really know what I had expected her to say, but it definitely was not green beans! So naturally, I asked all about them.
Missy went on to tell me how her Momma would simmer fresh green beans, for hours, with a little liquid and lots of drippin's. The only green beans I ate growing up came straight out of a can so I couldn’t grasp the concept of Missy’s Momma’s green beans, but I never forgot the way she talked about those beans. Food truly is love!
Missy didn’t have much experience in the kitchen, and I never had the pleasure of meeting her Momma, but in the 20+ years since that conversation, I’ve asked many of my southern friends how their mommas cooked green beans. Some used bacon, others drippins; some used onions, others didn’t - but the basic technique remained the same - low and slow. Here’s my interpretation.

Start by washing and trimming green beans - I only trim the stem end, but a lot of people like to trim both ends.. You do you.
I love using my salad spinner when I wash produce - I use it just about every day. Great invention!

Time to start cooking - fry the bacon in a skillet over medium-high heat, stirring frequently. Use a skillet large enough to hold the green beans (at least 4 quart capacity).
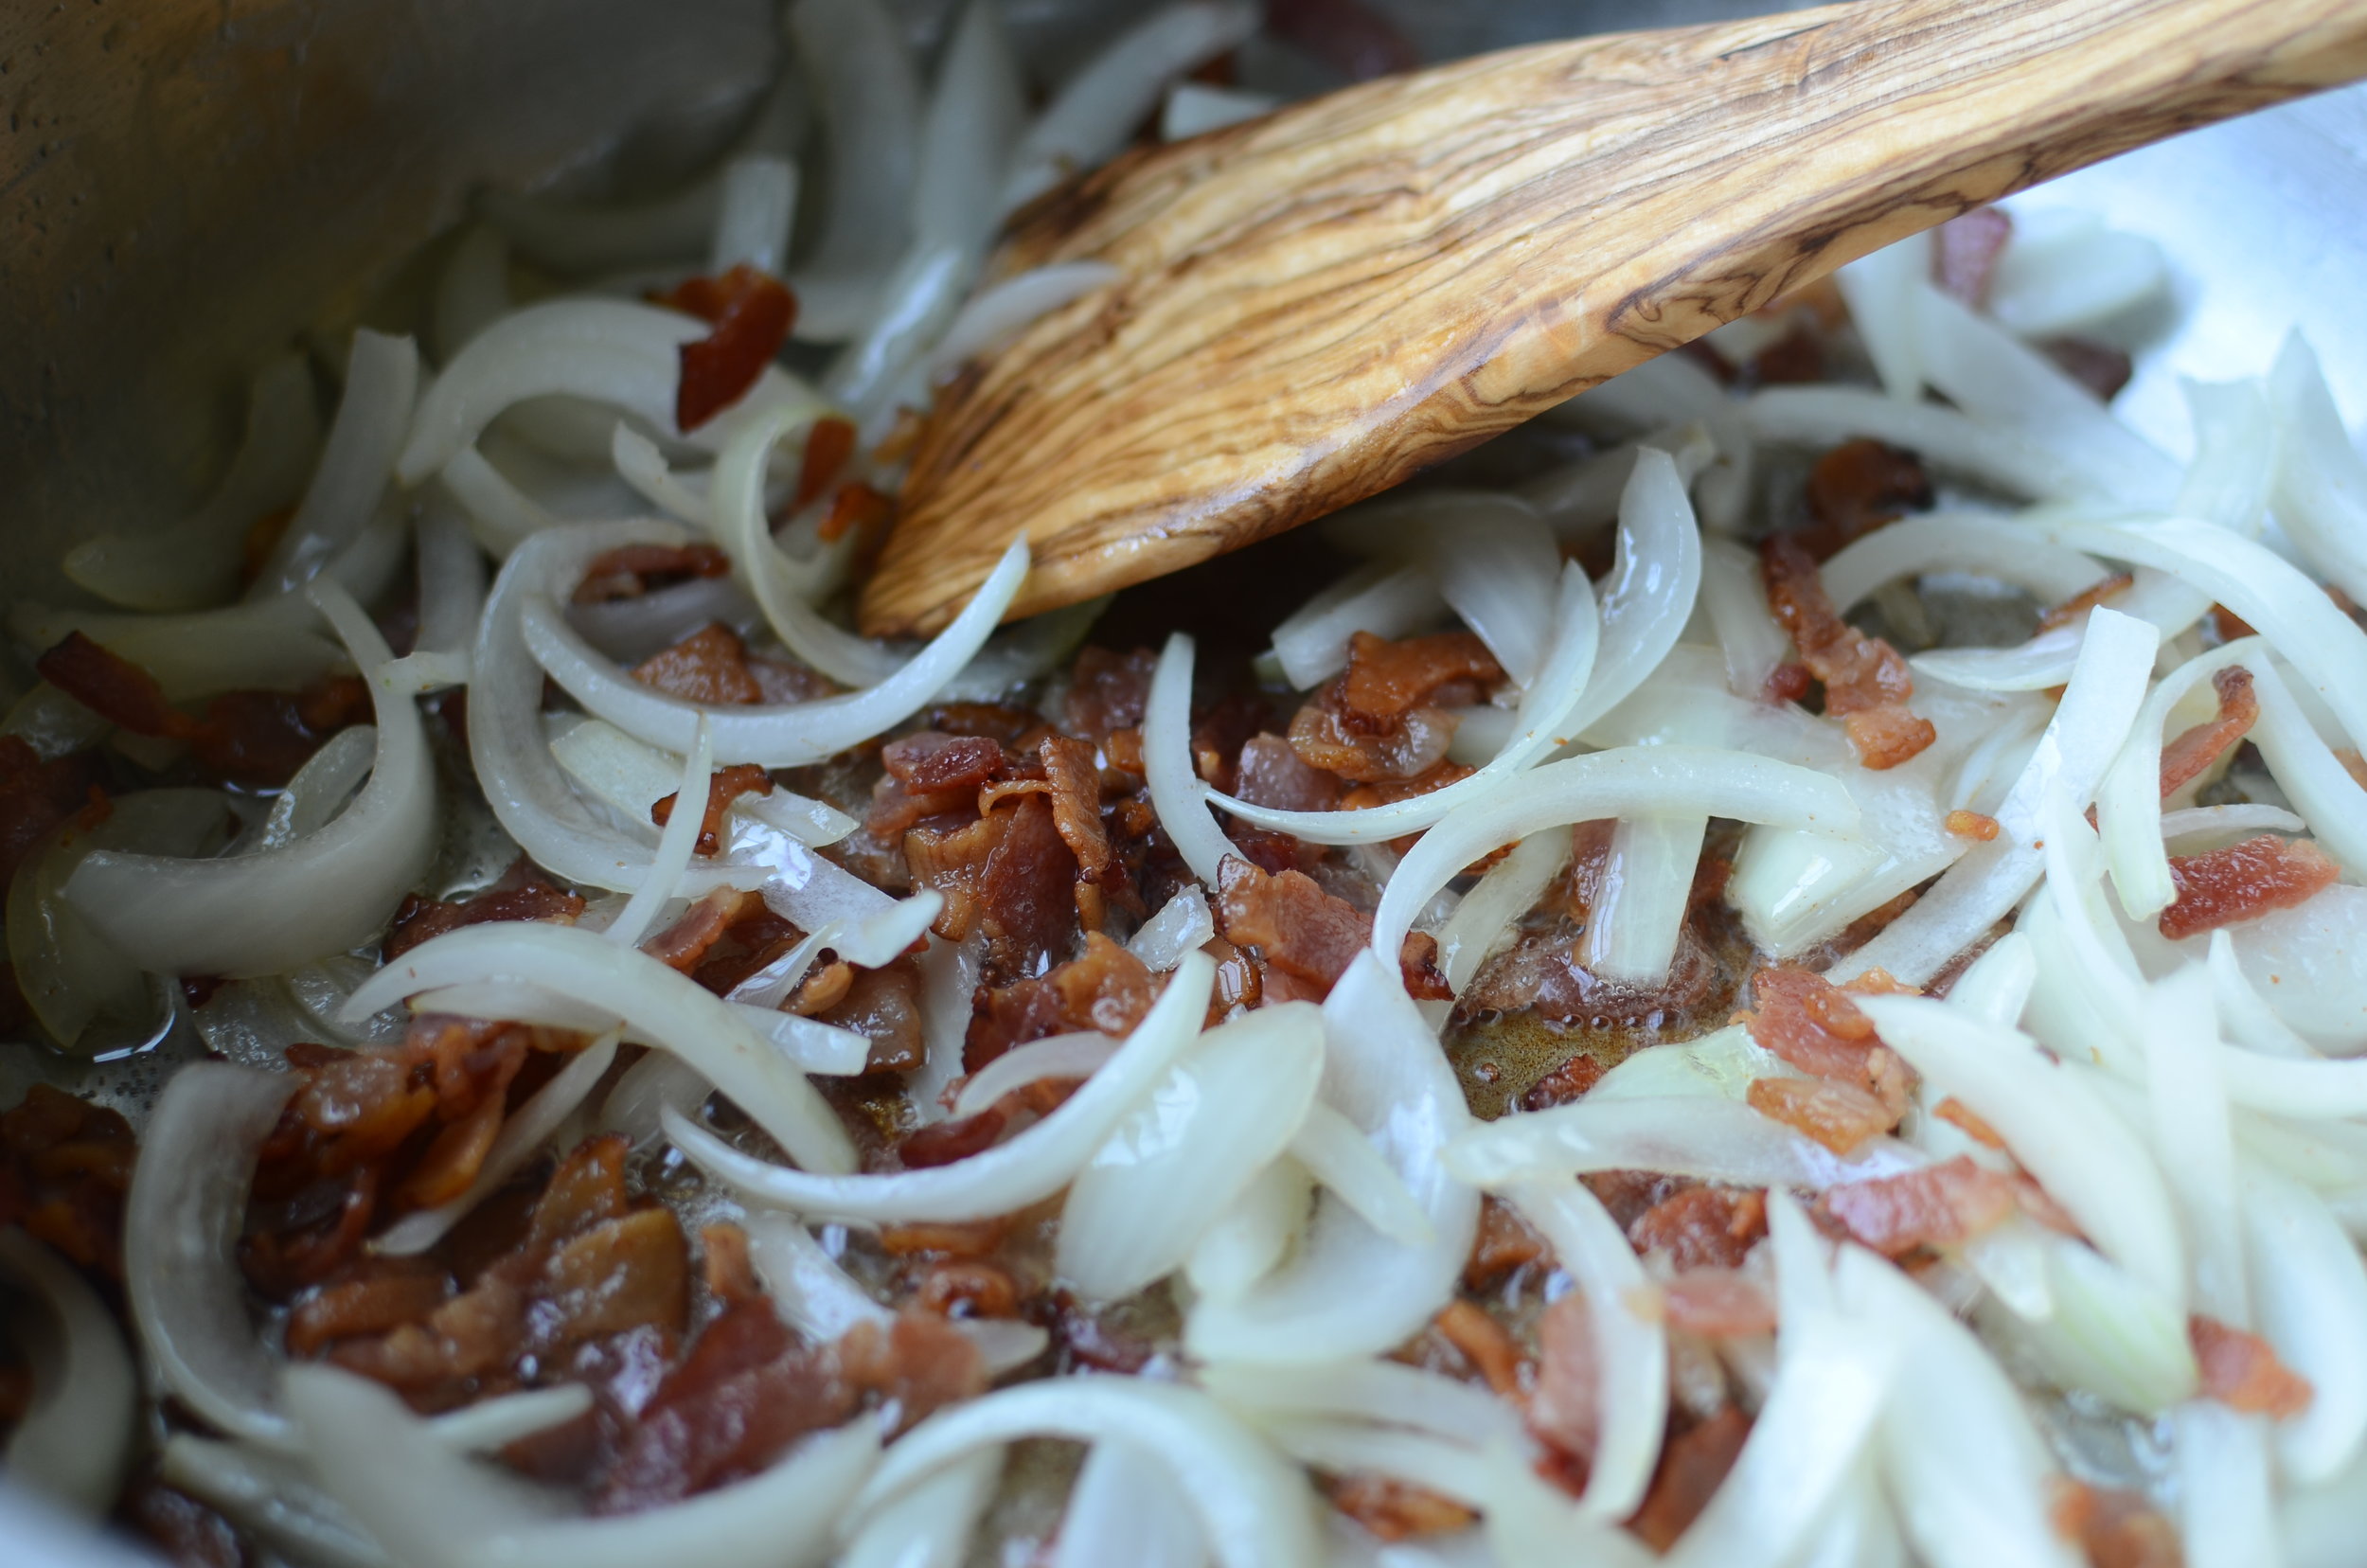
When the bacon is brown and has rendered most of its fat, add sliced onions and continue stirring for several minutes.
I’ve made these beans with and without the onions - they turn out fine either way, but I always have onions on hand, and I’m one of those people who actually likes to chop onions, so you can guess what I usually do.

Anyway, about 5 minutes after adding the onions, you’ll notice a nice brown layer of “fond” form on the bottom of the pan - that fond is full of flavor so be careful not to let it burn (have the chicken stock nearby so you can add a splash or two to any spots of fond that get too dark).
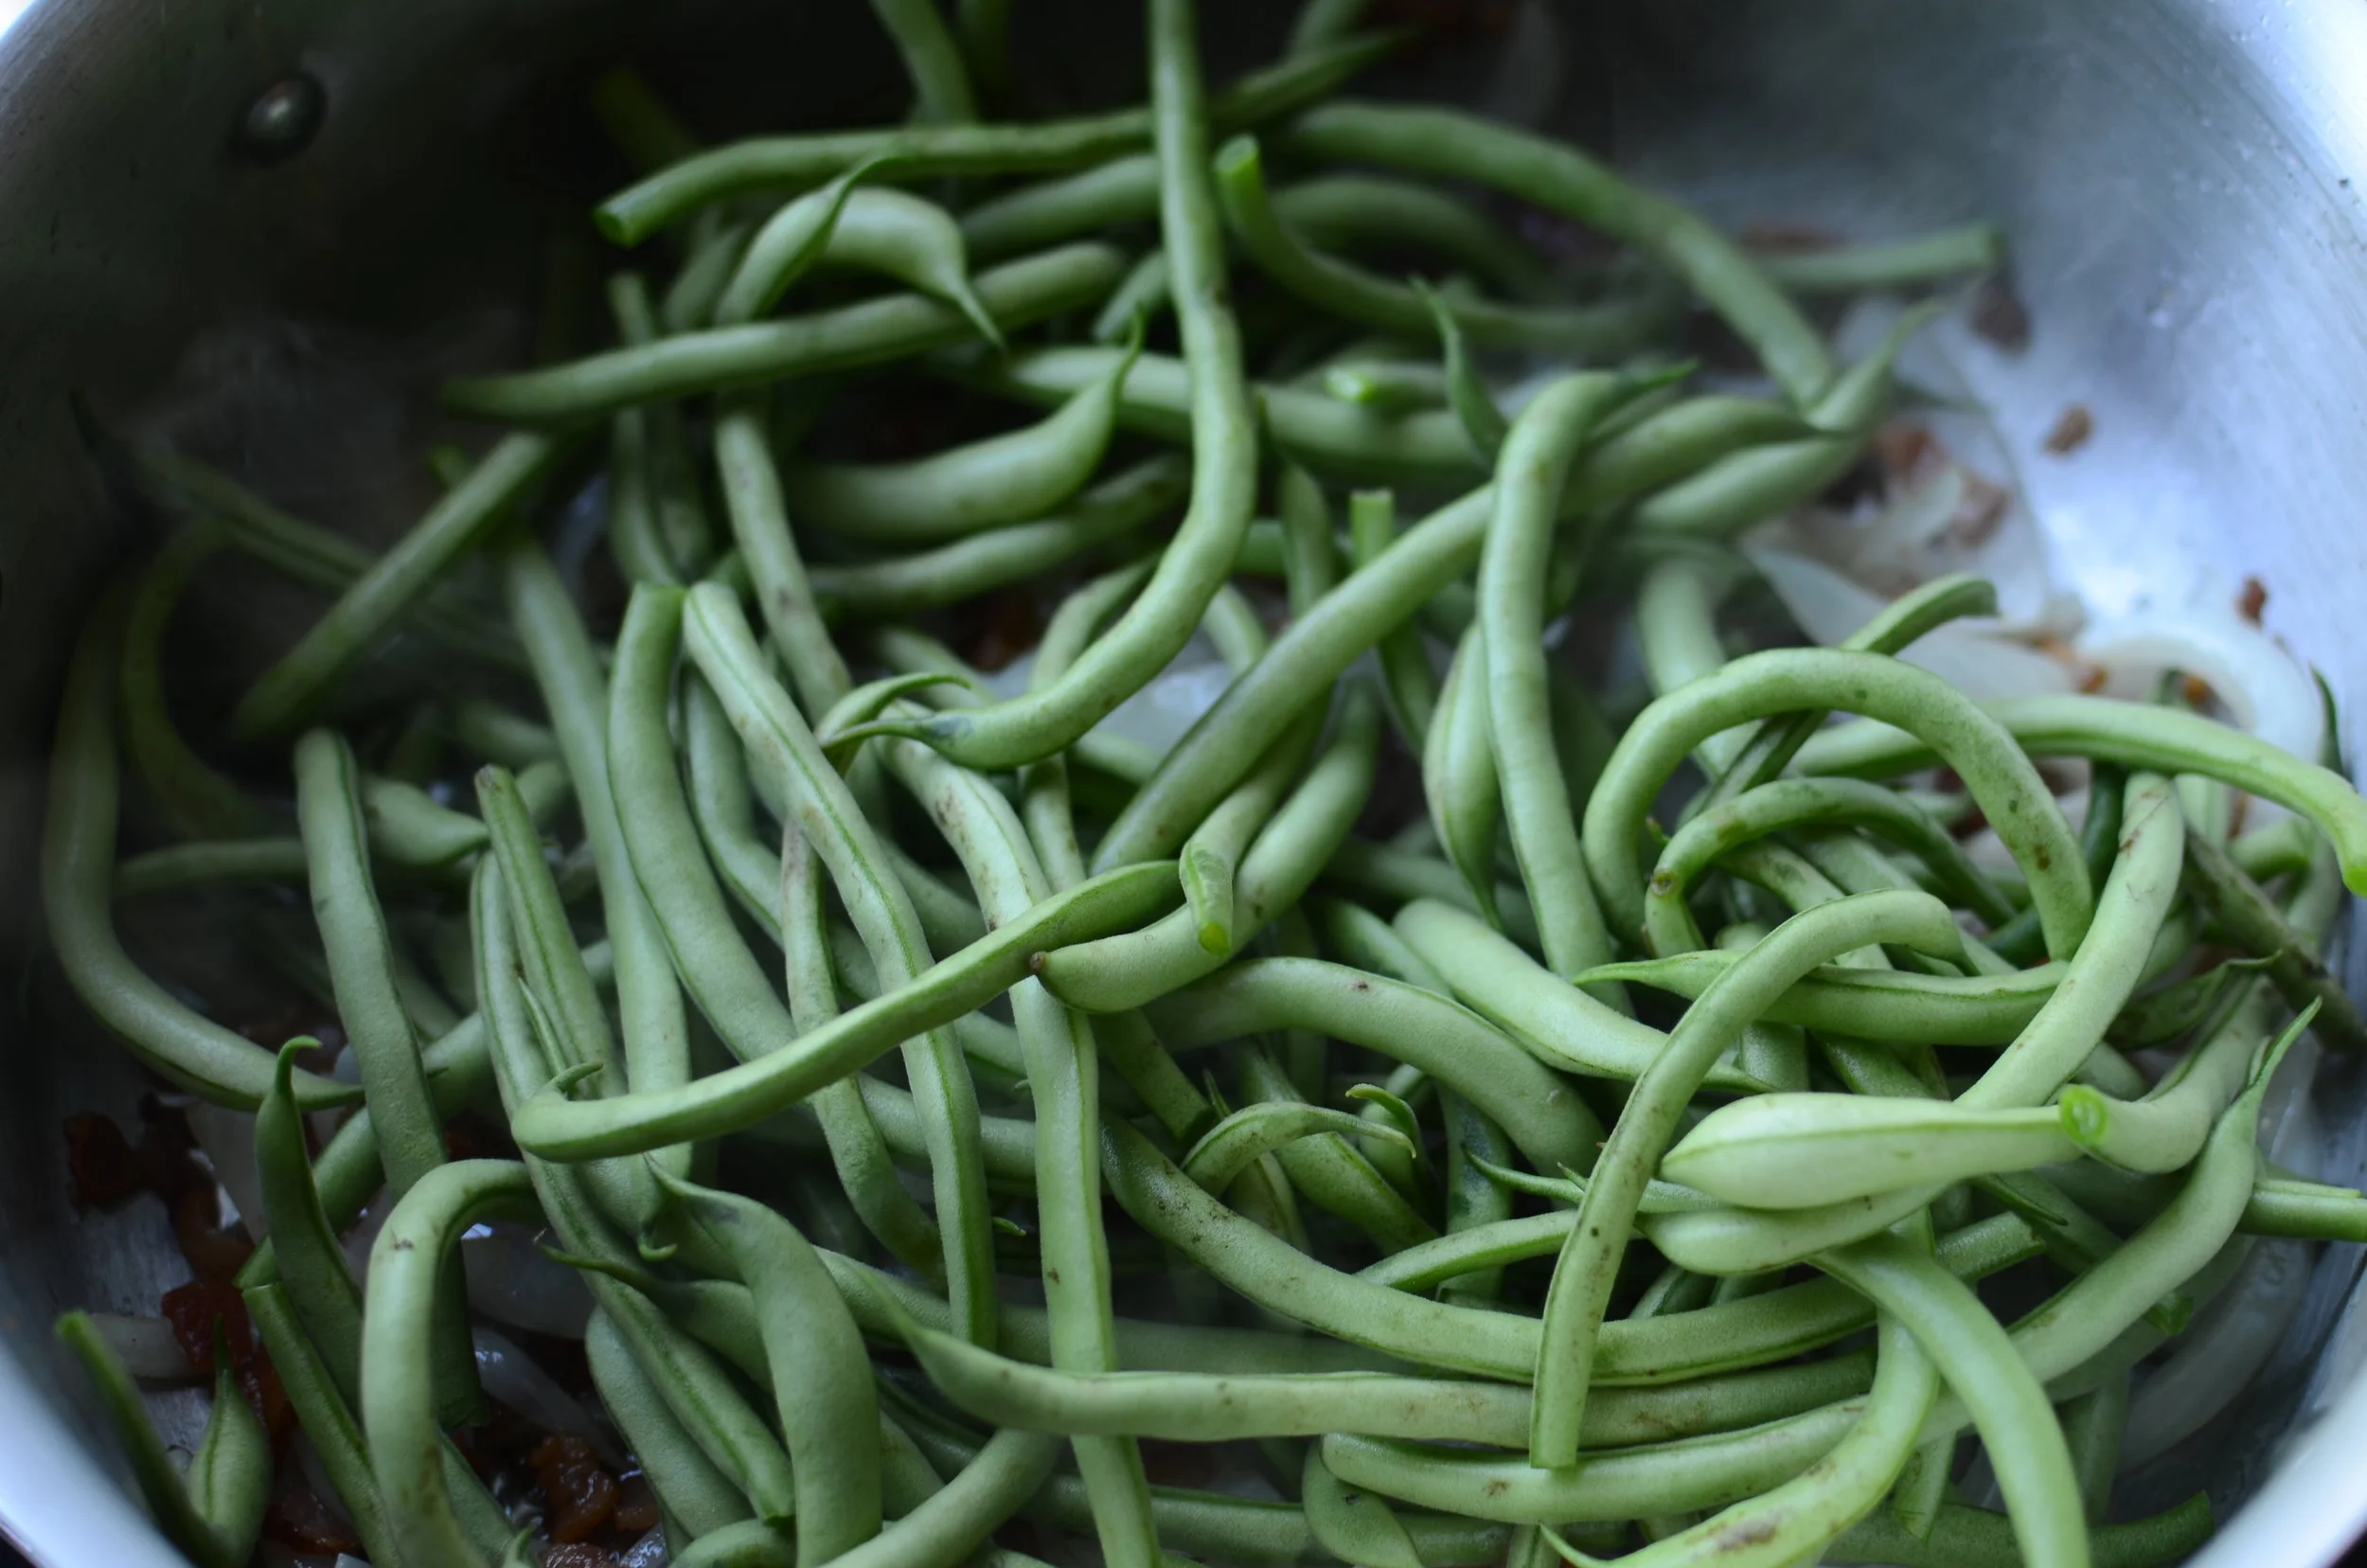
Add the washed and trimmed green beans to the pan.

Next, add low or no-sodium chicken stock. I’m using my own homemade chicken stock which is unsalted. Be sure to use very low sodium stock because a) the bacon contains quite a bit of salt, and b) we’re going to reduce the chicken stock down quite a bit so we don’t want the finished dish to be to salty.

Now this part isn’t completely necessary, but fat equals flavor so I do like to add a little extra bacon fat to the pan - just a tablespoon or so.
You keep a jar of rendered bacon fat in your fridge, don’t you? Good stuff!
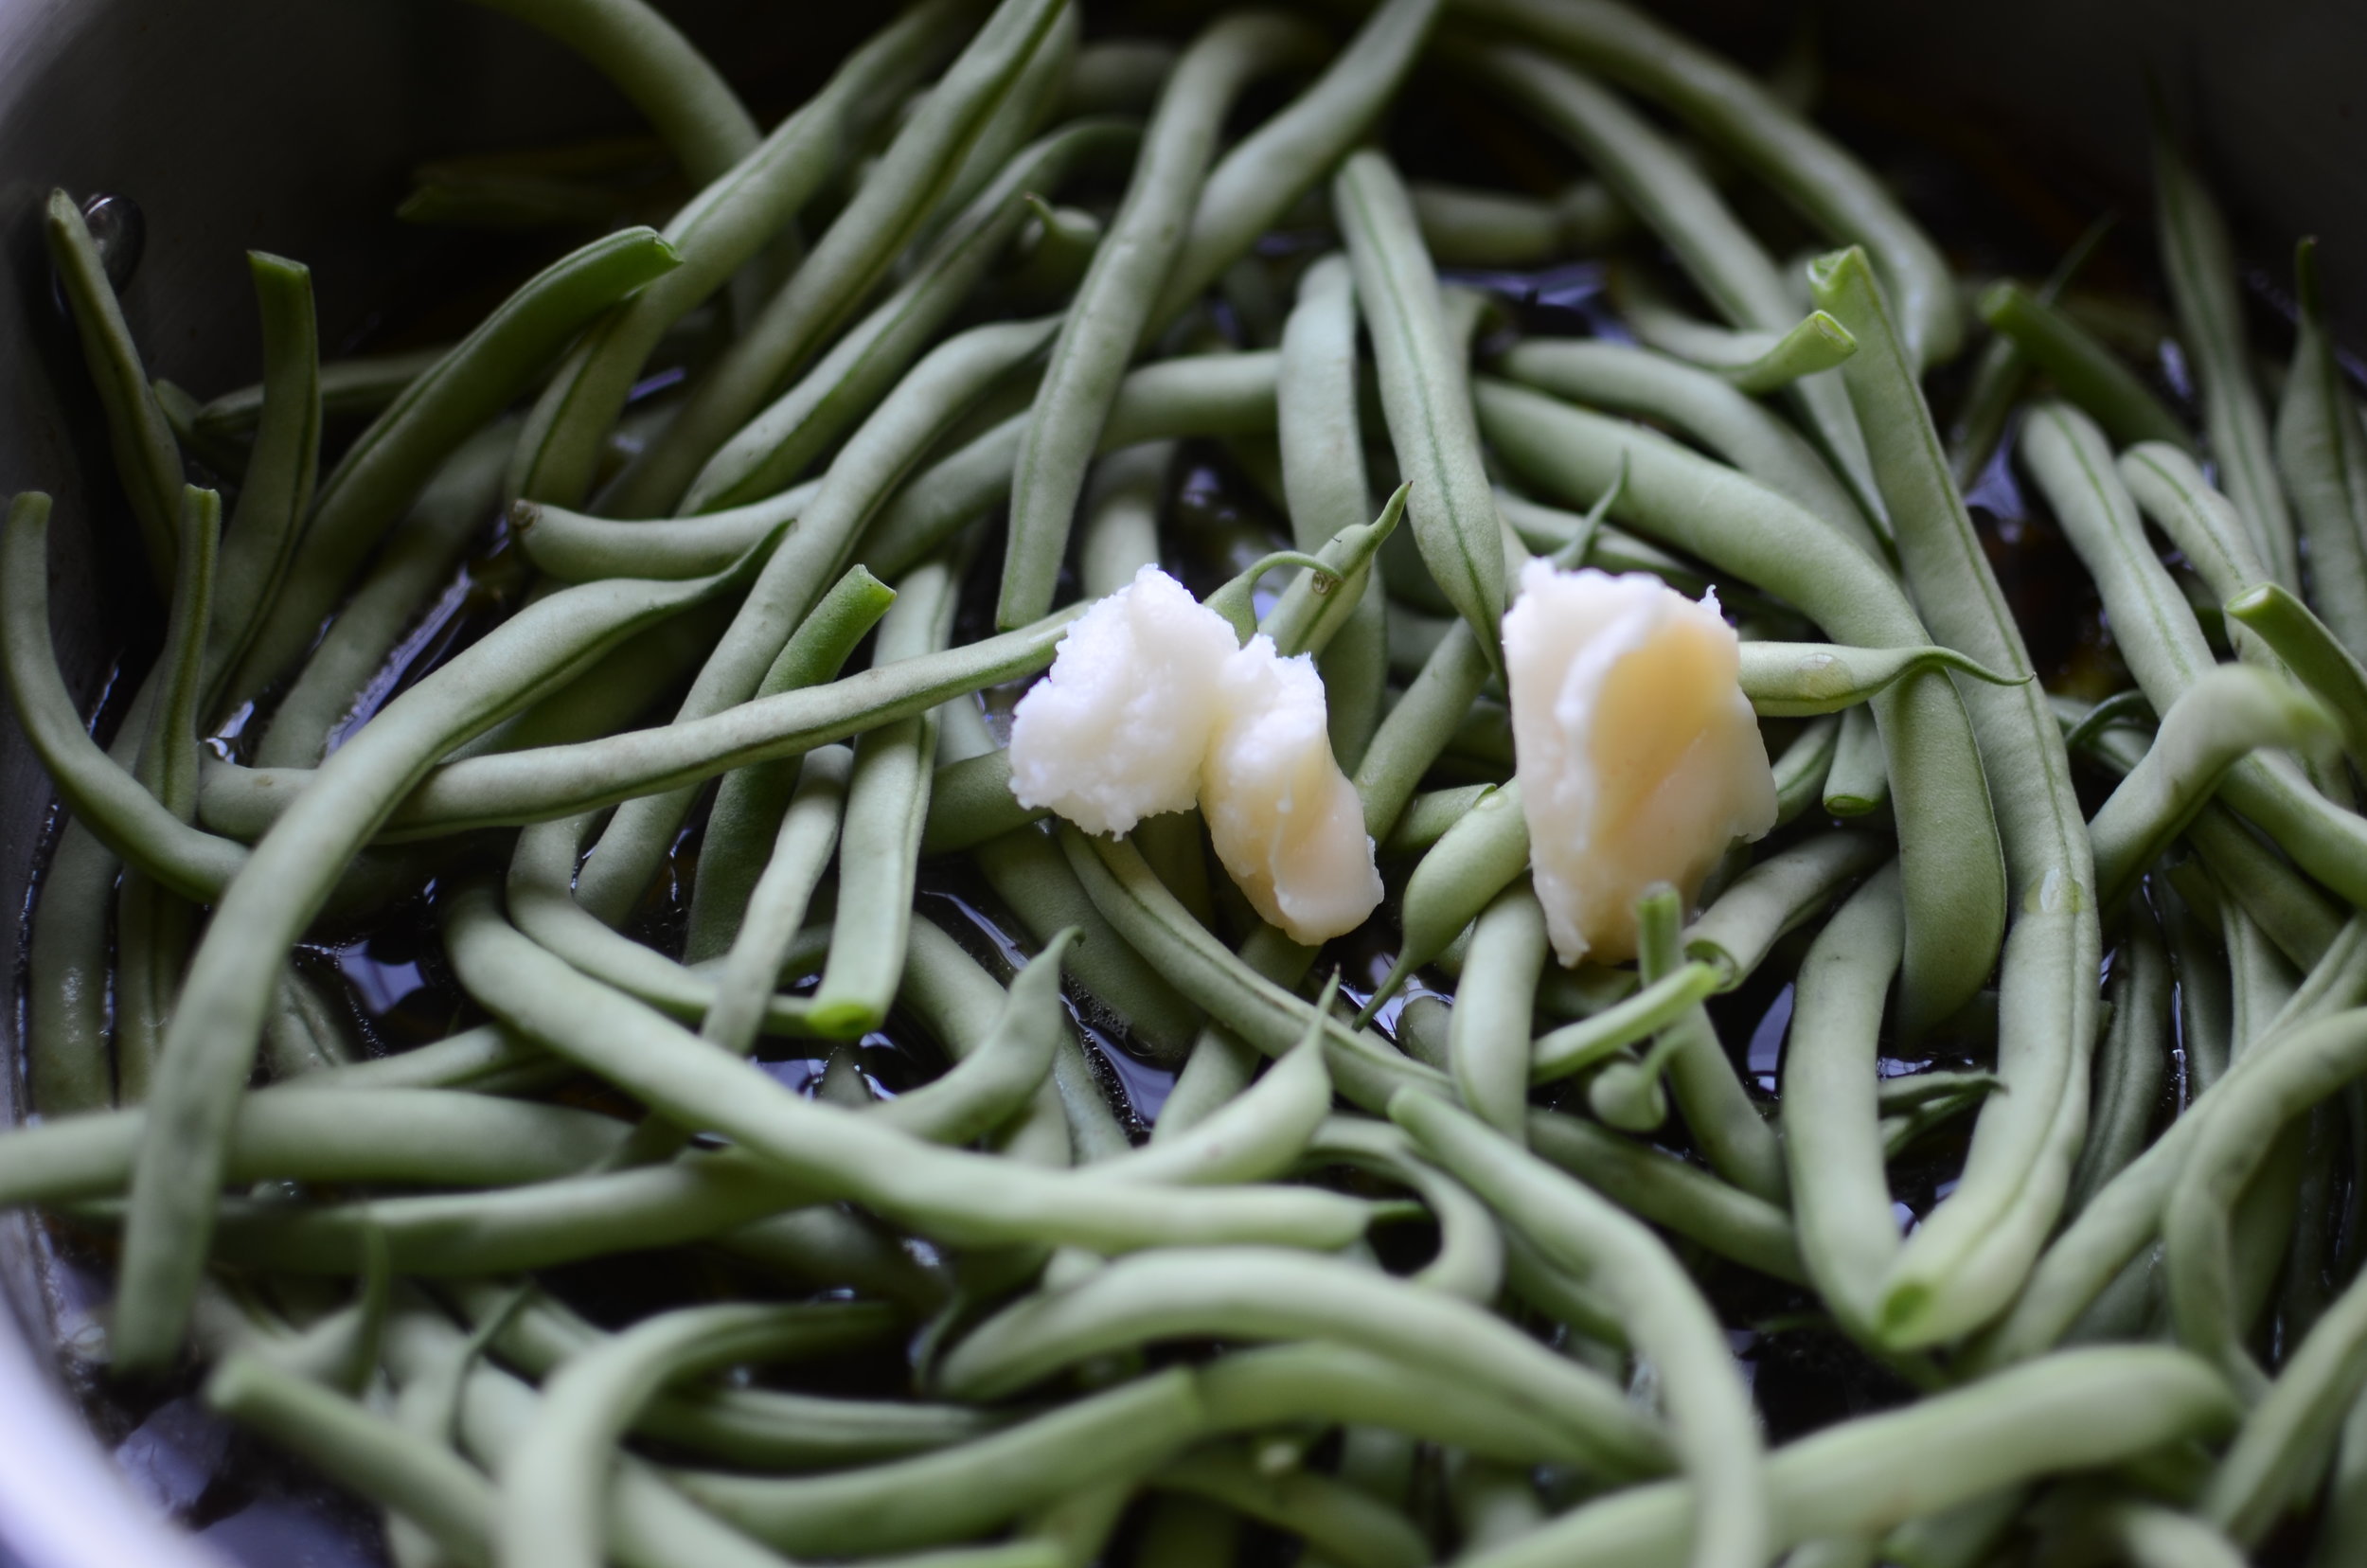
Note - adding additional bacon fat really depends on how much fat rendered into the pan when you cooked your bacon. My bacon was pretty lean so I definitely felt the need to add a little extra.

To recap, we have the bacon, onions, green beans, chicken stock, and a little extra bacon fat in the pan. Heat until the chicken stock starts to boil.

Reduce the heat to low and cover the pan; simmer for 1 hour.

After an hour, uncover the pan and give the beans a stir; increase the heat to a medium-low and continue cooking, uncovered, for about another hour or until the chicken stock reduces down to just a few tablespoons.

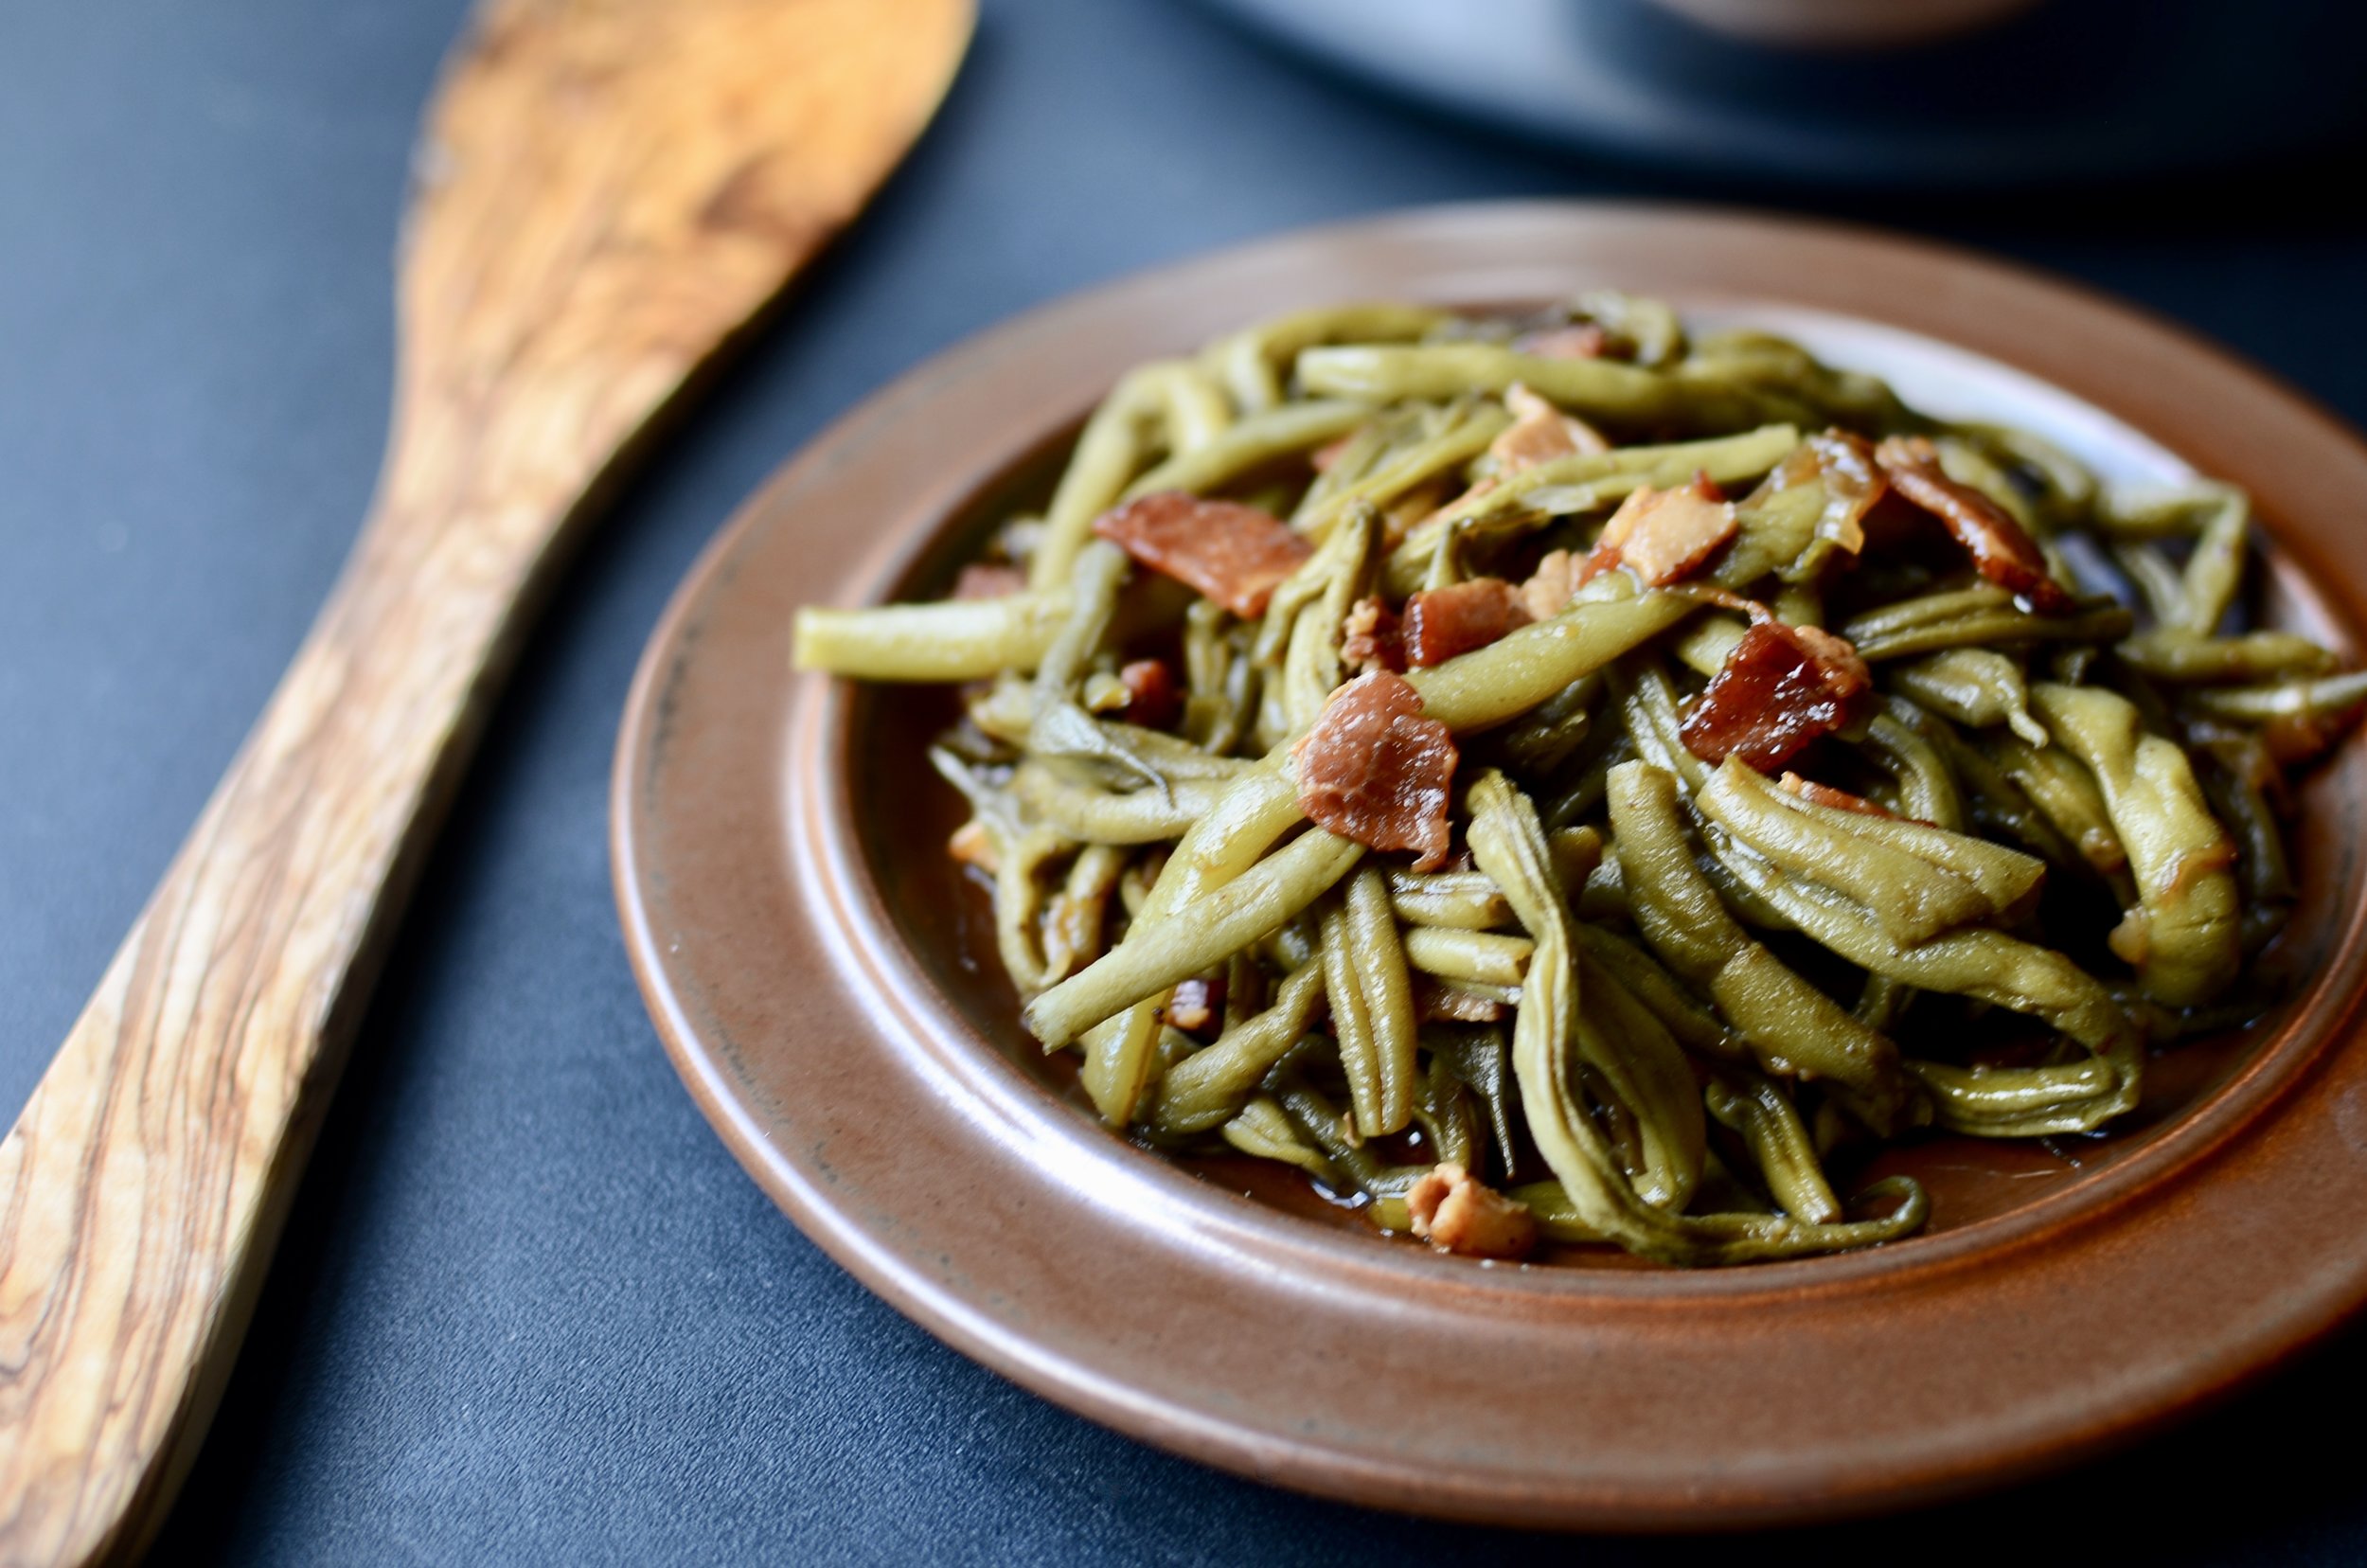
Here’s what the reduced chicken stock should look like after about an hour. And there you go - your green beans should be ready to serve. The bacon and chicken stock add enough flavor that I never feel the need to add salt, but you should taste yours carefully before serving and adjust if needed.
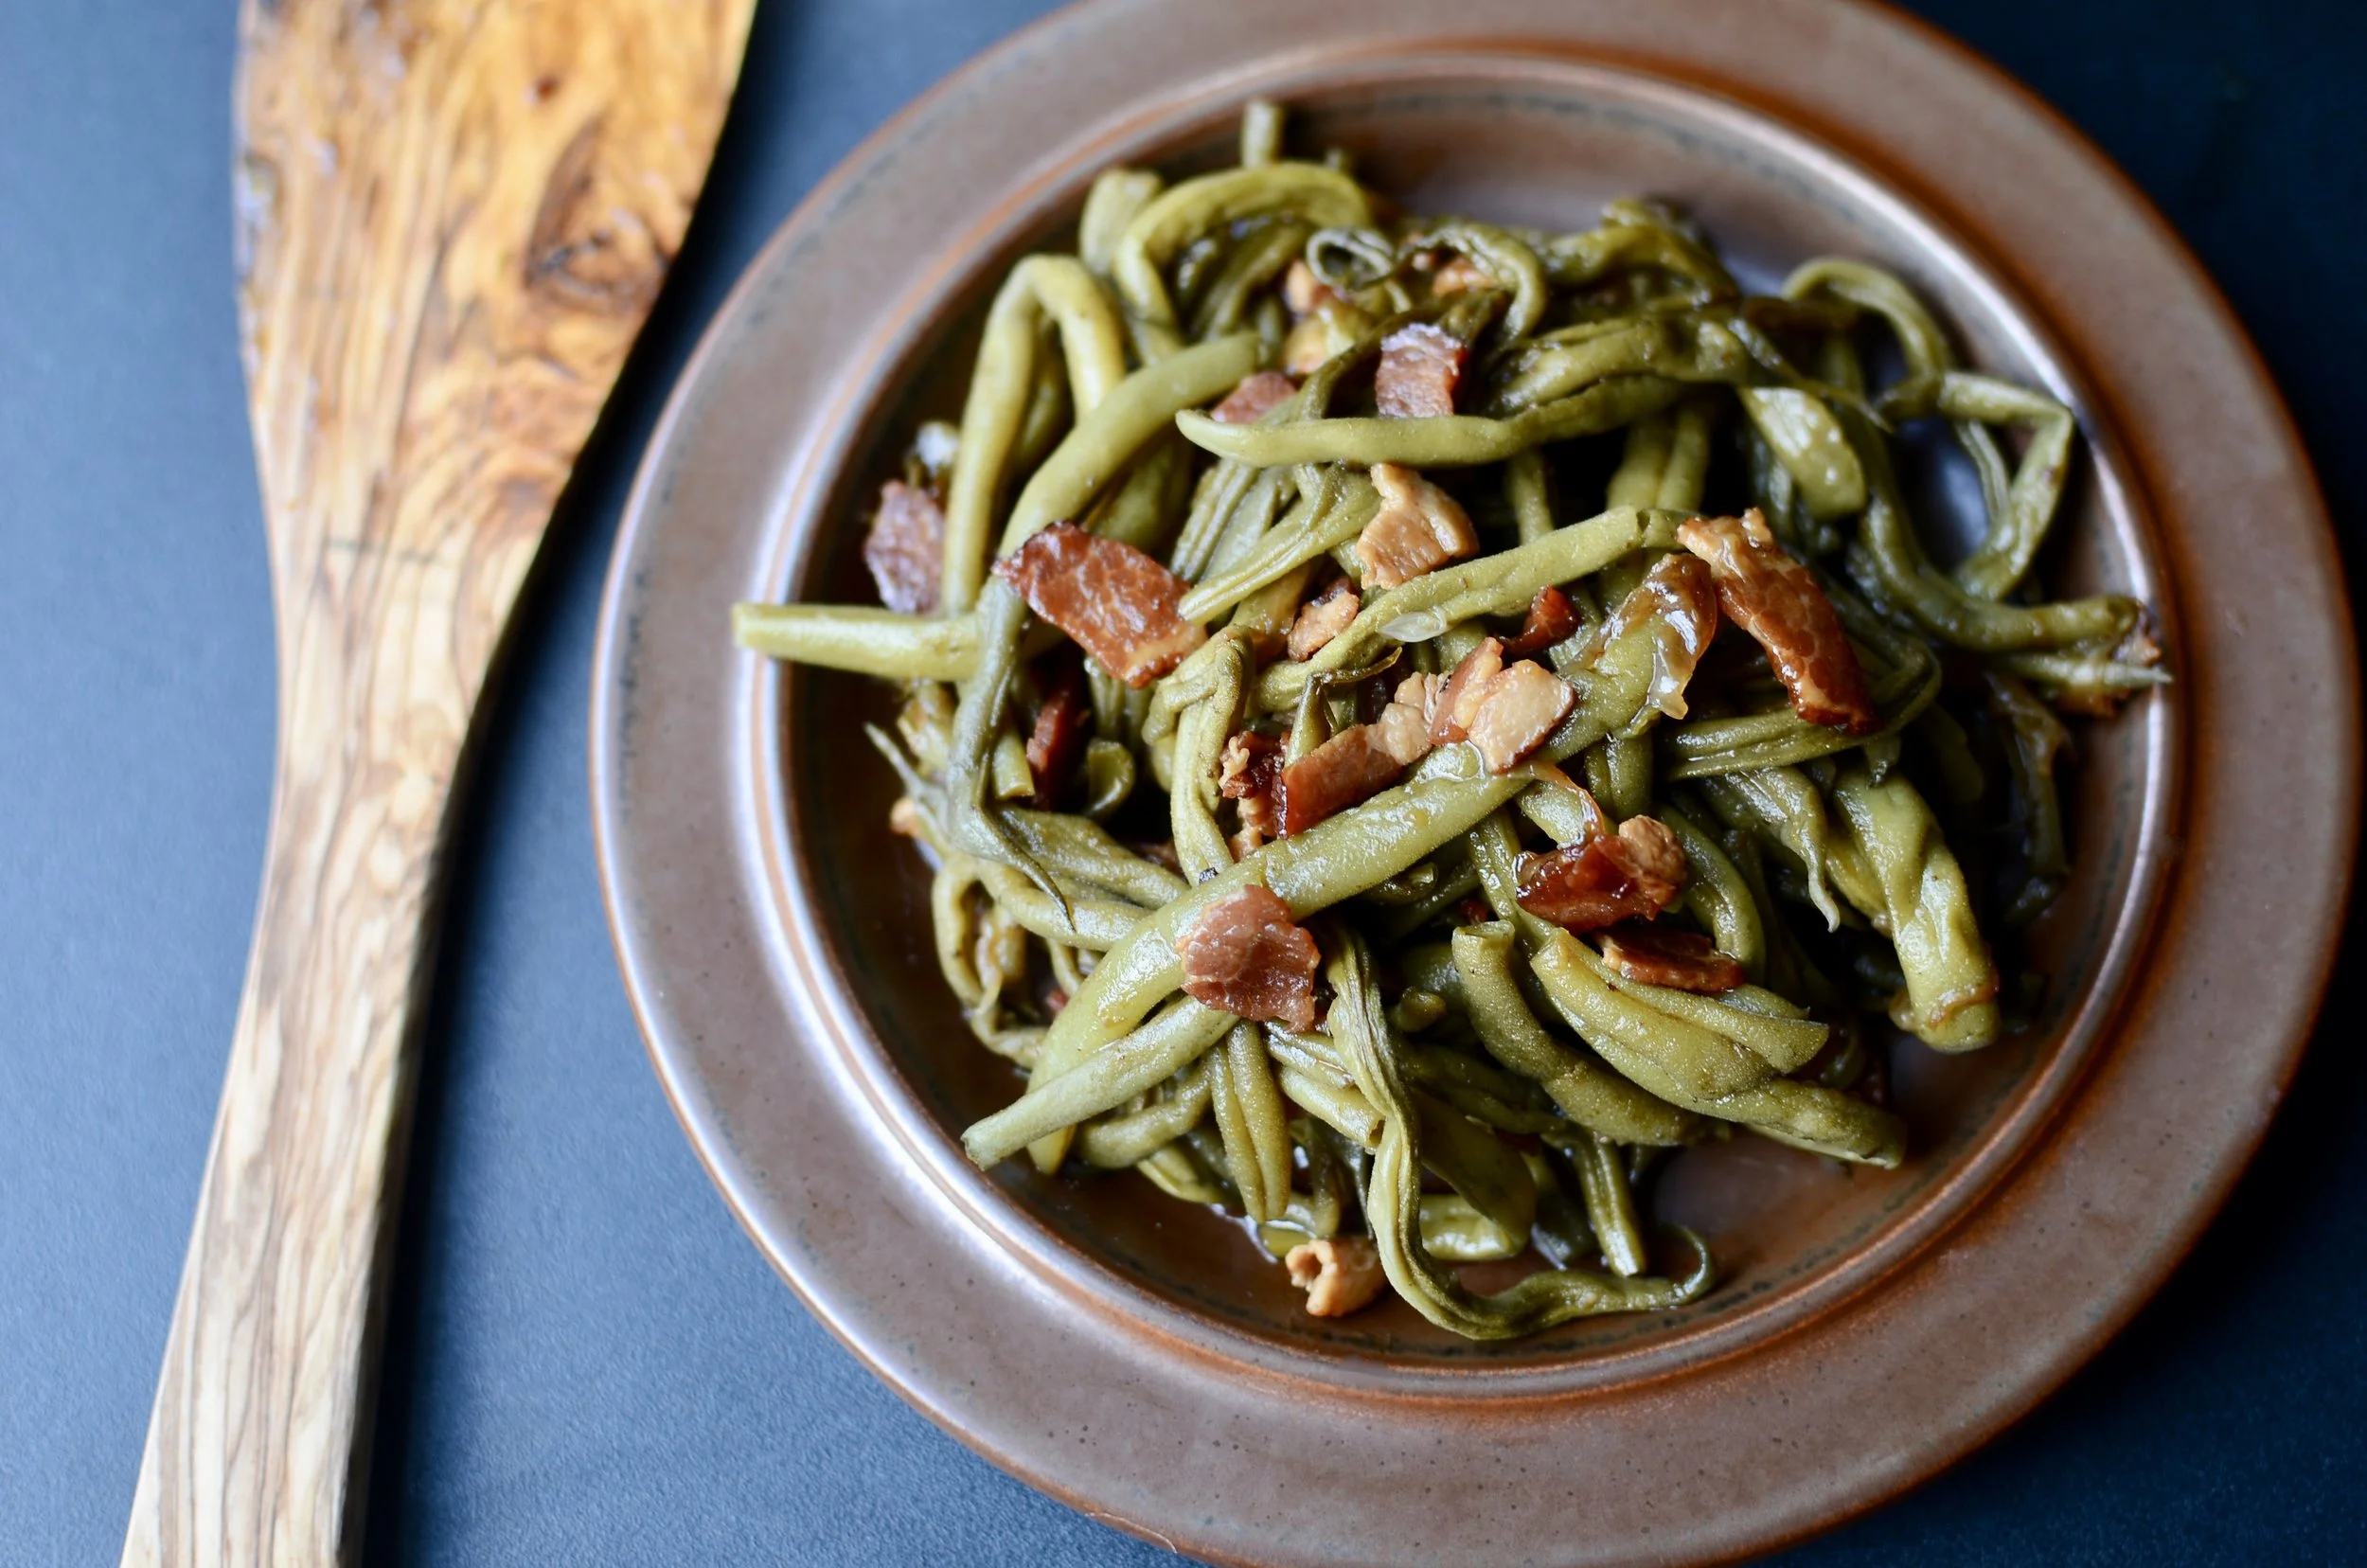
Enjoy!


Items used to make this recipe:
(affiliate links)
olive wood scraper/spatula https://amzn.to/31QXPDm
Mauviel rondeau https://amzn.to/2Z0eRlo
salad spinner https://amzn.to/2Nps1Bo
trimming knife https://amzn.to/3LrEK25
Momma’s Southern Green Beans
makes 1 1/2 pounds
Ingredients
1 1/2 pounds fresh green beans, washed and trimmed
6 ounces bacon, cut into bite-size pieces
6 ounces yellow onion, sliced
2 cups low or no-sodium chicken stock (try my awesome recipe) - see note below
1 tablespoon bacon drippings (optional)
Directions
In a 4-quart skillet or casserole pan over medium-high heat, cook bacon until brown, stirring frequently.
Add sliced onions to the bacon and continue cooking for about 5 minutes, stirring frequently.
Add green beans, low or no-sodium chicken stock, and optional bacon drippings; bring stock to a boil.
Reduce heat to low and cover pan; simmer for 1 hour.
Remove cover and stir green beans.
Increase heat to medium-low; cook for an additional hour, uncovered, until stock reduced down to just a few tablespoons.
Note
If you don’t have low or no-sodium chicken stock, substitute 1/2 cup regular chicken stock plus 1 1/2 cups water.