contact us

Use the form on the right to contact us.

You can edit the text in this area, and change where the contact form on the right submits to, by entering edit mode using the modes on the bottom right.

Form Block
This form needs a storage option. Double-click here to edit this form, and tell us where to save form submissions in the Storage tab. Learn more
         

123 Street Avenue, City Town, 99999

(123) 555-6789

email@address.com


You can set your address, phone number, email and site description in the settings tab.
Link to read me page with more information.

Blog

Butteryum food blog recipes

Caramel Sauce

Patricia @ ButterYum

There was an ice cream party at the kid's school today and each family was supposed to send in one ice cream topping. I had a feeling a lot of the kids would bring chocolate syrup, but didn't think anyone would bring caramel sauce, so I decided to whip up a batch - no recipe, I just winged it.

I started by melting 1 stick of unsalted butter (8 tablespoons), 1/4 teaspoon salt, and 1 cup of sugar in a saucepan.

I heated it over a medium flame until it reached a nice color and it started to smell kind of carmel-y. I also transferred the sugar/butter mixture into a larger pan because I remembered caramel bubbles up violently when liquid is added, and I planned to add cream in the next step.

I added about 3/4 cup of heavy cream and stirred well. Note: I usually let it get a bit darker before I add the cream, but I needed to get this out the door fast, so I finished it a bit on the light side. I knew the kids would love it no matter what, and they surely did... there was only a drizzle in the bottom of the jar at the end of the party.

Then I turned off the heat and added 1 teaspoon of pure vanilla extract; stir, stir, stir...

I let the mixture cool for a couple of minutes before pouring into jars. As you can see, this step can be a bit messy, so I filled the jars over a lined sheet tray.

After a quick clean-up, I added the lid and wasn't pleased with the appearance of this reused maraschino cherry jar, so....

I jazzed the jar up a little with gold ribbon and a couple of squares of recycled star tissue paper, which made for a much more pleasant presentation. I don't usually recycle tissue paper, but this one was too cute to throw away - glad I saved it.

Caramel Sauce

makes 1 1/2 cups

Printable Recipe

Ingredients

  • 8 tablespoons unsalted butter

  • 1 cup granulated sugar

  • 1/4 teaspoon fine salt

  • 1 cup heavy cream

  • 1 teaspoon pure vanilla extract (be sure to use the good stuff)

Directions

  1. Melt butter, sugar, and salt together in a large sauce pan.

  2. Bring to a boil and cook without stirring until desired color is achieved.

  3. Remove from heat and stir in cream.

  4. Cool for a couple of minutes before adding pure vanilla extract; stir to combine. Enjoy!

Stuffed Shells with 3 Cheeses

Patricia @ ButterYum

Mmmm, Stuffed Shells - a family favorite any time of year. Great when you need to feed a crowd too!

First boil 1 box of jumbo pasta shells (properly salted water please... add enough kosher salt so the water actually tastes salty - like the sea). Under cook the shells a bit so they don't turn to mush later in the oven. It's really important to cool these shells completely before proceeding. I do this by running them under cold water. I'll even throw in an ice cube or two. Then drain and move on to the next step.

In the meantime, gather all your ingredients together. Here I have my homemade sauce (or "gravy" as some family members insist on calling it), Mozzarella cheese, Parmesan cheese, Ricotta cheese, eggs, dried parsley, red pepper flakes, and s & p. I didn't have any frozen spinach on hand today, but I usually throw a 10-ounce box of that in too (thawed and squeezed of course).

Check out my delicious homemade sauce recipes:

For the filling, mix the eggs, ricotta, 1/2 the mozzarella, 1/2 the parmesan, parsley, red pepper flakes, salt and pepper, and optional spinach together. Mix, mix, mix.... you don't want any bites with too much red pepper... or worse, not enough cheese!!!

Haha, that reminds me of the time my 2 year old son said to me (with the most concerned tone in his voice), "But mommy, if you die, who will buy me cheese???" (ah, the love of cheese). For the record, I was not dying. I wasn't even sick... it just randomly occurred to my toddler that I was the prime cheese provider, and he was quite concerned that his cheese provisions could very well be hindered at some point in the event I should cease to exist.

That 2 year old is now nearly 16, and he's still a cheese fiend. I literally have to hide the fresh mozzarella from him!

Okay, back to the stuffed shells...

Here is the filling all nice and mixed.

I usually place the filling into a large, disposable pastry bag, but since most of you probably don't have one of those hanging around, I'll demonstrate with a gallon size zipper storage bag. This will help you to fill the shells with slightly less mess. Note I said slightly - unless you have a helper in the kitchen to hold each shell open, you are going to get a little messy, so if you're brave (or desperate) enough to try this alone, do yourself a favor and use a pastry or storage bag.

Before we go any further, put a layer of sauce on the bottom of your baking dish. This will prevent the shells from sticking to the dish.

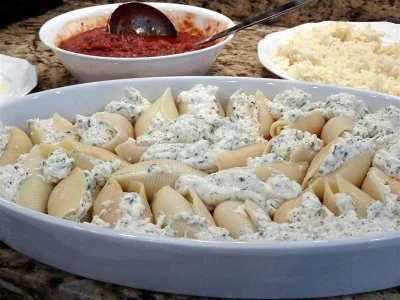
Now, cut a fairly decent size hole in the corner of the bag and start filling the shells. See how large I made this hole? I probably cut a good inch off the corner of the bag. Put the open corner into the shell and squeeze to fill. The bag will help you keep the shell open. So much easier than trying to fill them with a spoon.

If you have any filling left over, just squeeze it into the gaps between the shells. Waste not, want not.

Top the shells with the remaining sauce, remaining mozzarella and parmesan cheeses, and a sprinkling of dried parsley. IMPORTANT - place the baking dish on a sheet pan. Your oven will thank me later.

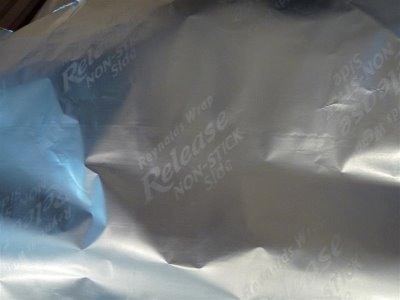
I like to use Reynold's Wrap Non-stick Foil whenever I make stick or cheesy things.  Nothing sticks to it.

Seriously, one side is printed "non-stick side" (the dull side). Put the non-stick side against the cheese and you'll never have to worry about the foil ripping all the melted cheese off your dinner again!

This is the side of the foil that was in direct contact with all that melted cheese. Look - you can click on the photo to see that there isn't one speck of cheese stuck to that foil. Not one speck! Great stuff!

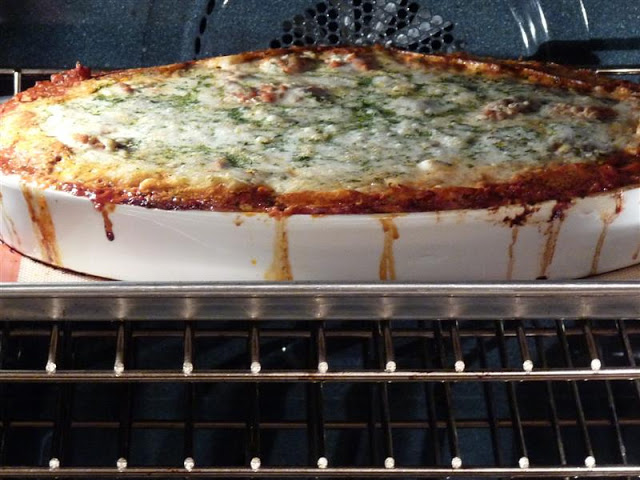
And THIS is why your oven is happy you put that baking dish on a cookie sheet. You'll thank me too :). Mmmm, yummy. I hope you enjoy this recipe!

Stuffed Shells with 3 Cheeses

Printable Recipe

Ingredients

  • 1 box jumbo shells (not quite fully cooked - rinsed and cooled completely)

  • 2 eggs

  • 32 ounces ricotta cheese

  • 16 ounces shredded mozzarella cheese, divided

  • 4 ounces grated parmesan cheese, divided

  • 3 tablespoons dried parsley

  • 2 teaspoons kosher salt

  • 2 teaspoons ground black pepper

  • 1 teaspoon red pepper flakes

  • 10 ounces frozen spinach, thawed and squeezed dry (optional)

  • 3-4 cups of your favorite tomato sauce, divided (try my recipes here and here)

Directions

  1. Preheat oven to 350F.

  2. In a large baking dish (like 11x15), spoon 1/2 of the tomato sauce; set aside.

  3. In a large bowl, combine the eggs, ricotta, 1/2 the mozzarella, 1/2 the parmesan, parsley, salt, pepper, red pepper flakes, and optional spinach; mix well.

  4. Fill the partially cooked pasta shells and place them on top of the layer of tomato sauce in the baking dish.

  5. Top with the remaining sauce, mozzarella, and parmesan.

  6. Sprinkle with dried parsley.

  7. Cover well with non-stick foil and place baking dish on a sheet pan.

  8. Bake covered in a 350F oven for 50-60 minutes, or until the shells are hot and bubbly.

  9. Remove foil and bake an additional 5-10 minutes until the cheese is golden brown.

  10. Remove from oven and rest for 10-15 minutes before serving. Enjoy!