contact us

Use the form on the right to contact us.

You can edit the text in this area, and change where the contact form on the right submits to, by entering edit mode using the modes on the bottom right.

Form Block
This form needs a storage option. Double-click here to edit this form, and tell us where to save form submissions in the Storage tab. Learn more
         

123 Street Avenue, City Town, 99999

(123) 555-6789

email@address.com


You can set your address, phone number, email and site description in the settings tab.
Link to read me page with more information.

Blog

Butteryum food blog recipes

Filtering by Category: misc

How To Clean Your Coffee Grinder

Patricia @ ButterYum

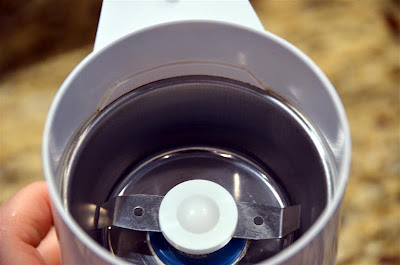
By now I think most people have an electric coffee grinder in their kitchen.  I actually have two - one for grinding coffee, and one for grinding spices (and just about everything else - more on that later).   The grinder I use for spices is cleaned after each use to keep flavors from mingling.  The grinder I use for coffee doesn't have to be cleaned quite so often, but it definitely needs to be cleaned to prevent the oily residue from going rancid and to keep the blades moving freely.  Here's the best way I've found to clean them.

Fill the grinding chamber about 1/2 full with dry rice and whiz away until all the residue is removed (if your grinder hasn't been cleaned for a while, you might have to repeat the process).

Unplug the grinder and discard the dirty rice particles.  Use a damp cloth or pastry brush to wipe away any remaining rice dust.  That's it - clean and ready to go for the next time.

Other uses:

  • - grind granulated sugar into superfine sugar

  • - grind granulated sugar a bit longer to make confectioner's sugar

  • - grind flaxseed

  • - grind blanched almonds to make almond meal

  • - grind citrus zest

  • - grind grains into flour (wheat, oats, etc)

  • - grind kosher or flake salt into fine salt (my preference for baking)

  • - grind dry bread to make breadcrumbs

  • - grind dried minced garlic into garlic powder (or onion)

  • - grind dried vanilla beans (mix with sugar to make vanilla sugar)

  • - grind dried mushrooms (great to add to a pot of soup)

  • - grind freeze dried shallots (to sprinkle on everything - Yum!!)

  • - grind chocolate

  • - grind hard cheese (like Parmesan)

  • - grind nuts into nut butter

  • - grind onions, ginger, and garlic into paste

So how do you use your coffee grinder?  Let me know if you have a suggestion to add to the list.

(affiliate links)

Chocolate Mocha Snack Cake (and a cake tip)

Patricia @ ButterYum

Have you had the pleasure of tasting Biscoff Spread yet?  I've been hoping our local grocery stores would start carrying it for more than 2 years now and I finally stumbled upon it a few weeks ago.  I quickly grabbed some and headed home to see if all the fuss I'd read about was true.  I'm happy to report, IT WAS!!!  If you're familiar with Biscoff Cookies, you already know that amazing butter-cinnamon-caramel flavor.  Now imagine it as a soft, creamy spread.  Insanely good, I tell you.  Insane!   I made the mistake of letting one of the teens taste my glorious find, but then I noticed the contents of the jar disappearing at an alarming rate so I had to move it into protective custody. 

Anyway, Biscoff Spread is soft, sweet, and spreadable, making it a perfect no-fuss substitute for frosting on my mocha version of this super simple chocolate mocha snack cake - a one-bowl recipe that bakes in about 35 minutes. 

There’s a reason why this cake is a family favorite! Don’t forget to check out the bottom of this post to see how I bake my cakes without a big hump in the middle.

Items used to make this recipe:

(affiliate links)


Chocolate Mocha Snack Cake w/Biscoff Frosting

Printable Recipe

serves 9-12

Ingredients

Cake:

  • 1 1/2 cups all-purpose flour

  • 1 cup granulated sugar

  • 3 tablespoons Dutch-processed cocoa powder

  • 1 teaspoon baking soda

  • 1 teaspoon table salt

  • 6 tablespoons vegetable oil

  • 1 teaspoon pure vanilla extract

  • 1 tablespoon white vinegar

  • 1 cup freshly brewed coffee (or hot water)

Frosting:

Directions

  1. Preheat oven to 350F.

  2. Prepare an 8x8-inch square cake pan with Baker's Joy baking spray.

  3. If you want your cake to bake without an ugly hump in the middle, wrap the pan with a moistened insulated baking strips (see photos below).

  4. In a medium bowl, combine all the cake ingredients and mix just until incorporated.

  5. Pour the batter into a prepared pan and bake in preheated oven for 35-40 minutes, or until a toothpick inserted in the center comes out clean.

  6. Remove cake from oven and place on a rack to cool completely; about 2 hours.

  7. To decorate the cake, use an offset spatula to spread the Biscoff in a thin, even layer on top of the cake.

  8. Garnish with chocolate covered coffee beans.

Notes

  • This cake is great served at room temperature, but it's also excellent chilled (that's the way I like to enjoy it).

  • Cake batter can also be used to make 24 cupcakes.

adapted from Lucinda Scala Quinn


Now for my tip:

See this cake?  It was baked in a naked cake pan.  Kind of sad looking, don't you think?  The edges of the cake are over baked and dry, and the center of the cake puffed into a huge hump.

Why does this happen?  Because naked cake pans heat very quickly in the oven, causing the batter along the edges to bake and set while the batter in the center of the pan continues to rise.

To avoid the hump issue, simply wrap the pan with a moistened insulated baking strip before popping it in the oven.

So why do the insulted baking strips make such a difference?  They keep the cake pan temperature in check, which allows all of the batter to bake at the same rate, resulting in a even layer.

See?  This is exactly the same cake recipe, but look how nice and even it baked.  The sides are as high as the middle.  No Hump!

And here's what that beautifully even cake looks like when plated.  Professional, no?  Needless to say, I highly recommend using insulated baking strips.  Happy Baking!

Recent Posts