contact us

Use the form on the right to contact us.

You can edit the text in this area, and change where the contact form on the right submits to, by entering edit mode using the modes on the bottom right.


123 Street Avenue, City Town, 99999

(123) 555-6789

email@address.com


You can set your address, phone number, email and site description in the settings tab.
Link to read me page with more information.

Blog

Butteryum food blog recipes

Filtering by Category: gluten free recipes

Mini NY Cheesecakes

Patricia @ ButterYum

We recently celebrated our oldest son's birthday and, as usual, he requested cheesecake for dessert.  I typically make some variation of our family's favorite cheesecake, but on this particular day I simply did not have the 6-8 hours needed to bake and chill a large cheesecake. So I had to come up with a Plan B - which in this case was to make mini cheesecakes that bake and cool in about 2 hours total. An added bonus - they're pretty darn cute and super easy to serve.   Here's how they're made.

Line a very good quality muffin pan (so the cheesecakes don't burn) with very good quality cupcake liners. I really like these grease-proof ones (they peel off easily).

Instead of making a crumb mixture to put in the bottom of the cupcake liners, I opted make a base with a store-bought cookie.  We like these chocolate sandwich cookies.

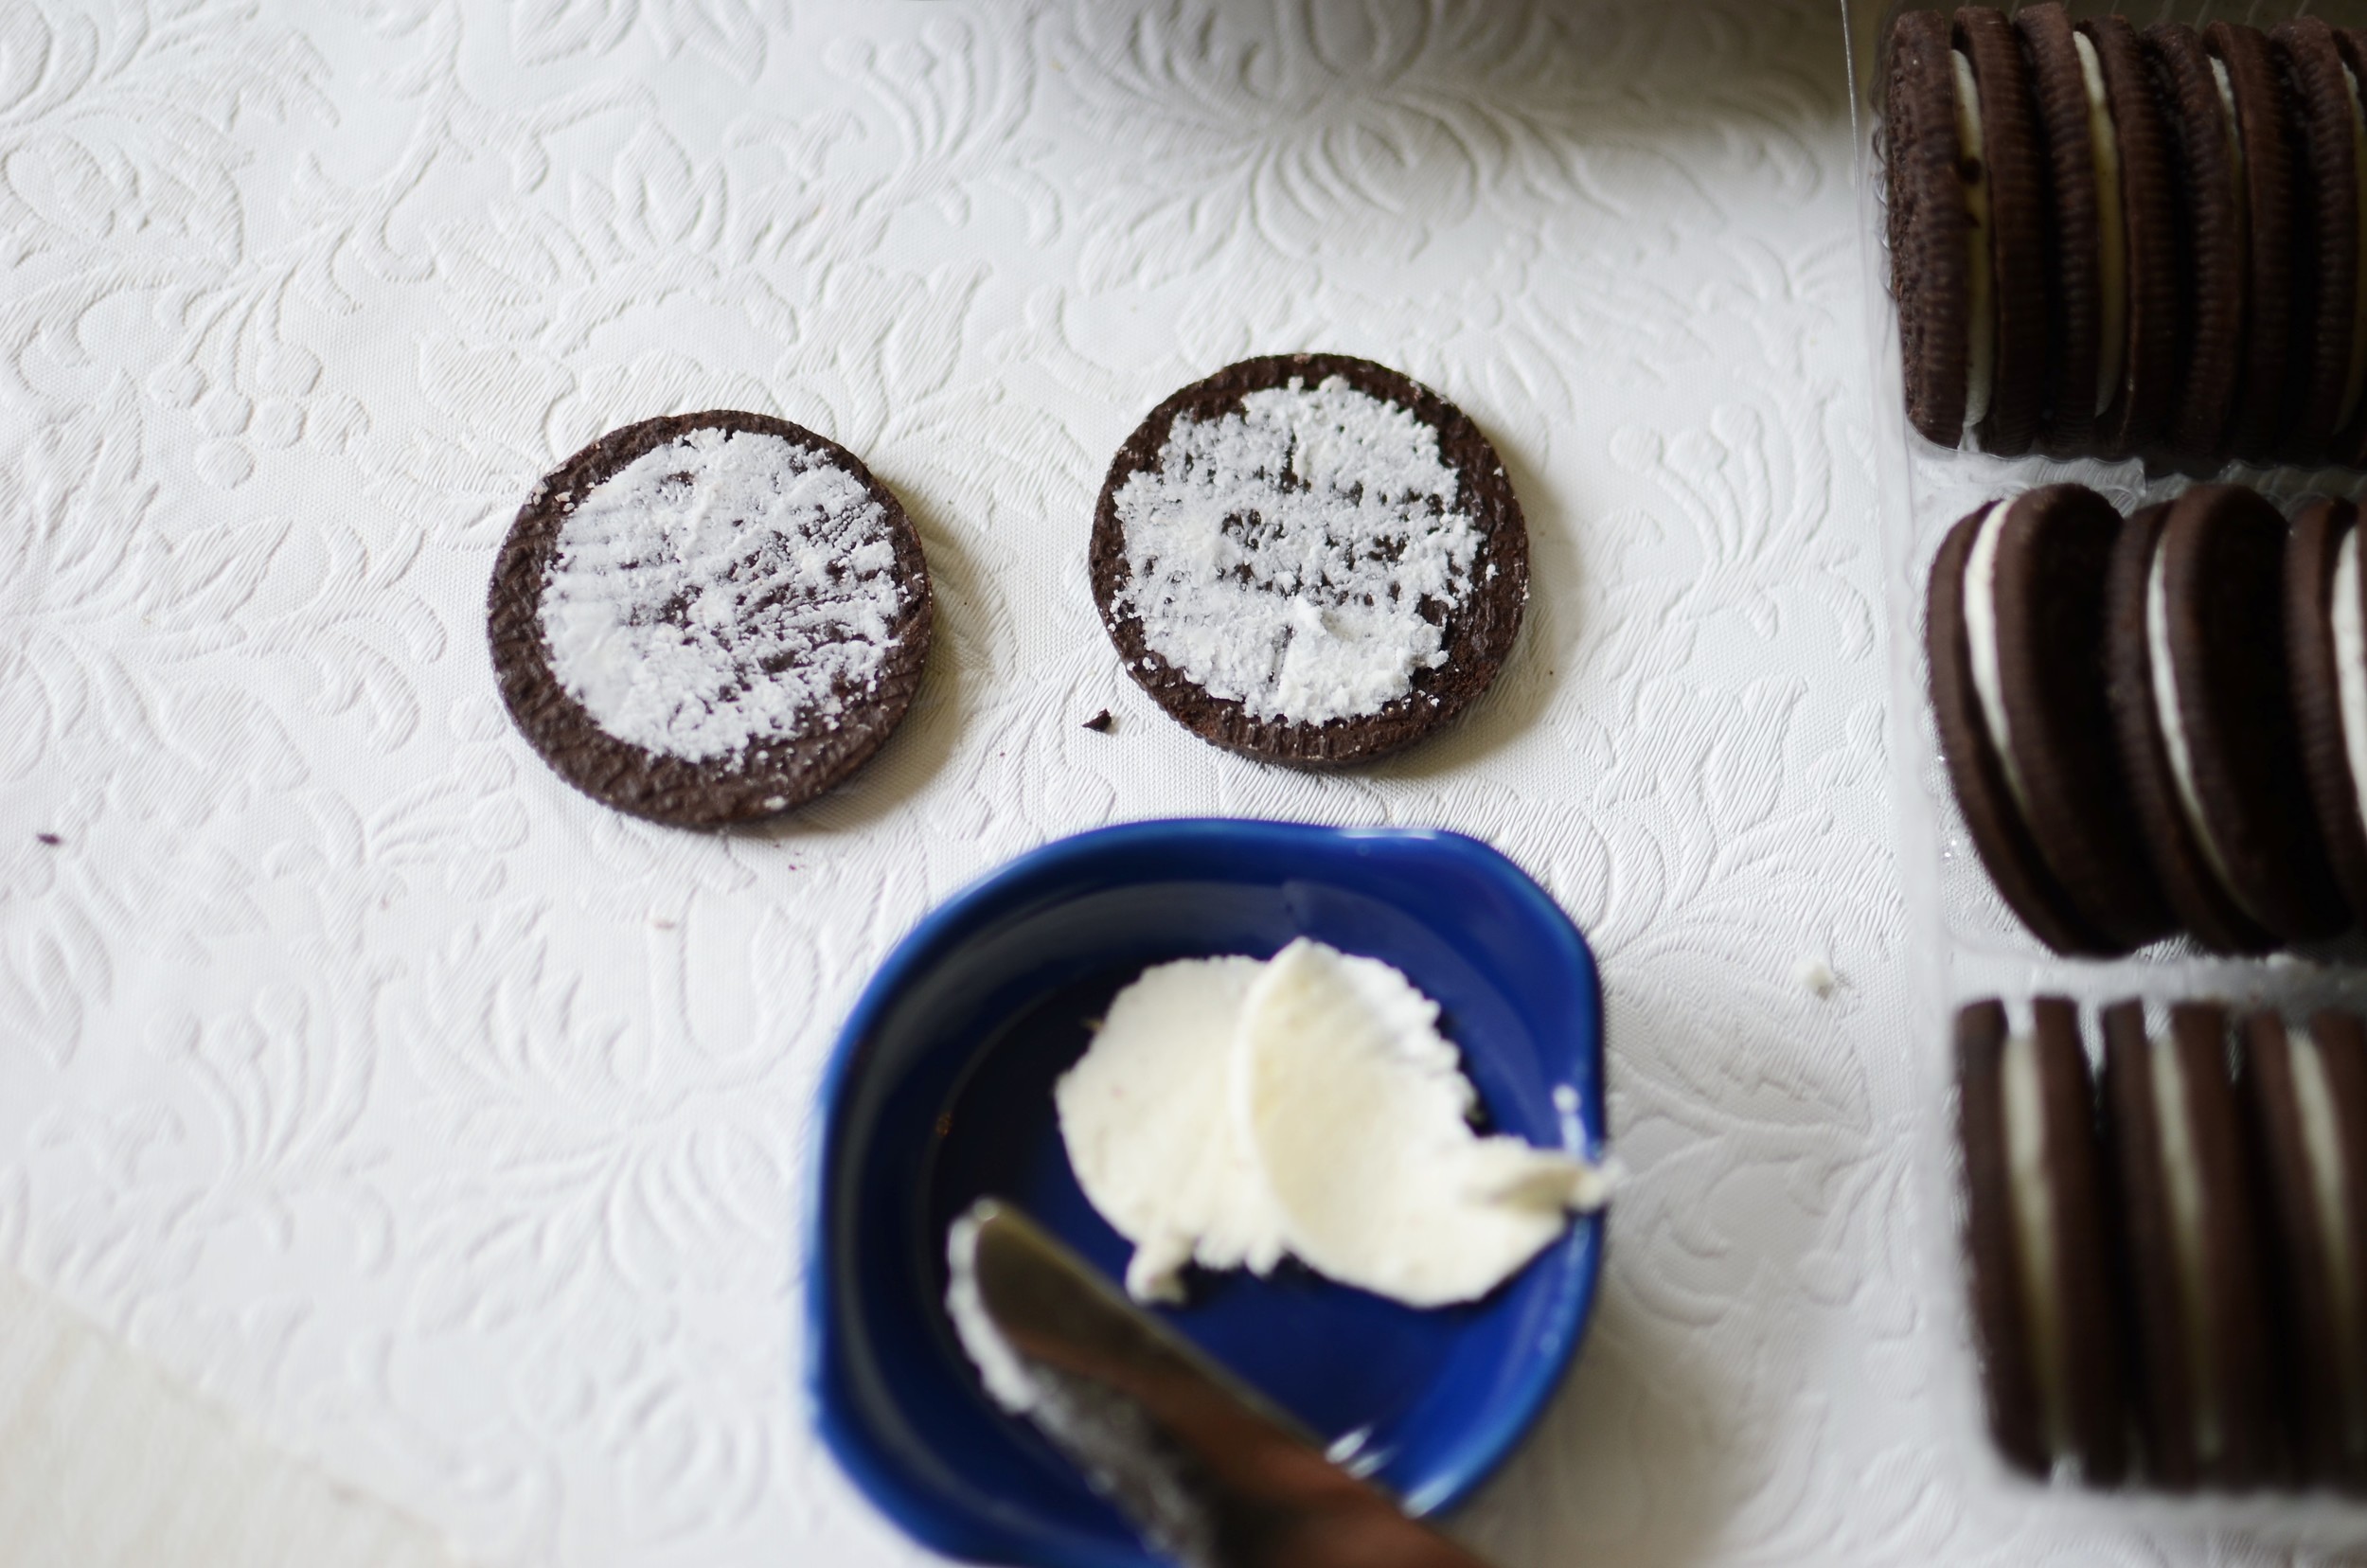
A whole sandwich cookie is too much, so I split them in half and scraped out the filling.  

I placed the halved cookies into the cupcake liners like this.

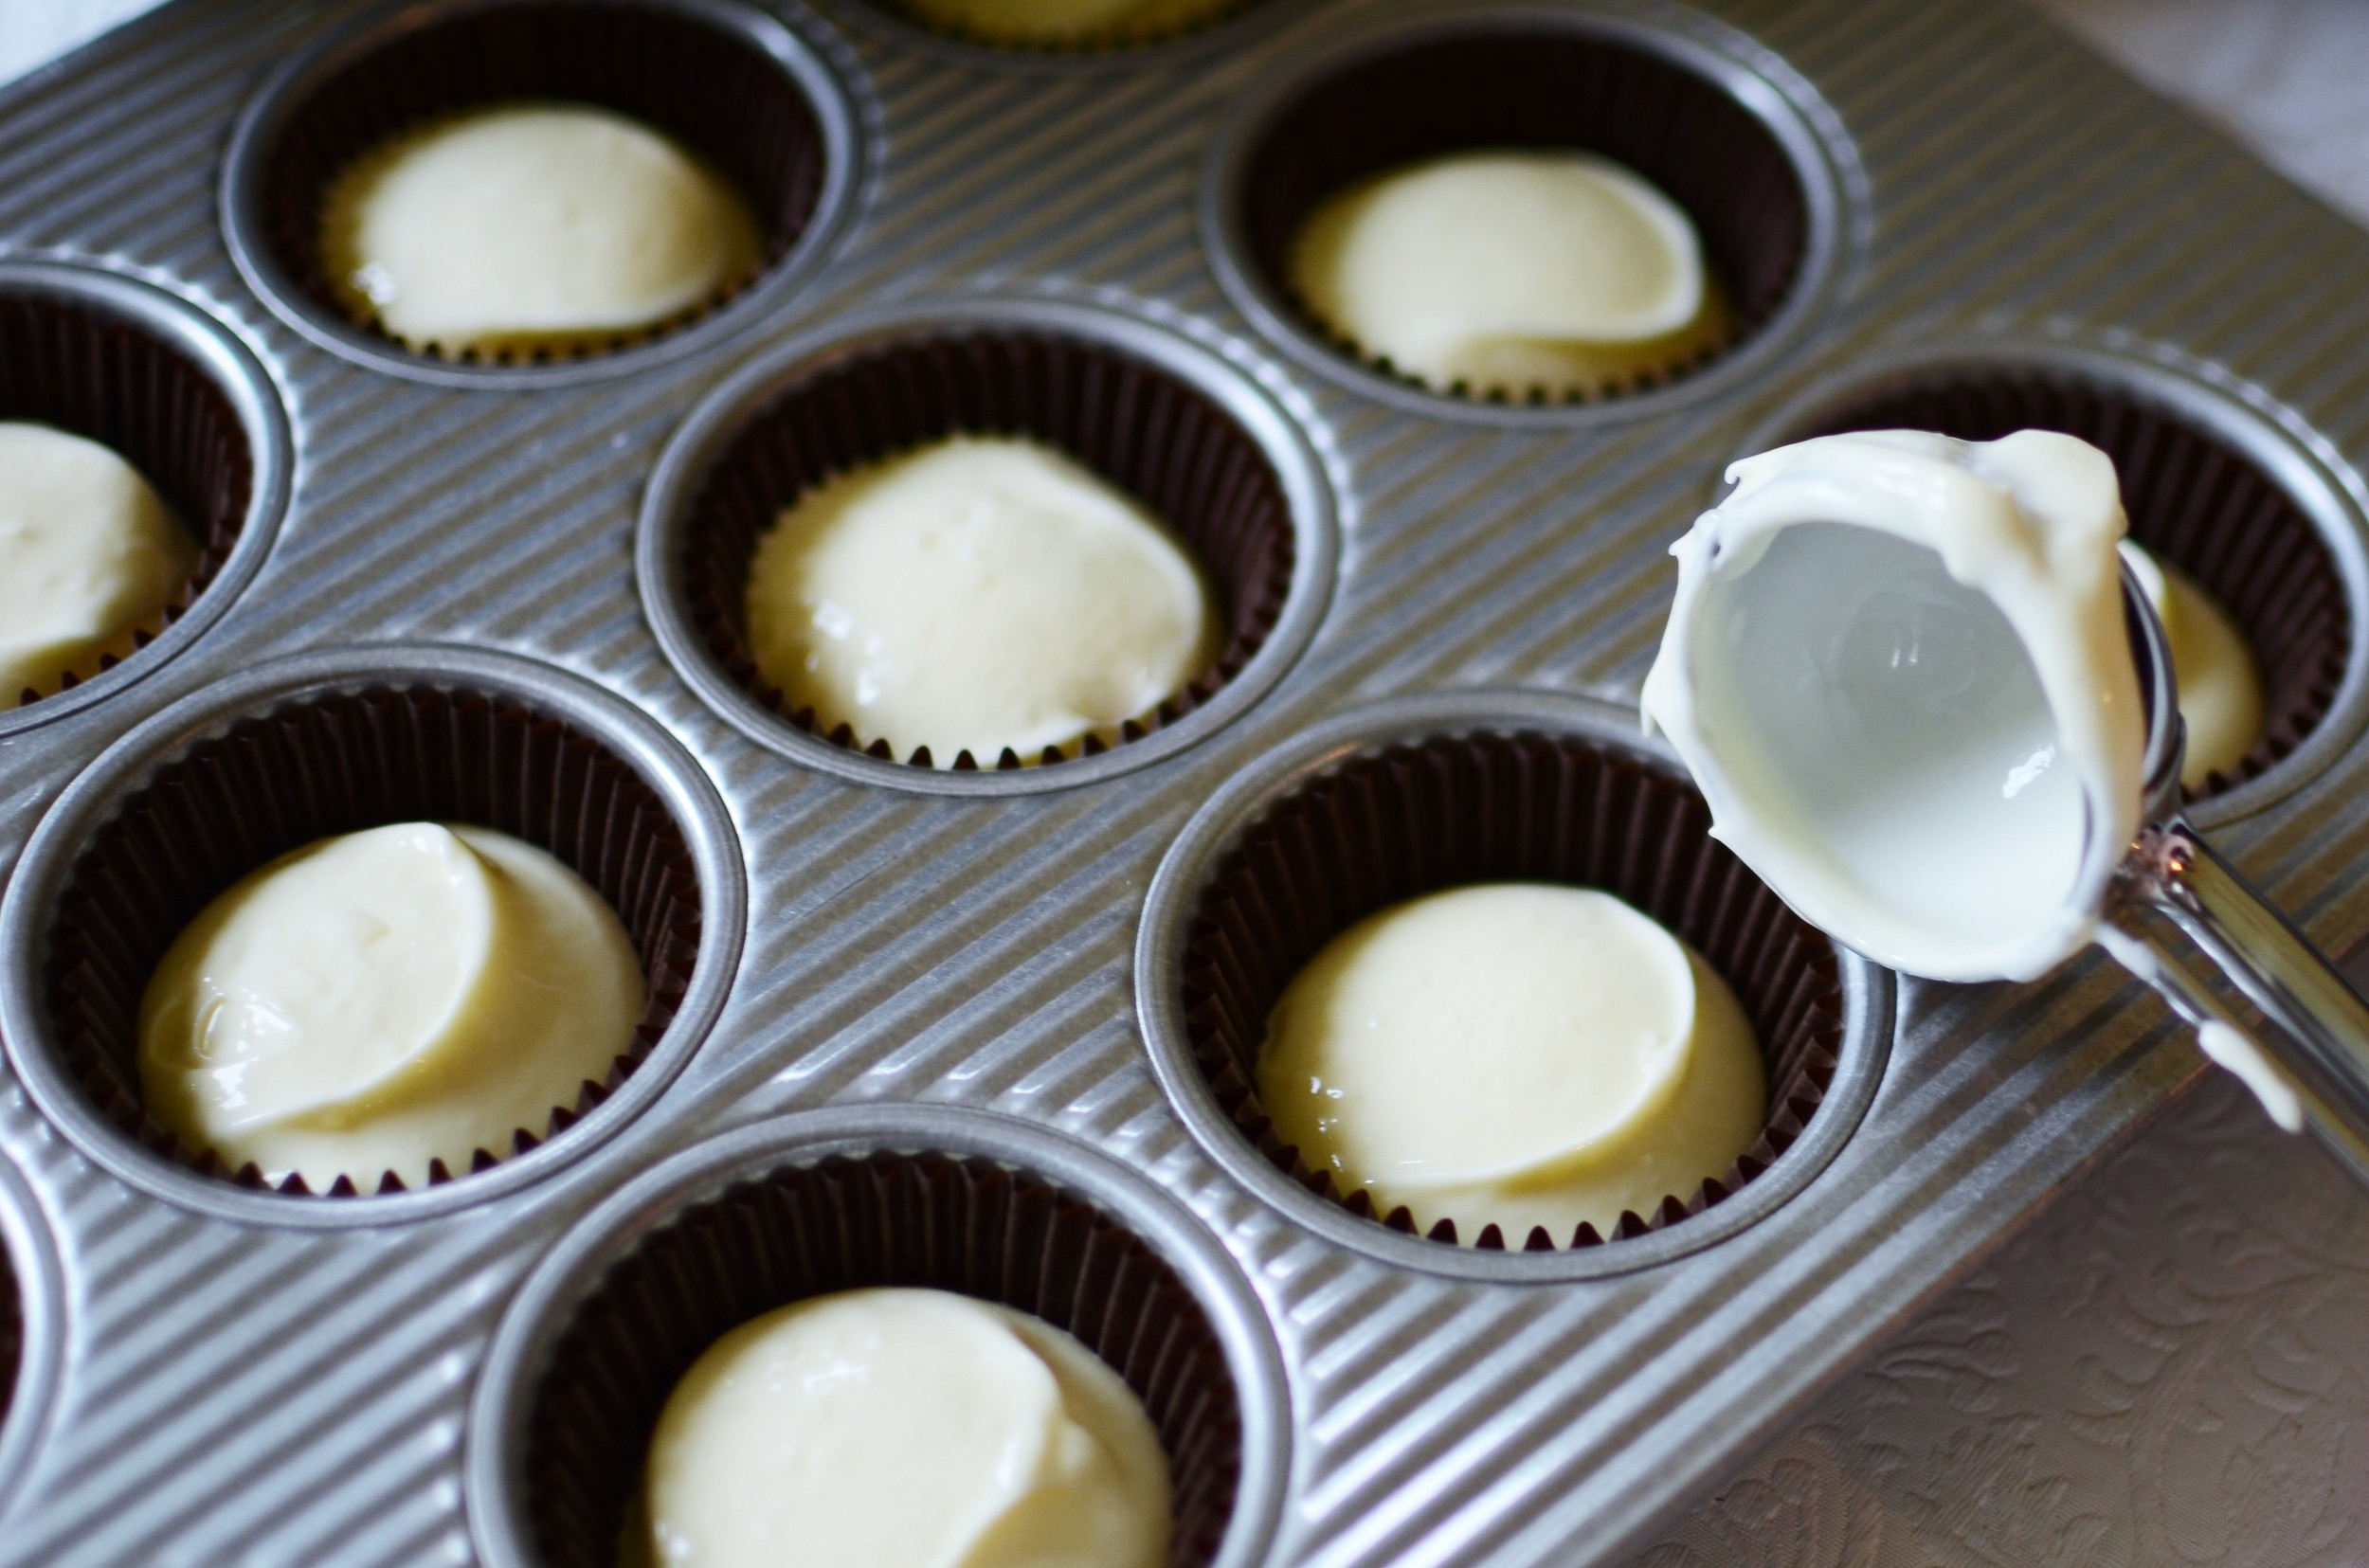
 Then topped each with a level #20 scoop of cheesecake batter.  A #20 scoop is the perfect size!

The mini cheesecakes bake for 20 minutes.  When they come out of the oven, they'll be puffed up a little over the top of the pan, but they'll sink down like this while you make the topping.  

To make the topping, whisk together sour cream, sugar, and vanilla bean paste.  I love vanilla bean paste!  If you don't have any vanilla bean paste, feel free to use pure vanilla extract - you won't see any specks of vanilla beans, but the flavor will still be awesome.

Do not skip the topping - it totally makes these cheesecakes!

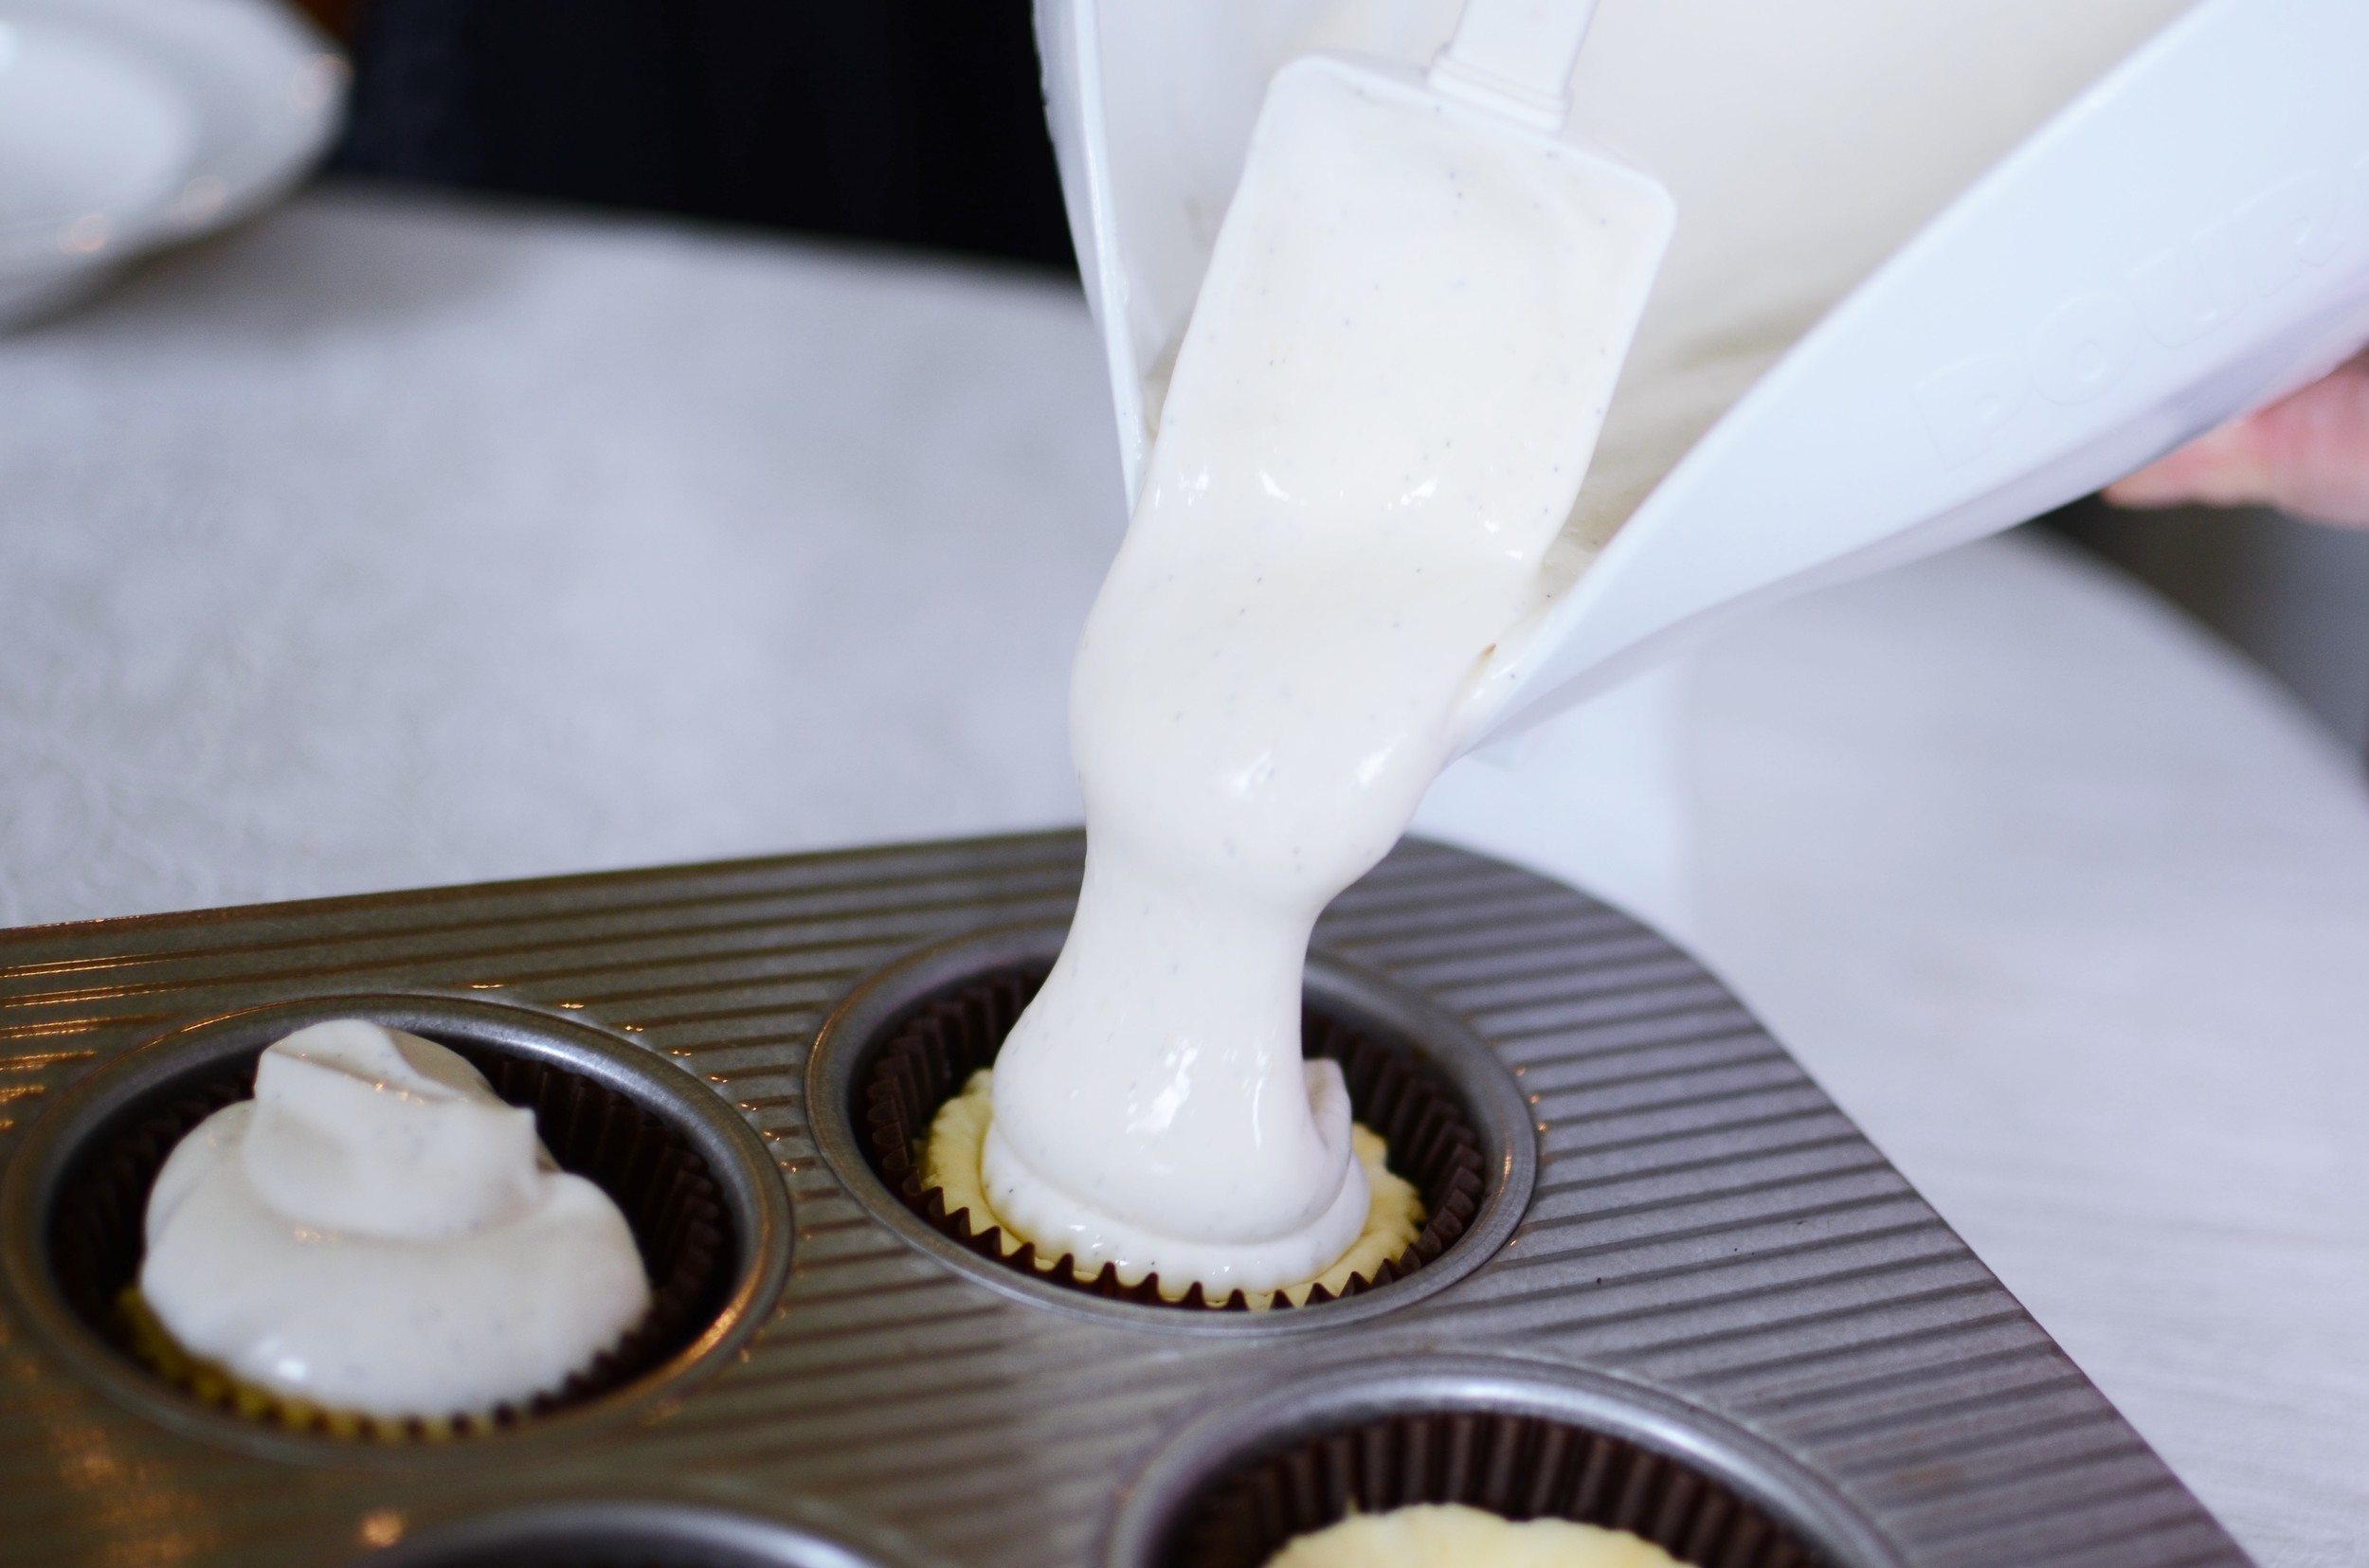
Pour the topping over the mini cheesecakes, being sure not to overfill the cupcake liners.  

Spread the cheesecake topping evenly and pop the pan back into the oven for 8 minutes. Remove from the oven and cool to room temperature before chilling for at least 1 hour.

How to make Mini New York Cheesecakes Recipe w/PHOTOS

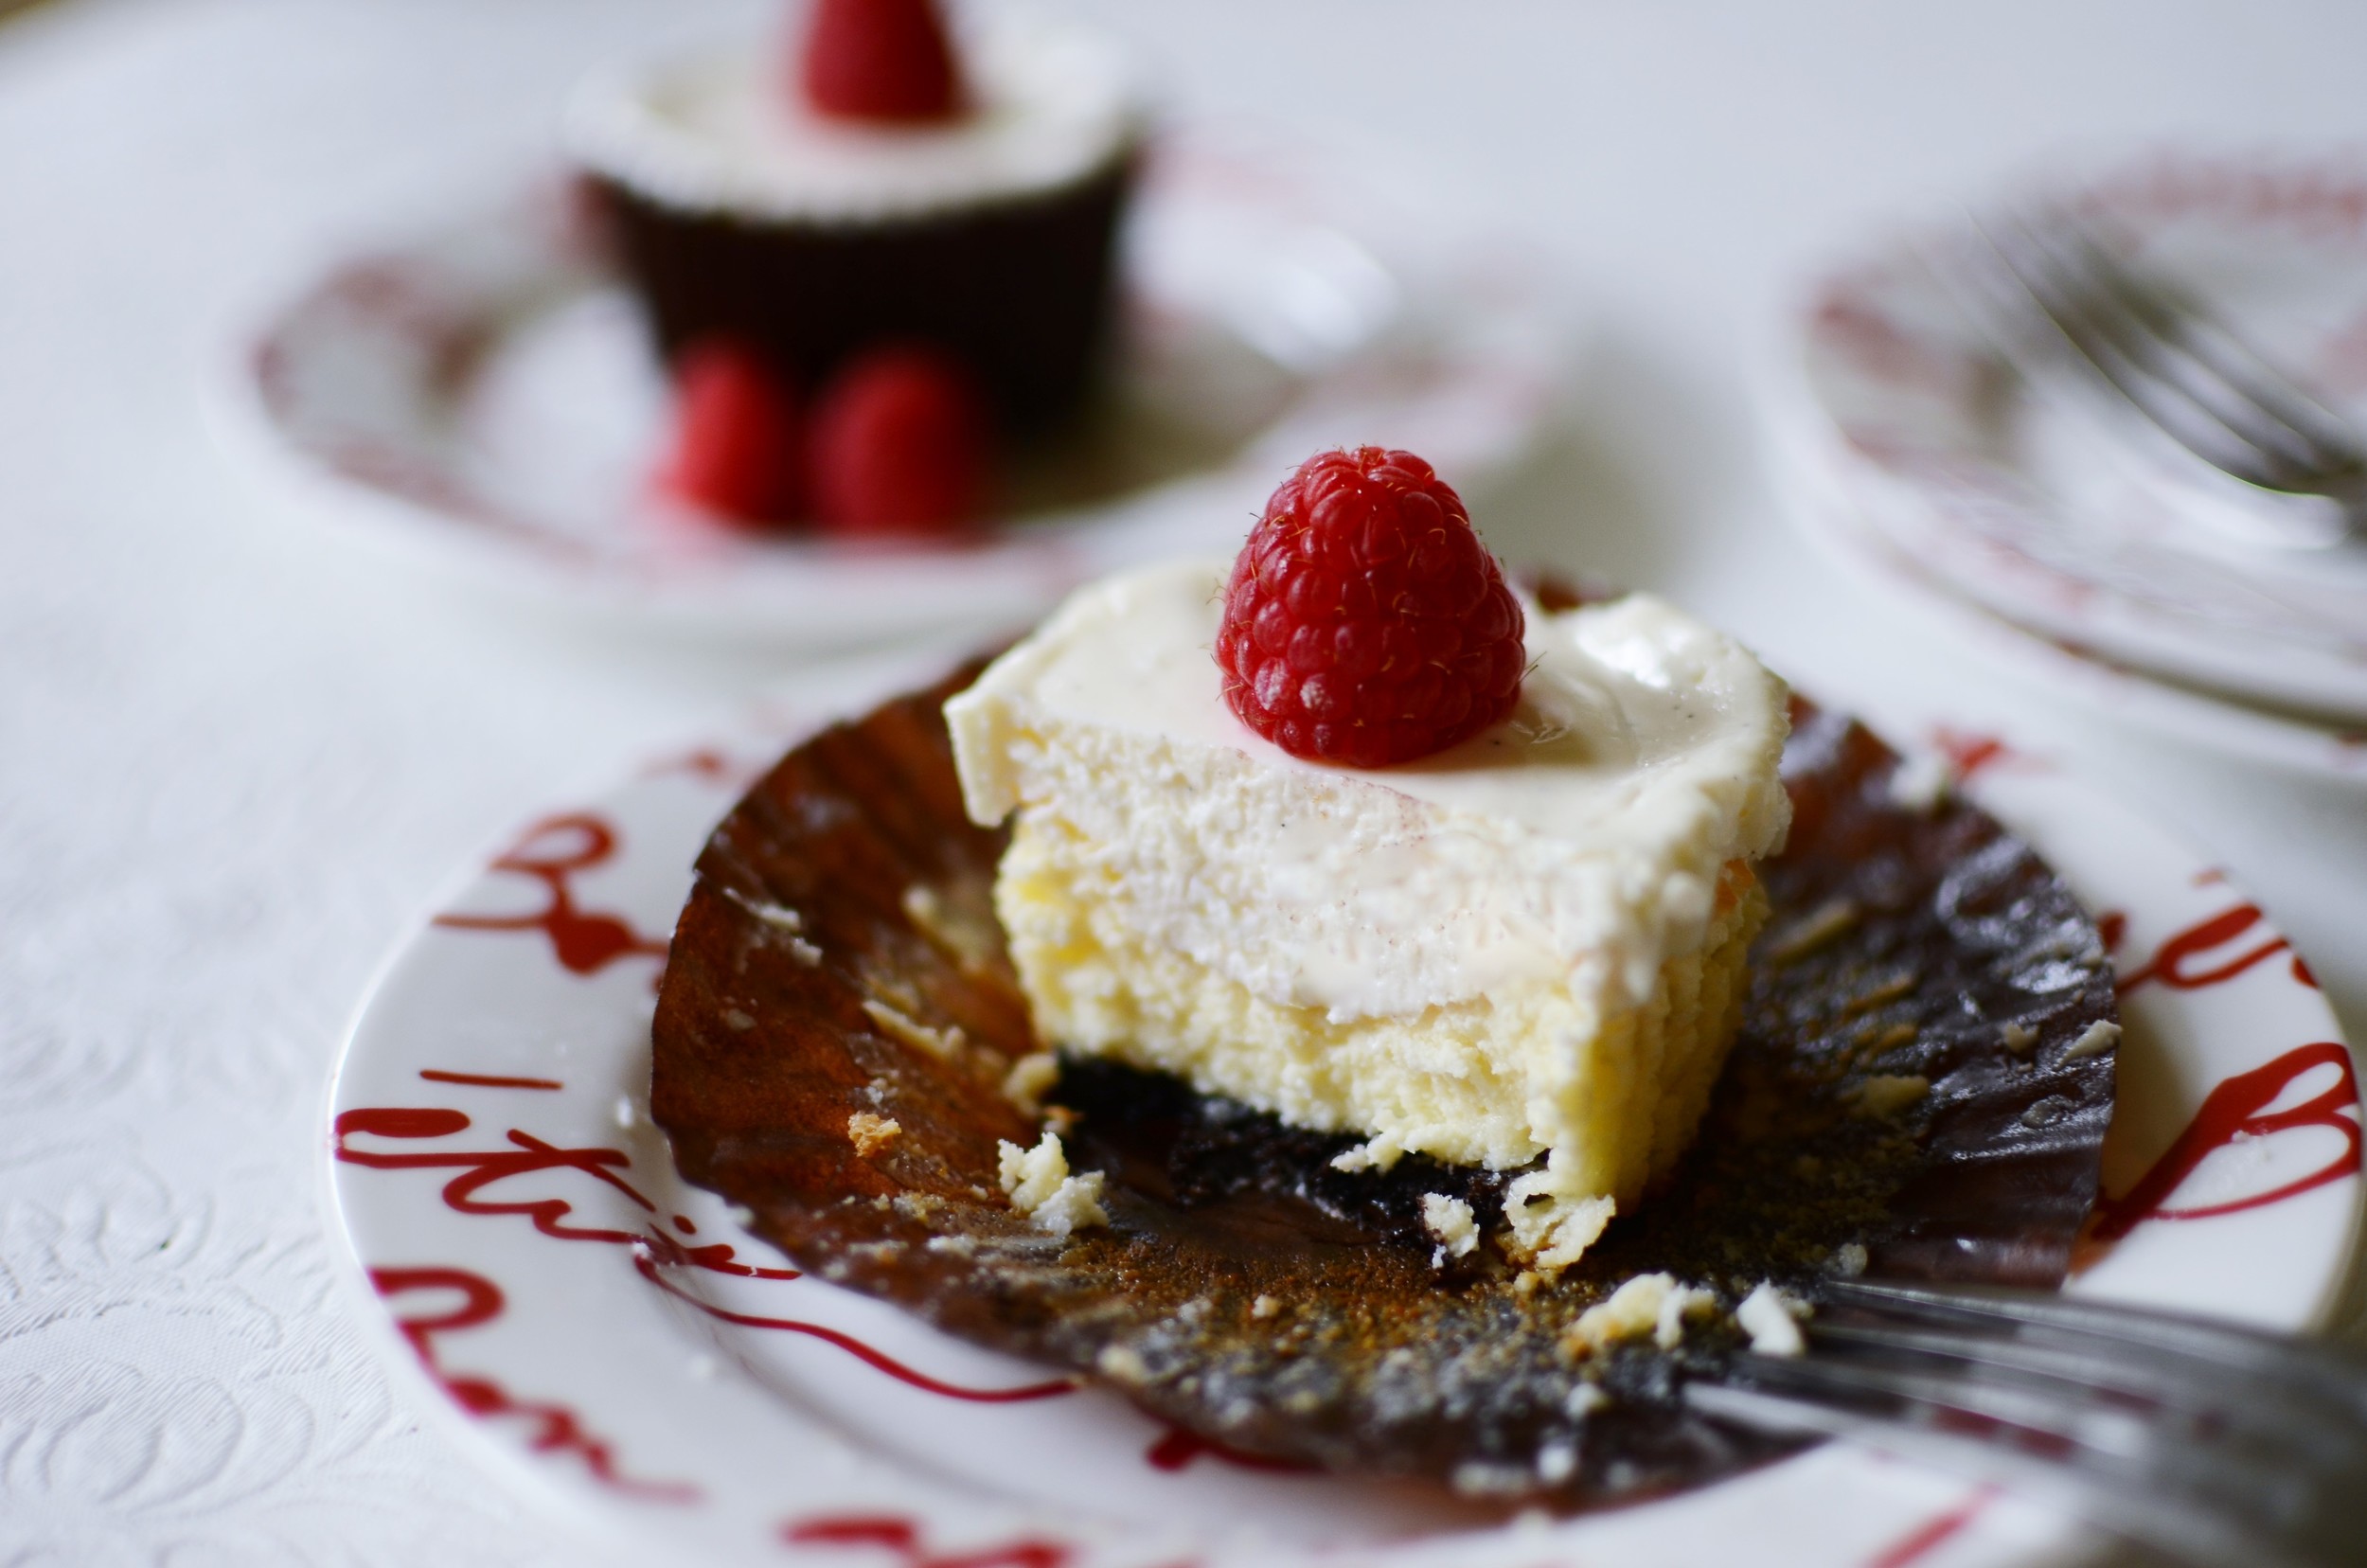
Oh my - wish you could taste how amazing these are.  

New York Style Cheesecake Recipe w/PHOTOS

Here's the recipe so you can make them yourself.  Enjoy!

Items used to make this recipe:

(affiliate links)


Mini New York Cheesecakes

makes 24 mini cheesecakes

Printable Recipe

Ingredients

Crust:

Filling:

  • 24 ounces cream cheese, room temperature

  • 1 cup granulated sugar

  • 3 eggs, room temperature

  • 1 1/2 teaspoons pure vanilla extract

Topping:

  • 16 ounces sour cream

  • 1/2 cup granulated sugar

  • 1 teaspoon vanilla bean paste (or pure vanilla extract)

Directions

  1. Preheat oven to 350F.

  2. Line two high quality muffin pans with greaseproof cupcake liners.

  3. Place 1 cookie half in the bottom of each cupcake liner.

  4. In the bowl of a stand mixer fitted with a BeaterBlade attachment, beat the filling ingredients together until smooth.

  5. Use a #20 scoop to portion the batter evenly into each cupcake liner; bake for 20 minutes (for best results, bake one pan at a time).

  6. While the cheesecakes are baking, whisk the topping ingredients together until smooth.

  7. Remove cheesecakes from oven and allow them to cool for 10 minutes (they will deflate and sink in the middle - this is a good thing).

  8. Divide topping evenly over cheesecakes (or fill until the mixture reaches the rim of the cupcake liner); return to oven for 8 minutes.

  9. Remove from oven and cool to room temperature.

  10. Chill for 1 hour before serving.

Note

  • To make this dessert gluten-free, simply use gluten-free sandwich cookies in place of standard cookies.

Gluten-Free Fudge Cookies

Patricia @ ButterYum

Gluten-Free Fudge Cookies - ButterYum

These Fudge Cookies are the bomb!  They're soft, and chewy, and absolutely packed full of deep chocolate flavor.  Oh, and did I mention they're gluten-free and dairy-free too!  You are going to LOVE these cookies!  The recipe comes together pretty quickly using a stand mixer.  Here's how they're made.

We're going to start with confectioners sugar (aka 10x, powdered sugar, or icing sugar).  

I always sift confectioners sugar because it's notoriously clumpy. 

Next we need Dutch-process cocoa.  Use very good quality - it's the major flavor component of these cookies.

DSC_8098.JPG

Again, cocoa powder is notoriously clumpy so it gets sifted too.   I use a mesh strainer to sift my dry ingredients, but I know some people are very fond of a more traditional sifter.

Stir the sifted sugar and cocoa together.

Done. 

DSC_8106.JPG

Time to add the egg whites.  Because eggs whites aren't a consistent size, I like to weigh them.  Actually, I like to use a digital scale to weigh most ingredients when I bake - it's the most reliable way to get consistent results, but we can talk about that another time.

Ok, we need just a couple more super yummy ingredients like pure vanilla extract and espresso powder.  These two brands are excellent.  You won't be disappointed if you use them.  

In goes the espresso powder.

Followed by the pure vanilla extract - use the good stuff

Place the mixing bowl on the stand mixer fitted with a paddle attachment or, even better, a BeaterBlade.  I love using a BeaterBlade because it has silicone ribs that scrape the sides of the bowl for you.  No more stopping to scrape down the sides manually.  Love, love, love my BeaterBlade (they're available in different sizes so be sure to get the one that fits your mixer).

Time to mix.  Since the cocoa powder and confectioners sugar tend to create a cloud of dust when mixing, I like to cover the mixer and bowl with a clean kitchen towel until all the dry ingredients are moistened.  Plastic wrap works well too.  

Okay, the cookie dough is done when all the ingredients are combined.  It'll be smooth and glossy and should look like this.  Let the dough rest at room temperature for about 10 minutes to firm up a bit before scooping.

Use a #50 scoop to portion the cookie dough onto a Silpat lined half sheet pan (these cookies don't look as nice when baked on parchment).  Using a portion scoop will ensure the most consistent results.  

See how all the cookie blobs are the same size and they're spaced evenly on the sheet pan?  That enables them all to bake in the same amount of time and they'll all be the same size.  If you don't have a #50 scoop, you can portion the dough using a level tablespoon.  

This cookie dough contains a lot of confectioners sugar which tends to dry out easily so cover it with a damp kitchen towel to prevent it from crusting between batches (I reused the same towel that covered my stand mixer earlier).  

Oh my, they're sooooo good.  I wish you could smell them.  I'm dying!!   

Now muster all your will power and allow the cookies to cool completely on the sheet pan before serving.  Mmm... they're so soft and chewy and fudgy and amazing.  You're going to love them!

Items used to make this recipe:

(affiliate links)


Gluten-Free Fudge Cookies

makes 32 cookies

Printable Recipe

Ingredients

Directions

  1. Preheat oven to 350F.

  2. Line two half sheet pans with Silpat liners.

  3. Stir the sifted confectioners sugar and cocoa powder together in the bowl of a stand mixer.

  4. Add the remaining ingredients to the bowl and place on mixer fitted with a paddle attachment or a BeaterBlade attachment.

  5. Mix on low speed until the ingredients are completely combined and the dough is smooth and glossy.

  6. Allow the cookie dough to rest for 10 minutes at room temperature.

  7. Use a #50 scoop to portion dough onto half sheet pans lined with Silpat liners.

  8. Bake on center rack for 8-12 minutes. The cookies should begin to crack when they're done.

  9. Remove from oven and allow to cookies to cool completely on sheet pan.

Note 

  • Store cookies in an airtight container between layers of wax paper.