DIY Corned Beef
Patricia @ ButterYum
I recently learned how easy it is to make corned beef from scratch and I thought, since St. Patrick's Day is just around the corner, I'd show you how it's done. And let me just go on the record and say this, you may never go back to the stuff from the grocery store again.
Be sure to plan ahead - the brisket needs to brine for 6-8 days before cooking. And you'll also need to find pink curing salt, not to be confused with pickling salt, pink himalayan salt, or pink Peruvian salt (look for Instacure #1 or Prague powder #1). You can order it online or you might be able to get some from a butcher, or a friend who makes their own sausage and/or cures their own bacon.

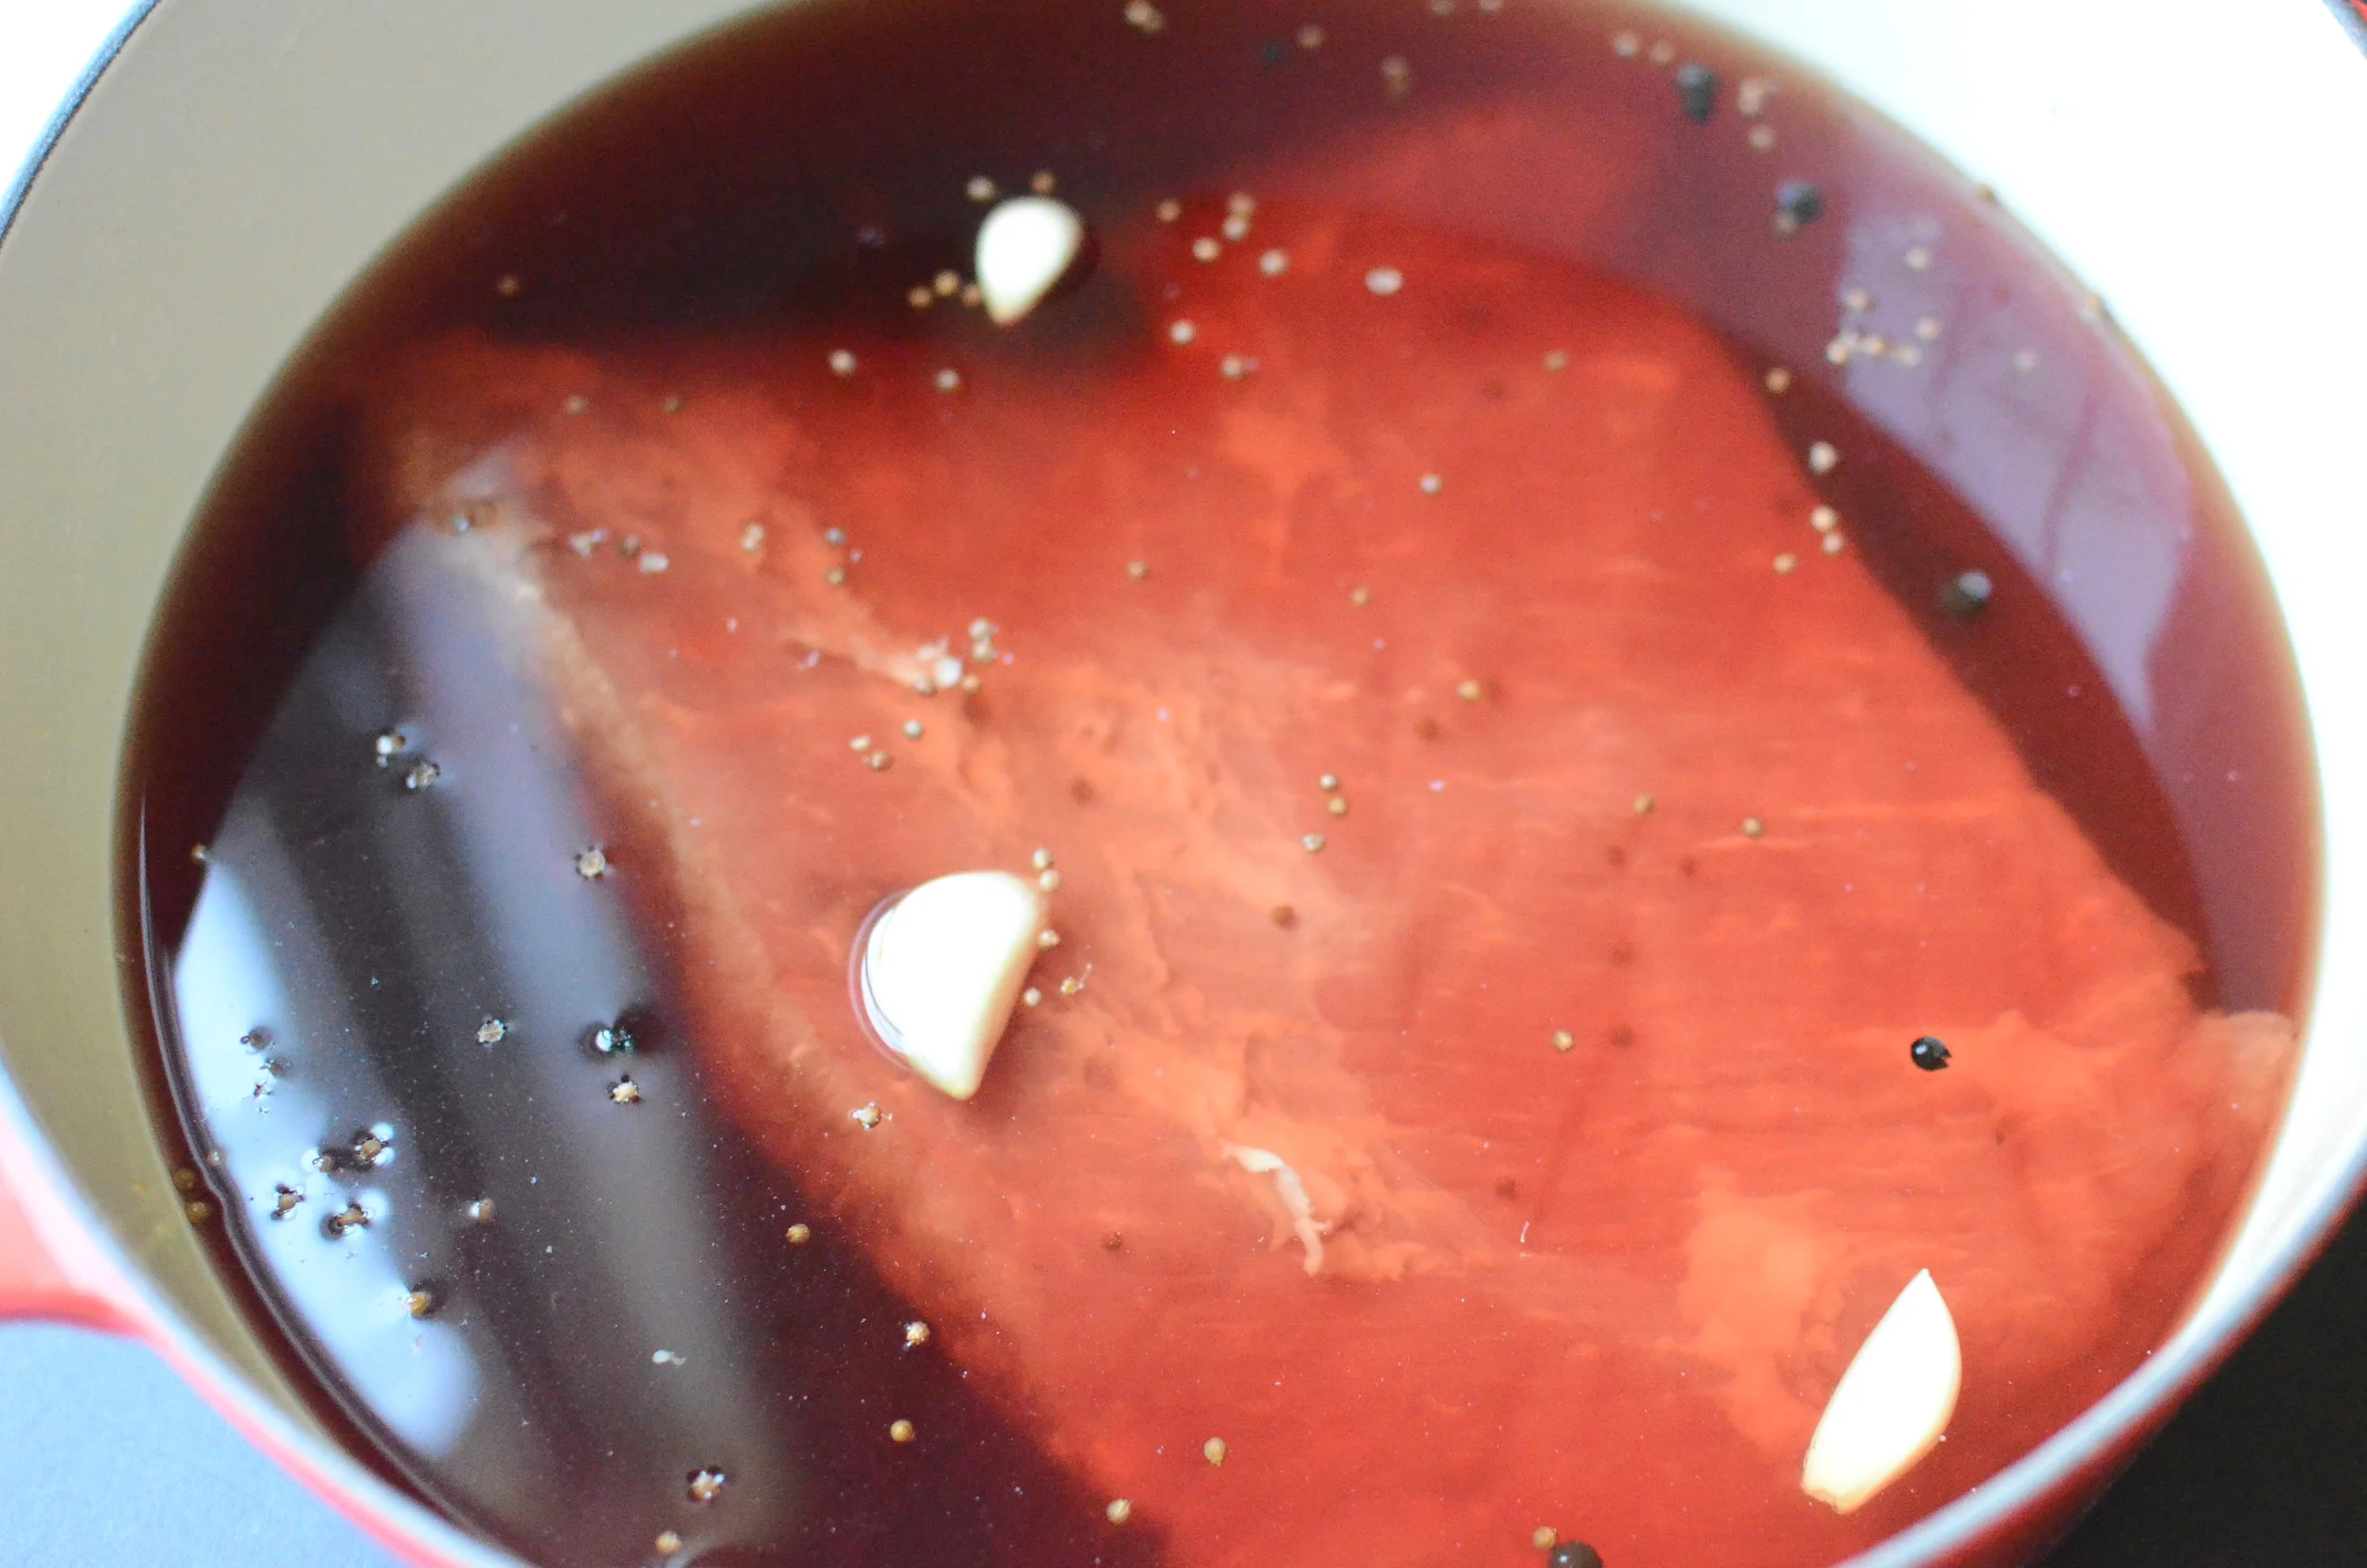
First prepare the brine. The beef brisket will sit in the brine for a minimum of 6 days and a maximum of 8. Clockwise from top left: table salt, whole garlic cloves, brown sugar, pink curing salt (instacure #1), bay leaves, whole allspice berries, whole coriander seeds, whole peppercorns.

You'll also need 16 cups of water and a non-reactive vessel that’s large enough to hold the brine and brisket (non-reactive vessels would be glass, food-grade plastic, stainless steel, or ceramic). I used this ginormous 13.25-quart French oven, but anything that's big enough and isn't made of aluminum, uncoated cast iron, carbon steel, or unlined copper will work.

Add the brisket, bay, garlic, peppercorns, allspice berries, and coriander seeds. My brisket stayed completely submerged in the brine. If yours doesn't stay submerged, it can be weighed down with a dinner plate.

Cover the container and refrigerate for a minimum of 6 days and a maximum of 8 days. Less than 6 days and the brine won't penetrate all the way through the brisket. More than 8 days and the brisket will be too salty.
Here's what the brined brisket looks like after 8 days. Remove the brisket and discard the brine.

On the day you cook the corned beef, you'll need more peeled garlic cloves, black peppercorns, and bay leaves. Also preheat the oven to 250F.

Place the brined brisket in 10-quart or larger stockpot and add the bay, peppercorns, and garlic.

Pour in 8 cups of cold water.
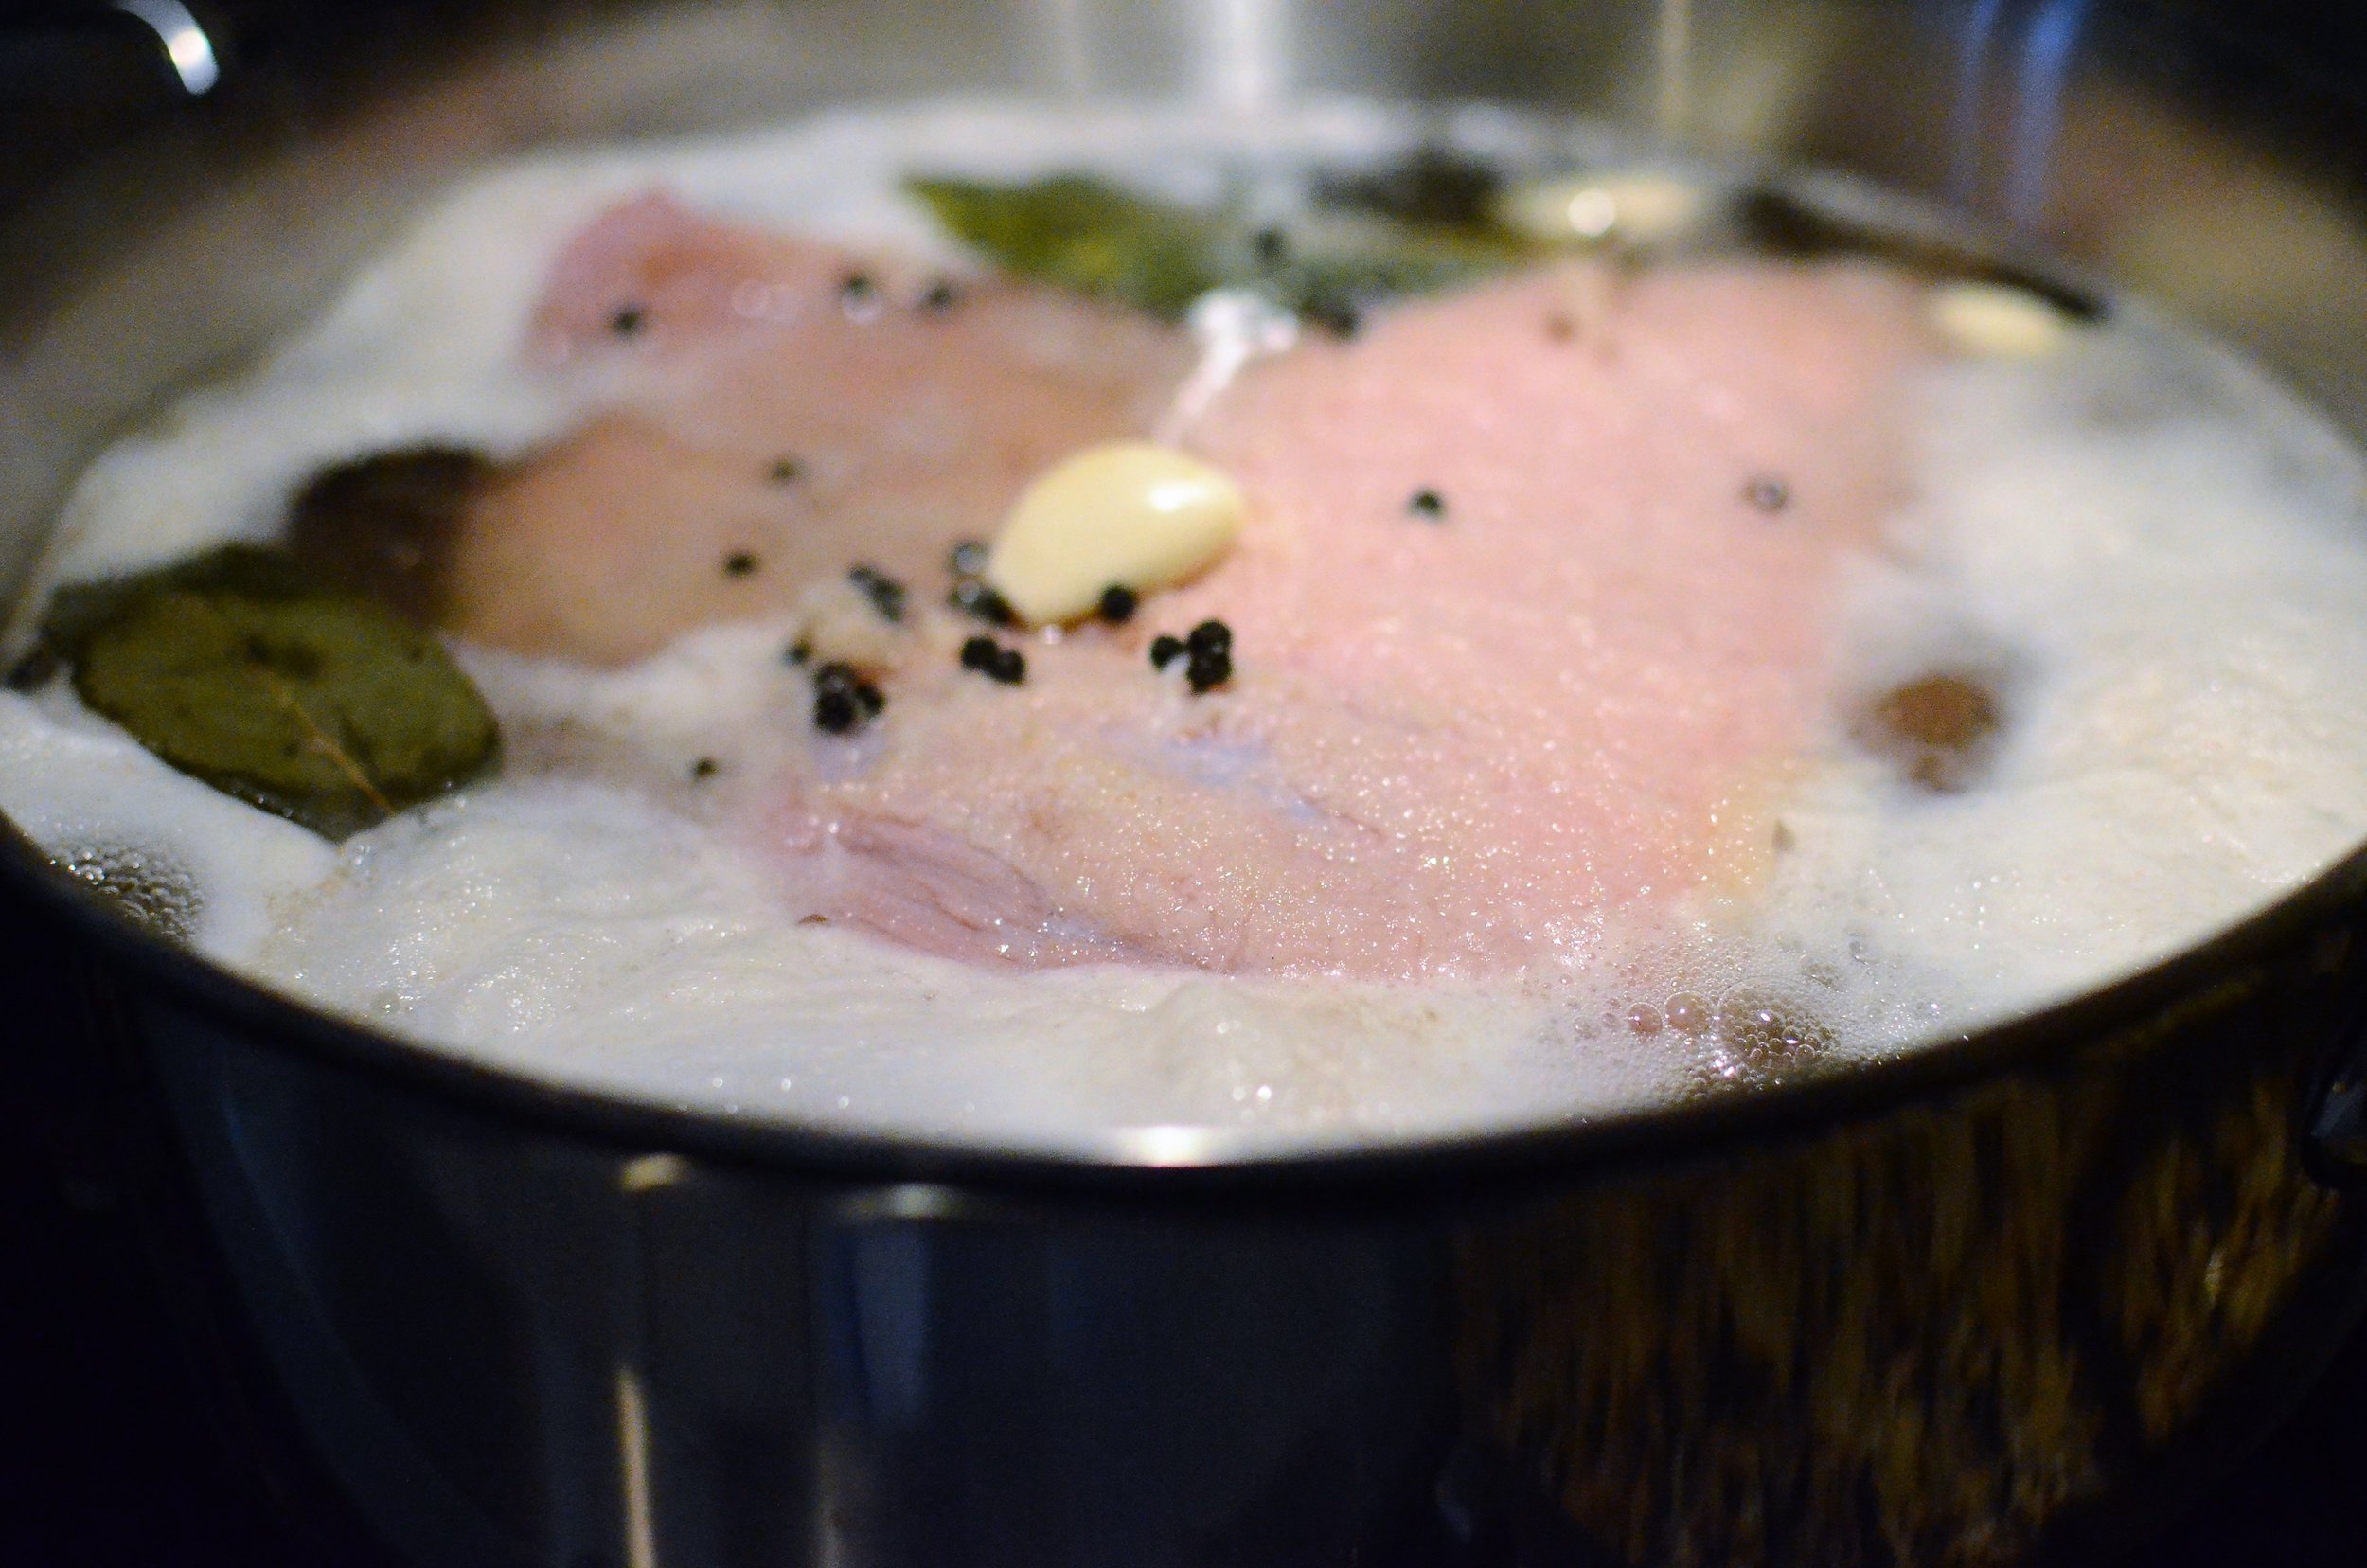
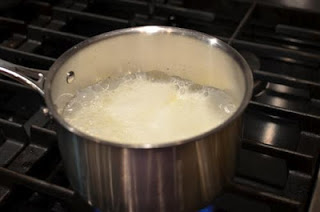
Bring to a boil on the stove top, then remove from heat and cover.

Place in center of preheated oven for 3 hours.

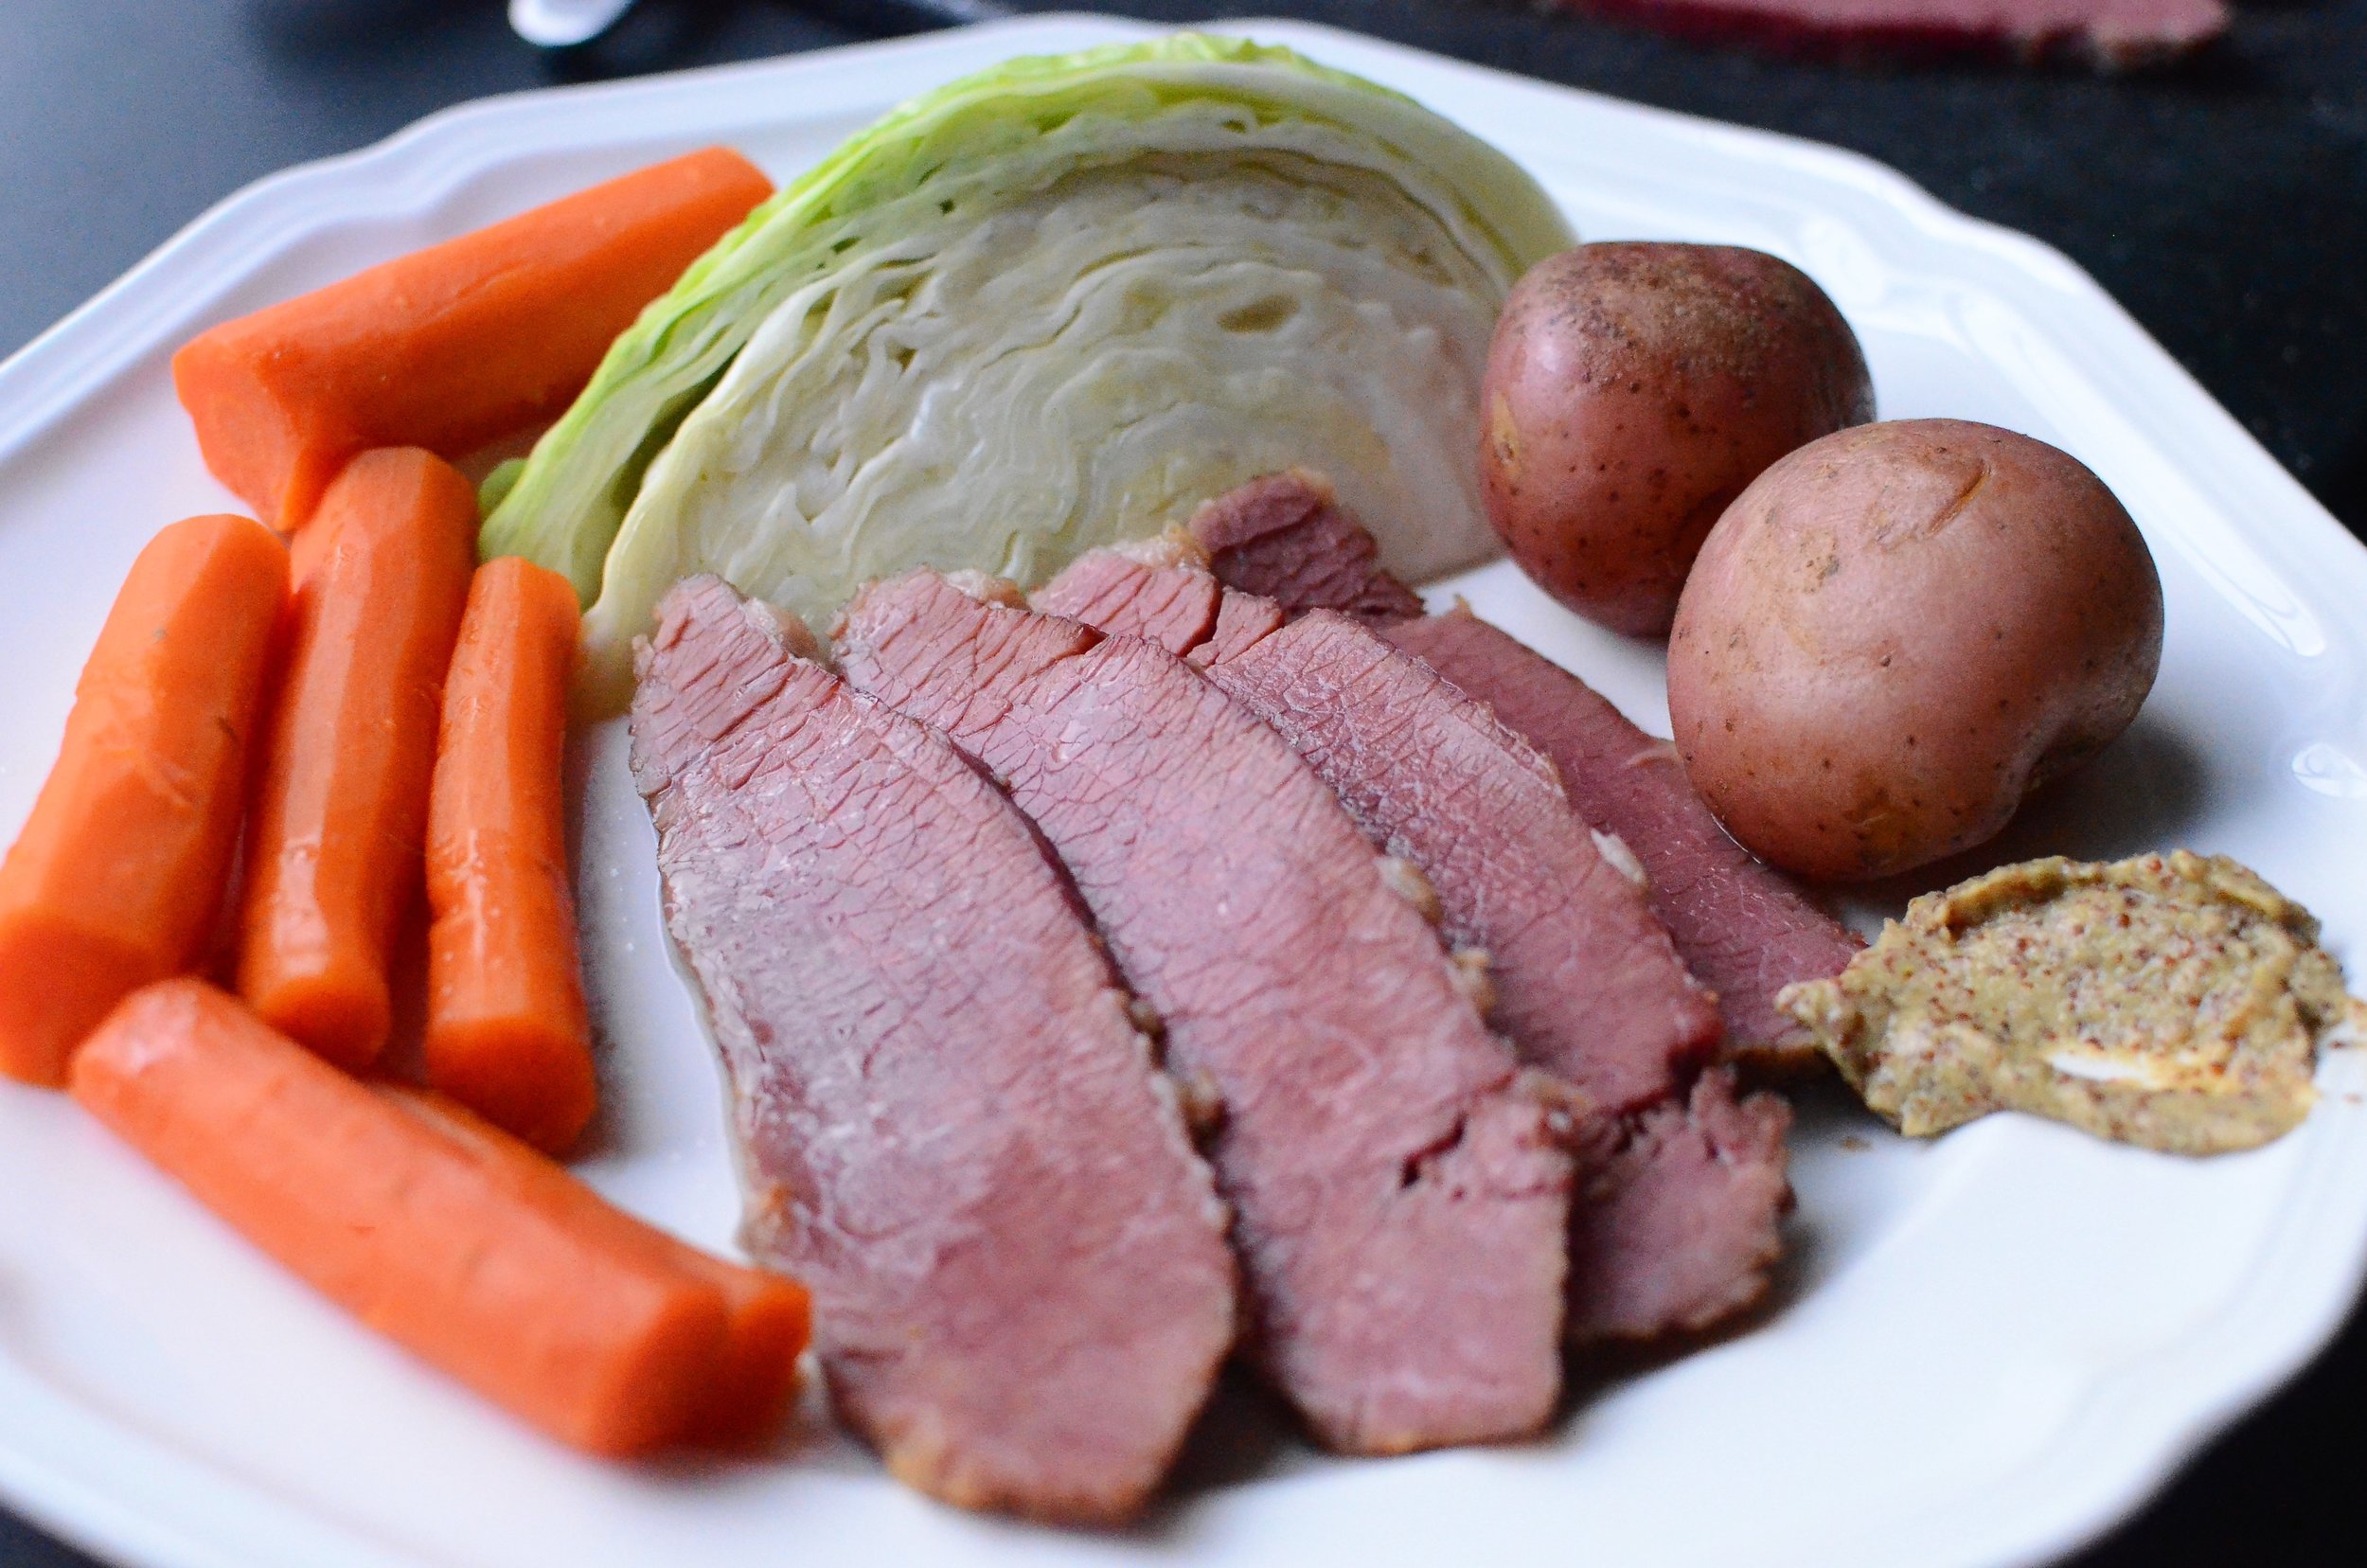
Return stockpot to stovetop and transfer corned beef to platter; drizzle with some cooking liquid to keep it from drying out. Add the cabbage, carrots, and potatoes: simmer for 15-30 minutes or until the potatoes are tender (remove cabbage after 10 minutes).
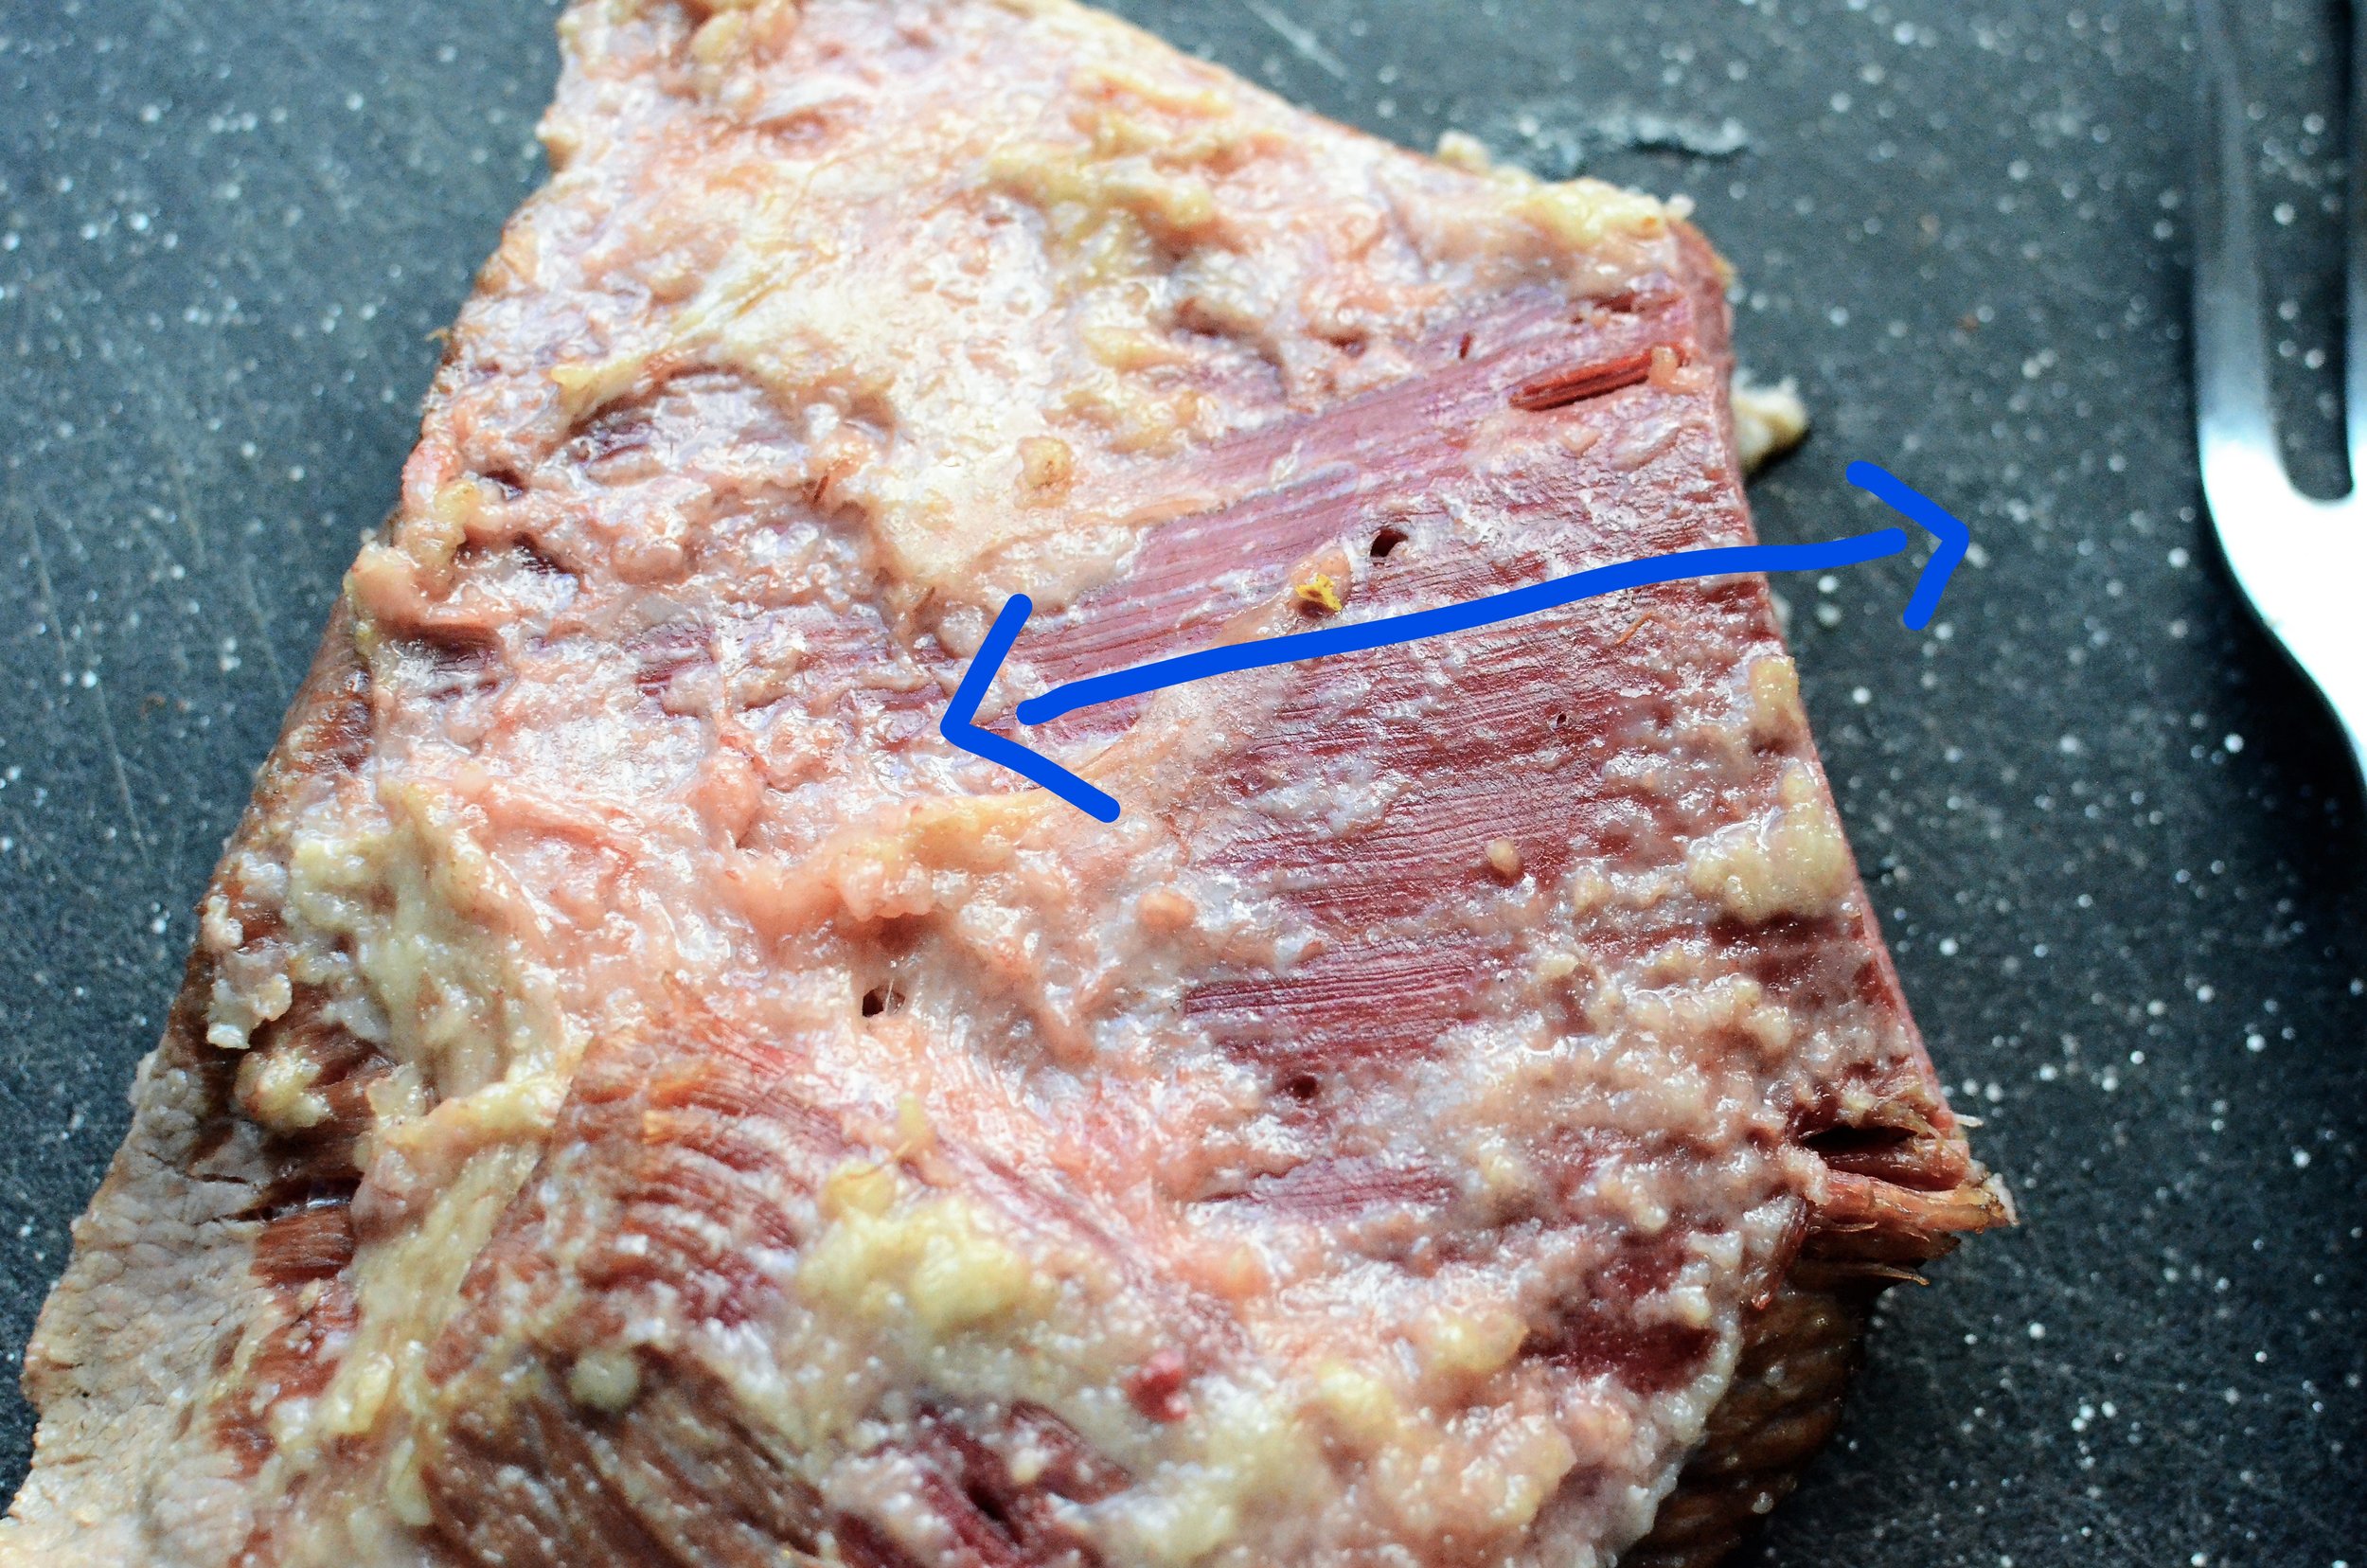
I like to scrape away some of the excess fat from the top of the corned beef - that allows me to see what direction the grain of the meat runs. Cut slices across the grain.

Try not to drool.

Mmmmm.... it's soooooooo incredibly good!


Items used to make this recipe:
(affiliate links)
Instacure #1 https://amzn.to/431XHjo
or
Prague Powder #1 https://amzn.to/431XHjo
13.25-quart enameled cast iron dutch oven https://amzn.to/46irt6l
DIY Corned Beef
makes 12 servings
Ingredients
Brine:
4 quarts water
3/4 cup table salt
1/2 cup brown sugar
2 teaspoons pink preserving salt #1 (see notes below)
4 bay leaves
3 whole peeled garlic cloves
1 tablespoon black peppercorns
1 tablespoon coriander seeds
5 whole allspice berries
Additional Ingredients (the day of cooking):
4 pound flat cut beef brisket, fat trimmed to 1/4-inch
2 quarts water
2 bay leaves
3 whole peeled cloves garlic
1 tablespoon black peppercorns
brined corned beef
1 head cabbage, cut into wedges
1 1/2 pounds red new potatoes
1 1/2 pounds carrots, peeled and cut into 2-inch pieces
Directions
Brine (6-8 days before cooking): In a 12-quart or larger non-reactive container (see notes), whisk the table salt, brown sugar, and curing salt until dissolved; add bay leaves, whole garlic cloves, black peppercorns, coriander seeds, and allspice berries.
Place trimmed beef brisket into brine, cover, and refrigerate for a minimum of 6 days and a maximum of 8 days (brisket should stay completely submerged - use a dinner plate to weigh it down if necessary).
Remove brisket from brine; discard brine.
Preheat oven to 250F.
In a 8-quart or larger stockpot over medium-high heat, combine 2 quarts water, bay leaves, whole garlic cloves, black peppercorns, and the brined brisket until it reaches the boiling point.
Turn off heat, cover, and place in preheated oven for 3 hours.
Remove stockpot from oven and return to stovetop; transfer corned beef to a platter and drizzle some of the cooking liquid over to keep it from drying out.
Add cabbage, carrots, and potatoes to the stockpot and bring to a simmer for 15-30 minutes or until the potatoes are tender (remove the cabbage after 10 minutes).
Slice beef across the grain and serve with the cooked vegetables.
Notes
Pink curing should not be confused with pickling salt, pink himalayan salt, or pink Peruvian salt (look for Instacure #1 or Prague powder #1). It should contain a mixture of sodium chloride and sodium nitrite.
The difference between curing salt #1 and #2? Basically, curing salt #1 is used to preserve things that will be cooked (corned beef, sausage, bacon, etc). Curing salt #2 is used to preserve things that will be air dried (salami, pepperoni, jerky, etc).
A non-reactive container is one made of glass, food-grade plastic, stainless steel, or ceramic. Avoid aluminum, uncoated cast iron, carbon steel, or unlined copper.
adapted from America's Test Kitchen