contact us

Use the form on the right to contact us.

You can edit the text in this area, and change where the contact form on the right submits to, by entering edit mode using the modes on the bottom right.


123 Street Avenue, City Town, 99999

(123) 555-6789

email@address.com


You can set your address, phone number, email and site description in the settings tab.
Link to read me page with more information.

Blog

Butteryum food blog recipes

Filtering by Category: thanksgiving recipes

Mini Pumpkin Spice Donuts with Vanilla Bean Glaze

Patricia @ ButterYum

Mini Pumpkin Spice Donuts with Vanilla Bean Glaze - ButterYum

Happy first day of Fall.  Here in Virginia, the weather has begun to turn chilly and I can't wait to start making all my favorite cold weather foods, beginning with these delicious Mini Pumpkin Spice Donuts with Vanilla Bean Glaze.  They're such a fun way to celebrate the change of season.  

I've baked mini donuts in pans like this, but I find I get much better results using an electric donut maker like this.  There really isn't anything wrong with donut pans that go in the oven, but the donuts they produce usually have one flat side, whereas the ones baked in the donut maker are domed on both sides. Also, you can crank out batch after batch pretty quickly.   

To prepare the donut maker, I use a silicone pastry brush to coat the indentations with a little vegetable oil or shortening.  The electric donut maker has a non-stick finish, but brushing with a little oil helps make donut removal a little easier.

The ingredients are mixed together easily.  No special techniques here, but I love using my BeaterBlade attachment so I don't have to stop to scrape down the sides of my mixer bowl.  If you don't have a BeaterBlade, you can use a standard flat beater, or feel free to mix everything together using a hand mixer if you don't own a stand mixer. 

To neatly dispense the batter into the donut indentations, I like to use a large disposable pastry bag.  It helps me fill the indentations quickly and easily.  Really cuts down on the mess too.  

No piping tip necessary, I just cut a small opening at the end of the bag.

I evenly pipe the batter, filling the indentations to the rim.  

Then I close the donut maker and wait 4-5 minutes until the mini donuts spring back when pressed slightly.   

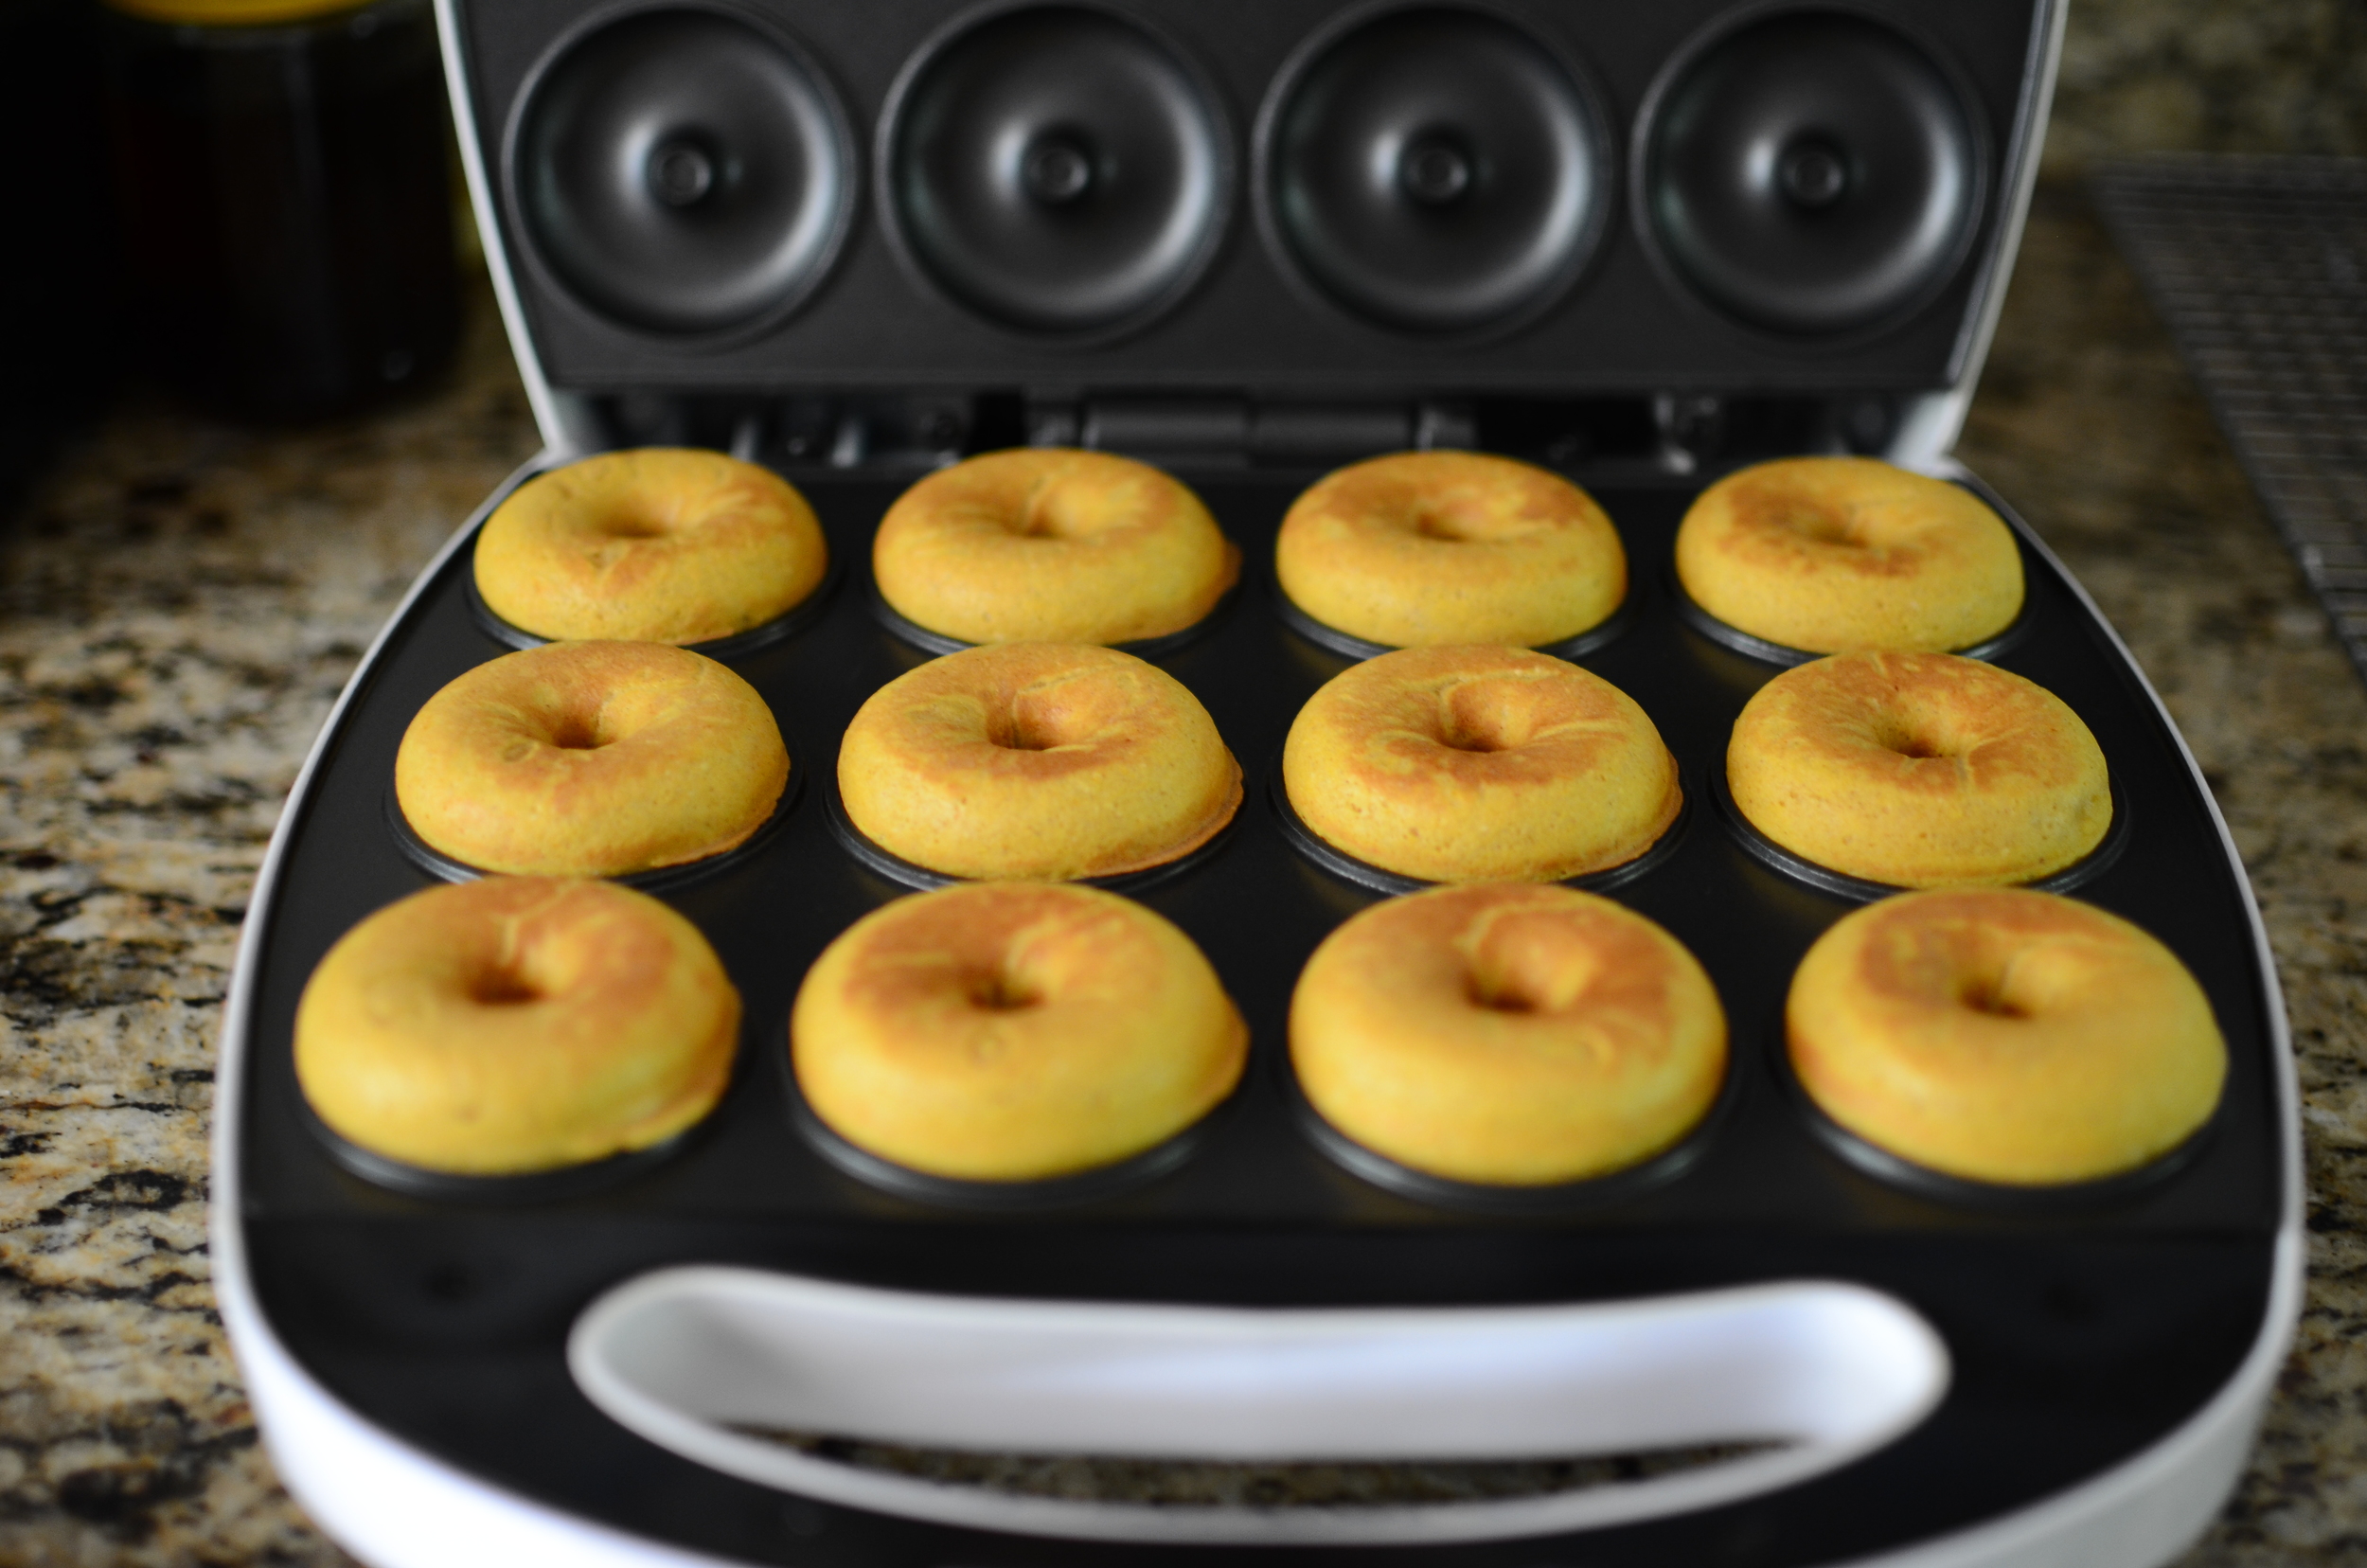
Open the donut maker up and suddenly I have one dozen of the most perfectly shaped, evenly domed mini donuts.  Aren't they adorable? 

DSC_5248 (2).JPG

The mini donuts are removed from the donut maker and placed on a cooling rack to cool completely before glazing. 

Time to make the vanilla bean glaze.  Vanilla bean paste is full of those tiny little black vanilla bean seeds that look so nice on baked goods.  If you don't have vanilla bean paste, you can substitute pure vanilla extract.  Be sure to use the good stuff! 

Whisk together the glaze ingredients until smooth - it should be about this thick to coat the donuts nicely.  If needed, add more confectioners sugar or half & half to adjust the consistency.  As soon as the glaze is ready, start dipping the donuts.

Dip the top half of the cooled donuts in the glaze and place them back onto the rack to rest for about 30 minutes so the glaze can set up. 

Mini Pumpkin Spice Donut w/Vanilla Bean Glaze Recipe w/PHOTOS

That's all there is to it.  Hope you give these tasty mini donuts a try.  Happy fall! 

Mini Pumpkin Spice Donuts with Vanilla Bean Glaze

makes 24 mini donuts

Printable Recipe

Ingredients

FOR THE DONUTS:

  • 1 3/4 cups all purpose flour

  • 2 teaspoons baking powder

  • 1 teaspoon ground cinnamon

  • 1/4 teaspoon ground ginger

  • 1/4 teaspoon ground nutmeg

  • 1/4 teaspoon fine sea salt

  • 1 large egg

  • 3/4 cup 100% pure pumpkin puree

  • 1/2 cup granulated sugar

  • 1/2 cup whole milk

  • 1/4 cup canola oil

  • 1 teaspoon pure vanilla extract

FOR THE GLAZE:

  • 1 cup confectioners sugar

  • 1 tablespoon half and half

  • 1/2 teaspoon pure vanilla bean paste (or pure vanilla extract)

Directions

To make the donuts:

  1. Preheat electric donut maker and brush indentations with vegetable oil or shortening.

  2. In the bowl of a stand mixer, whisk together the flour, baking powder, cinnamon, ginger, nutmeg, and salt.

  3. Add remaining ingredients and mix until combined using BeaterBlade attachment (or mix with a hand mixer).

  4. Using a large pastry bag, fill bottom half of the prepared donut maker, filling each indentation to the rim.

  5. Close donut maker and bake for 4-5 minutes (use a toothpick to check for doneness - the should spring back when pressed lightly).

  6. Carefully remove mini donuts from maker and cool completely on wire rack before glazing.

To make the glaze:

  1. In a small bowl, whisk together the confectioners sugar, half and half, and vanilla bean paste until smooth.

  2. Dip tops of cooled mini donuts in glaze immediately; allow glaze to dry for 30 minutes.

Note

  • To use mini donut pans, preheat oven to 350F. Bake for 8-12 minutes until done.

Dry Brined Turkey

Patricia @ ButterYum

If you're intimidated by the thought of brining in a liquid solution, Dry Brining is the perfect technique for you.  I’ve made turkey all kinds of ways, and dry brining is by far my favorite for a couple of reasons; 1) it’s much less messy than brining in liquid, and 2) it produces the most juicy, flavorful bird imaginable!

Plan to begin the process anywhere from 24-72 hours (*see notes below recipe) before you place your turkey in the oven to roast.  Enjoy!

Rinse and dry a 12-14 pound turkey well and place on a rimmed sheet pan. If there’s a pop-up timer in the turkey, remove it (they’re notoriously inaccurate).

Sprinkle the entire bird, inside and out, with kosher salt. Be sure to check the “note” section below the recipe to calculate how much kosher salt you’ll need based on the weight of your turkey.

Place the turkey in the fridge, uncovered, for at least 24 hour (but can be as long as 72 hours - *see notes below the recipe).

Be careful about accidental cross contamination - here I placed a barrier of homemade chicken stock in front of my turkey to reduce the risk that someone might accidentally touch it.

After 24-72 hours, remove the turkey from the fridge and pat dry thoroughly with paper towels.

Next, tuck the wings, tied the legs smear butter all over the skin, and insert an oven-safe probe thermometer in the thickest part of the thigh (without touching any bone). Sprinkle the turkey lightly with salt and pepper. Not too much, the salt brine will have flavored the meat already so we’re just adding a little flavor to the skin.

Roast in a 325F oven for 15-18 minutes per pound, or until the internal temperature in the thickest part of the thigh reaches 165F. I check both legs in a couple of places, just to be on the safe side.

Allow the turkey to rest for 30-40 minutes before carving (the internal temperature will rise 5-10 additional degrees - this is normal). That should leave you with plenty of time to make gravy with all the yummy pan juices. Happy Roasting!

Items used to make this recipe:

(affiliate links)


Dry Brined Turkey

Printable Recipe

Ingredients

  • 12-14 pound turkey (thawed if applicable)

  • 6 tablespoons kosher salt (see formula in the “note” section below)

  • 4 tablespoons unsalted butter, softened

  • kosher salt and pepper for sprinkling

  • 1 large onion, sliced

  • 1 large carrot, sliced

  • 1 large stalk celery, sliced

  • 2 cups water

Directions

  1. Remove neck, giblets, etc from inside turkey; reserve for gravy.

  2. Rinse turkey well and dry thoroughly with paper towels; place on half sheet pan.

  3. Sprinkle turkey inside and out with salt, refrigerate uncovered for 24-72 hours.

  4. Preheat oven to 325F and place oven rack in the lower third position.

  5. Pat turkey well with paper towels to absorb any moisture that might be on the surface (pay close attention to nooks and crannies).

  6. Place a roasting rack into a large roasting pan; add sliced onion, carrot, celery and water.

  7. Smear softened butter all over turkey and sprinkle lightly with kosher salt and pepper; place on roasting rack.

  8. Place turkey in oven, uncovered, and roast for 15-18 minutes per pound or until the meat in the thickest part of the thigh registers 165F.

  9. Remove from oven and rest for 30-40 minutes. Strain pan drippings and use to make gravy.

NOTEs

  • Cook’s Illustrated suggests salt-brining a turkey for a maximum of 48 hours, while The New York Times says you can let it go for as long as 72 hours.

  • To calculate how much Kosher salt you will need, use this formula: