Not So Spooky Halloween Brownies
Patricia @ ButterYum

Halloween Ghost Brownies
This is my latest Heavenly Cake Bakers entry - Barcelona Brownies (aka Not So Spooky Halloween Brownies). Baker buddy Matthew suggested I call them Frownies - Perfect!
To be completely honest, I did not set out to turn these brownies into little ghosts, but I'll explain that a little later.
For now let's just go through the recipe, which you can find here. I suppose you could do this with any brownie recipe, or even a mix if you like... just have some fun!

Oh, oh, oh... I want to quickly mention how in love I am with my new BeaterBlade attachment for my KitchenAid. I'll write much more about it once I've had a chance to use it more, but my initial feelings are WOW! No more stopping to scrape the mixer bowl... something I loathed doing!
That being said, the recipe for these brownies instructs the use of the whip attachment (if using a stand mixer), but I used the BeaterBlade and it mixed the ingredients perfectly.
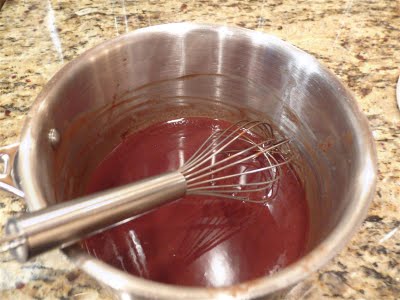
Okay, the recipe starts by making a simple ganache from chocolate and heavy cream - set aside to cool and reserve for use later. Sorry, forgot to get a photo of that step.
Next, I melted butter and chocolate together. Easy, and you don't need a double boiler if you have a good quality heavy duty pan and a very, very low flame. Stir constantly - it doesn't take long to melt and you want to make sure the chocolate doesn't burn.

Then I weighed the remaining ingredients, but you can use standard measuring cups/spoons if you prefer. I opted to omit the nuts from this recipe... I like nuts, but I'm just not a fan of nuts in my brownies.
Okay, I combined the ingredients in the order instructed and placed the batter in a heavy duty quart size storage bag to easily fill my pan. I didn't get my silicone financier pan yet so I used a mini muffin pan instead - this recipe made exactly 24 mini muffin size brownies.

See how neat the zipper bag makes filling the pan? Easy clean up too... just throw the bag away when you're done.

Into a 325F oven for 12-15 minutes, or until the internal temperature reaches 194F.
Don't they look good?

As soon as the brownies come out of the oven, you poke three holes in each using a chopstick or 1/4-inch dowel.
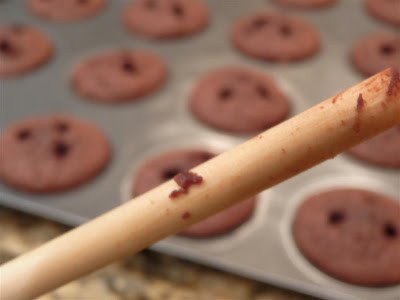
You're supposed to coat the chopstick/dowel with oil to keep the brownie particles from sticking, but I found myself constantly removing brownie bits and recoating the dowel with oil.
Which reminds me of this quick tip - did you know the best knife to use when cutting brownies is a plastic disposable knife? It's true... absolutely no sticking! So I guess I'll start my search to find a set of plastic chopsticks.

Now it's time to fill the holes with the reserved ganache. I find this process a bit messy if using a spoon or pastry bag, but these plastic squeeze bottles make the job effortless!
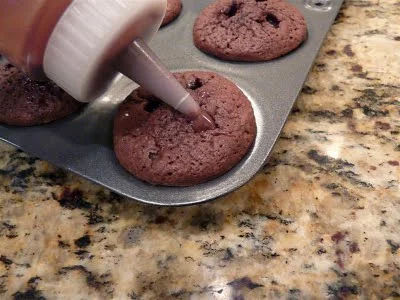
See how neat :).

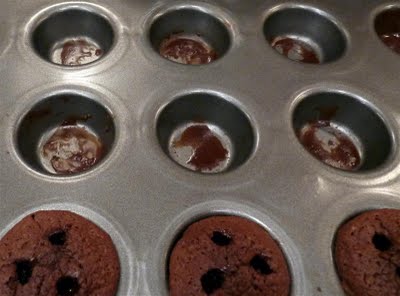
Hmmm... I had exactly enough ganache to fill each hole, but it seeped down into the brownies and left these odd looking open voids. Kinda reminded me of alien faces. Not very appetizing.
What to do , what to do...

(lightbulb!!) Since I'm not very fond of alien faces, and since it is October, little ghosts seemed more seasonally appropriate. A quick sprinkling of powdered sugar really helped to drive home the ghost theme... let's see if the kids get it when they come home from school.
(update - yes, they recognized the little ghosts right away)
Be careful not to poke those holes too deeply... I found little puddles of ganache under all my brownies. Anyway, thanks for taking the time to visit!
