contact us

Use the form on the right to contact us.

You can edit the text in this area, and change where the contact form on the right submits to, by entering edit mode using the modes on the bottom right.


123 Street Avenue, City Town, 99999

(123) 555-6789

email@address.com


You can set your address, phone number, email and site description in the settings tab.
Link to read me page with more information.

Blog

Butteryum food blog recipes

Filtering by Category: dessert recipes

How To Make Fresh Whipped Cream At Home

Patricia @ ButterYum

Is there such a thing as heaven in a bowl? You bet there is - it's called fresh whipped cream!

Fresh whipped cream is about a gazillion times better than the stuff that spurts out of a can... and let's not even mention that frozen non-dairy whipped topping stuff... ugh! Okay, I've eaten that stuff once or twice, but seriously, this is WAY better!! It's pretty easy to make too, and believe me, after you taste it you'll be hooked!

If you want to drag out your stand mixer, or your hand-held mixer, feel free, but I'm going to show you how to do this fast and easy using a simple bowl and whisk. 

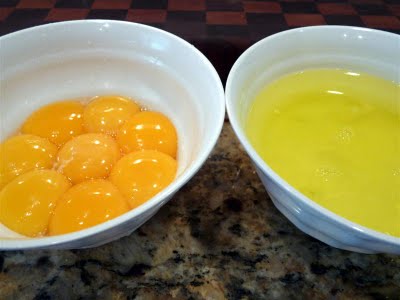
Here is the cast of characters that we'll need. Well chilled heavy cream (aka whipping cream or heavy whipping cream), and vanilla sugar.

If you don't have vanilla sugar, you can use regular granulated, superfine, or even powdered sugar, plus a splash of vanilla extract.

You'll also need a whisk - one with thin wires works best; the more the better. And lastly, a nice big bowl - one that will give you lots of room to move that whisk around!

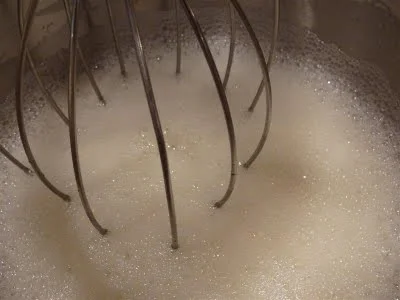
Okay, watch your clock. This is going to take about 60 seconds.  Put your cream, sugar, and vanilla in the bowl and start moving the whisk back and forth quickly. No need to do a "figure 8"... a simple east to west motion is all you need.

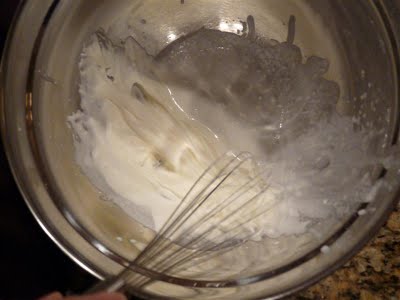
After just a few seconds you'll notice the cream start to thicken.

Keep going. You're doing fine. Just a little longer now. You're almost there!

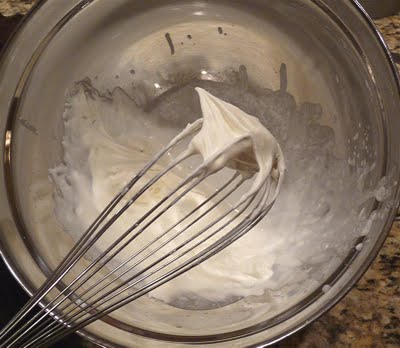
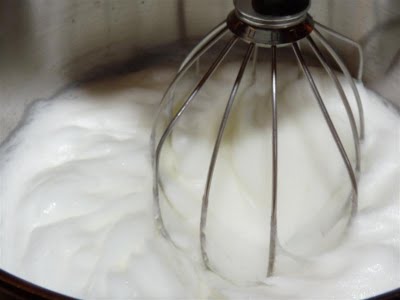
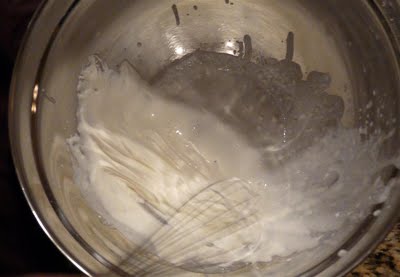
And there you go... start to finish in less than 60 seconds. See how glossy and smooth it is, and it holds it's shape beautifully.... now, just wait until you taste it!

One word of caution - don't be tempted to hide in the guest room and eat this all by yourself!  Also, be sure to stop whisking at this point or you'll end up with a big bowl of sweetened vanilla flavored butter.

Now go buy a pint of heavy cream and get busy impressing your friends and family!

Fresh Homemade Whipped Cream

makes about 2 cups

Printable Recipe

Ingredients

  • 1 cup chilled heavy cream

  • 1-2 tablespoons vanilla sugar (or substitute granulated sugar and 1/2 teaspoon vanilla extract or paste)

Directions

  1. Whisk together in a large bowl for about a minute. That's it. done. Enjoy!

Note

  • To make vanilla sugar, rinse and dry used vanilla bean pods and place them in an airtight container with granulated sugar. Add more vanilla pods as you acquire them, and add sugar as needed. Use for cakes, cookies, whipped cream, coffee... good stuff!

Hungarian Jancsi Torta

Patricia @ ButterYum

ButterYum Hungarian Jancsi Torta

ButterYum Hungarian Jancsi Torta

Here's my entry for the first cake selection of the new baking group Heavenly Cake Bakers , featuring recipes from Rose's Heavenly Cakes by Rose Levy Beranbaum.

Begin by preparing a 9" springform pan - grease and line the bottom with parchment, spray parchment and sides with baking spray. Set aside.

black walnuts in a torte

black walnuts in a torte

The recipe didn't specify what kind of walnuts to use, so I chose Black Walnuts over the more common English variety. Black Walnuts have the most amazing flavor, one that pairs extremely well with chocolate. The flavor is hard to describe, but Hammon's website has a list of flavor descriptions here. Looks like they're pretty good for you too - you can find nutritional information here.

Note: Black Walnuts are kind of hard to find, but they usually appear in the stores around the Thanksgiving and Christmas holidays. I found these at Costco (my favorite store). Stock up and store them in the freezer because they have a tendency to quickly go rancid otherwise.

We have lots of Black Walnut trees growing on our property, but I know how difficult harvesting them can be after my mother-in-law spent the better part of a weekend doing just that several years ago. First you repeatedly drive over the hard outer husk with your car (no joke), then you pry the outer husks away, then you smash the inner shells with a heavy mallet, then you pry them all open and pick out all the itty-bitty pieces of nut meat - your hands practically stained for life in the process... all that you only get about a cups worth in the end... definitely not worth the effort.

Okay, back to the recipe - the Black Walnuts are toasted to enhance their flavor, then the walnuts are placed in a clean kitchen towel to rub as much of the thin nut skin off as possible. This is a pretty messy process. Use an old or dark colored kitchen towel. The photo above is before the skins were removed.

Here's what the nuts look like after - it's impossible to remove all of the skin. Additionally, it's really difficult to separate all the nuts from the loose papery skins, so I ended up shaking the nuts in a sieve with medium gauge mesh. Worked pretty well!

Then the walnuts are ground in the food processor with a bit of sugar.

Dark chocolate is also ground in the food processor. I suppose you could use semi-sweet or milk chocolate if you wanted to. Caution - the food processor can have a tendency to melt the chocolate a bit, so you might want to chill the chocolate as well as the chopping blade in the fridge for a couple of minutes first. By the way, I wear earplugs when I chop chocolate in the food processor... you wouldn't believe the noise!

Next I separated the eggs.

The yolks were whipped until light and fluffy. Then the ground nuts and chocolate were stirred in and the mixture set aside.

Now for the meringue - in a separate mixing bowl, whip the whites until frothy. This is the stage when you should add the cream of tartar.

Btw, I have 2 bowls and 2 whip attachments for each of my mixers - invaluable investment!

When the eggs reach soft peaks, the sugar can slowly be added.

Continue whipping until the stiff peak stage is reached.

Time to gently fold the egg whites into the yolk mixture.

Everybody into the pool, I mean pan. I used insulated cake strips around the outside of my pan. They keep the sides of the cake from baking too fast. The recipe stated that the batter would fill the pan about 1/2 full, but the batter actually filled my pan about 3/4 full, so I placed the springform on a sheet pan just in case the batter decided to spill over in the oven.

Thankfully no spills occurred. The cake is removed from the oven when the internal temp reaches 200F (about 45 minutes). The cake should cool on a wire rack for 5 minutes before the sides of the pan are removed. The Torta can be served warm or at room temperature. I opted for room temp.

Here it is - isn't it pretty?

Rose suggests serving with apricot preserves, sour cherry preserves, or ganache. I was feeling very chocolaty today, so I topped my Torta with a quick combo of ganache and mascarpone cheese - heaven!

Mascarpone Ganache

  • 1/4 cup dark chocolate, chopped

  • 1/4 cup heavy cream, scalded

  • 1/2 cup Mascarpone cheese, softened

  • Raspberry puree for garnish (optional)

Directions

  1. Combine heavy cream and chocolate until well combined; cool to room temp.

  2. In a small bowl, cream mascarpone until soft and smooth; add chocolate and combine.

Yum - I really like this Hungarian Jancsi Torta. The texture is so light it's practically a souffle. Oh, I found cutting this torta easiest using a hot/dry serrated knife coated with oil. Just run the knife under hot water, dry it off, and wipe a little oil on with a paper towel. Don't cut yourself!

Enjoy!

For more Heavenly Cake Baker posts about this Hungarian Jancsi Torta, visit Marie's blog.