contact us

Use the form on the right to contact us.

You can edit the text in this area, and change where the contact form on the right submits to, by entering edit mode using the modes on the bottom right.

Form Block
This form needs a storage option. Double-click here to edit this form, and tell us where to save form submissions in the Storage tab. Learn more
         

123 Street Avenue, City Town, 99999

(123) 555-6789

email@address.com


You can set your address, phone number, email and site description in the settings tab.
Link to read me page with more information.

Blog

Butteryum food blog recipes

Filtering by Category: chocolate recipes

Penguin Snack Cakes

Patricia @ ButterYum
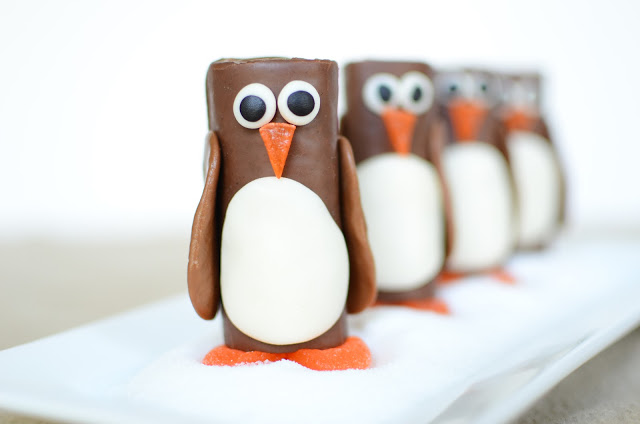
Are these guys cute or what?  That's what I though when I saw them on Pinterest not long ago.  I've always had a fondness for penguins, and so has my oldest son, so I knew I wanted to make them for a recent family get-together.

You’ll need Swiss cake rolls, tootsie rolls, sugared orange slices, white fondant, and black fondant. Better get a little extra of everything - you know, for snacking.

Cut the sugared orange slices in thirds.

Remove the center section and set it aside for now. Press the two outer sections together (reserve the center section for later).
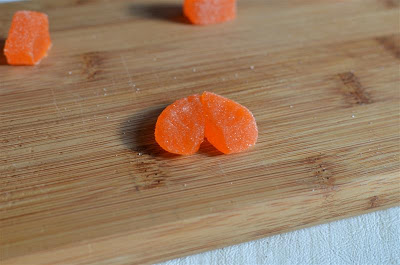
Squish the two outer sections down to flatten them (they’ll stick together nicely). Set aside.
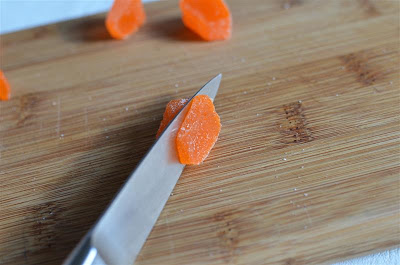
Now take the reserved center piece and cut a small beak shape; set aside.  This is where the operation gets a little sticky - keep a moist towel and a dry towel handy.  

When you have the appropriate number of beaks and feet, set them aside and move to the next step.

It’s fondant time. You’ll need a 1-inch diameter ball of white fondant for the tummy. For the eyes, you’ll need two 1/4-inch balls of white fondant and two 1/8-inch balls fo black fondant. Be sure to clean your hands well after handling the black fondant so you don’t accidentally discolor the white fondant when you handle it.

Place one of the 1-inch balls of white fondant in the center of your palm.

Flatten the ball into an oval shape.

Place the Swiss cake roll, flat side down on your work surface and place the flattened oval as shown.

Now it’s time to make the eyes. Place the 1/8-inch balls of black fondant on top of the 1/4-inch balls of white fondant.

Gently press the two together.

I see you!

Place the eyeballs on the penguin as shown. They should have no trouble sticking, but if they don’t, warm them in your hands slightly, then try again.
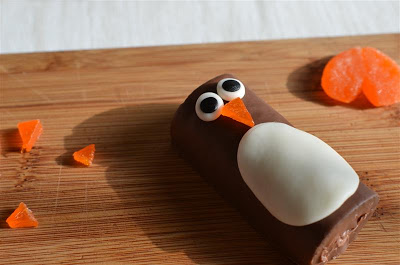
Now place the beak under the eyes, again, it should be sticky enough to hold in place all by itself. We’re almost done.
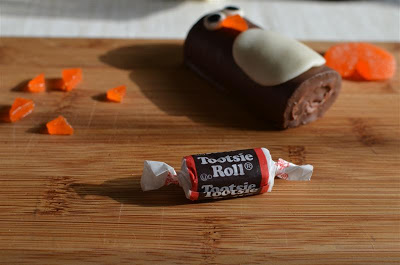
Now it’s time to make the wings. You’ll need one small tootsie roll per penguin.

Cut the tootsie roll in half.

Knead each half into an oblong shape, then flatten each into the shape of a wing. Attach to the sides of the penguin, just below the eyes. The tootsie roll wings don’t stick as easily as the other parts - use the heat of your hands to make sure they’re soft and sticky before attaching.

Place the feet on a bed of snow (sugar) and top with the assembled penguins.
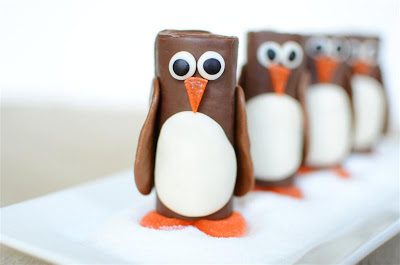
Enjoy!

Fall Themed Cake Challenge

Patricia @ ButterYum

Hi Everyone.  A couple weeks ago I was asked if I was interested in participating in a 2012 Fall Themed Cake Challenge, where a group of food bloggers would join together and post some nifty seasonal sweet treats.  How could I say no?  My entry is a fairly simple solution for those who want to make an autumnal cake, but aren't comfortable doing elaborate cake decorating techniques.  I've used a maple leaf template here, but other templates would work for other occasions.  A snowflake would be perfect for a winter buffet.  Recipes for the cake are at the bottom of this post.  Also, there's a list of the participating bloggers listed below - I hope you check them out.

1- Cup of hot cocoa cake-Munchkin Munchies

2- Carrot Cake with Cream Cheese frosting-D & P Celebrations

3- Caramel Apple Cake-The Baked Equation

4- Maple Leaf Chocolate Cake-ButterYum

5- Boo Shoe SugarTopper-Trilogy Edibles

6- Goodbye Fall-Pink Little Cake

7- Turning Leaves-Simply Sweet by Honeybee

8- Fall Teddy Bears-Karma's Cakes

9- Thanksgiving Head Dress-Sweetology

10- Fall Flower Pot Cupcakes-Butter Hearts Sugar

11- End of Fall Cupcakes-Not your momma's Cookie

12- Thanksgiving in a Cupcake-Savor the Baking

13- Turkey Cake-The Baking Sheet

14- Picking Leaves-Sweet Things


Chocolate Domingo Cake with Decorative Stencil

Printable Recipe

serves 10-12

Ingredients

  • 1/4 cup plus 3 tablespoons (42g) Dutch processed cocoa powder

  • 2/3 (160g) cup sour cream

  • 2 large (100g) eggs

  • 1 1/2 teaspoons (6g) pure vanilla extract

  • 1 1/2 cups plus 1 tablespoon (156g) sifted cake flour

  • 1 cup (200g) granulated sugar

  • 3/4 teaspoon (4g) baking powder

  • 1/4 teaspoon (1.5g) baking soda

  • 1/2 teaspoon (3.5g) salt

  • 14 tablespoons (200g) unsalted butter, softened

Directions

  1. Preheat oven to 350F and line a 9-inch springform pan with parchment paper on the bottom, then spray the parchment paper and sides of the pan with a flour/oil baking spray (hold the parchment paper in place with a dab of butter or shortening).

  2. In a small bowl, whisk together the cocoa, sour cream, eggs, and vanilla. In the bowl of a stand mixer, combine the remaining dry ingredients.

  3. Add the butter and cocoa mixture; mix on low for 30 seconds, then increase the speed to medium and continue mixing for about 2 minutes.

  4. Spread the batter into a smooth layer in the prepared pan.

  5. Bake for 30-40 minutes or until a toothpick comes out of the center of the cake clean (one or two crumbs are okay). Cool cake completely.

To decorate as shown:  

  1. Lay a template in the center of the completely cool cake.

  2. Sprinkle an even layer of powdered sugar over the entire surface of the cake and carefully removed the template.

  3. Pipe a buttercream border around the edges and sprinkle with shaved chocolate.

Chocolate Egg White Buttercream

Printable Recipe

makes about 2 cups (double to frost an entire 9-inch cake)

Ingredients

  • 5 ounces (142g) bittersweet chocolate

  • 1 cup (227g) unsalted butter, softened

  • 2 large (60g) egg whites

  • 1/2 cup (100g) granulated sugar

Directions

  1. Gently melt chocolate in microwave on high, stirring every 10-15 seconds until almost completely melted. Rely on the residual heat to finish melting the chocolate as you continue to stir; set aside to cool.

  2. In the bowl of a stand mixer, whip the egg whites until soft peaks form; slowly add sugar and continue beating until stiff peaks form.

  3. Gradually add the room temperature butter, a tablespoon at a time, until it's fully incorporated.

  4. Add the cooled melted chocolate and whip until fully combined.

Note

  • Use pasteurized egg whites if you have any concerns about using fresh egg whites.

adapted from The Cake Bible