
Sous Vide Chuck Roast Steak
Patricia @ ButterYum
If you subscribe to my monthly newsletter, you know I promised to share this amazing steak recipe this month and today is the day! But first, a little background - a couple of times a year, we like to butcher a whole ribeye roast into steaks that we then vacuum seal and stash away in the freezer for special occasions and family get-togethers. This year, however, the rather substantial increase in beef prices left me with a serious case of sticker shock. Then I thought about a technique that would reportedly turn a fairly tough and inexpensive cut of beef (chuck) into a tender and flavorful steak that could rival a ribeye. A whole chuck roast was 1/3 the cost of the ribeye roast so that sealed the deal for me, and the results were nothing short of spectacular. I urge you to give this easy technique a try - you will not be disappointed!


In case you haven’t already figured it out, we’re going to cook the chuck using the Sous Vide technique. Place bagged steak(s) into cooking vessel and clip to side to prevent the bag(s) from moving during the cooking process (which can interfere with water circulation). If you cook more than one steak, place each in its own bag. Be sure to remove as much air from the bag as possible so the steak(s) stay submerged under the water. If needed, you can weigh down the bag with a dull stainless steel butter knife or spoon. The stainless flatware will not interfere with the flavor of the steak.

Anchor the immersion circulator to the cooking vessel and set the cooking temperature and time (full recipe at the bottom of the page). Be sure the water level is high enough to completely cover the steaks, but not exceed the maximum water level indicated on the immersion circulator. If your cooking vessel has a lid, use it to prevent evaporation (otherwise, monitor the water level during the cooking process and add water as needed). The steaks should stay submerged at all times during the cooking process.

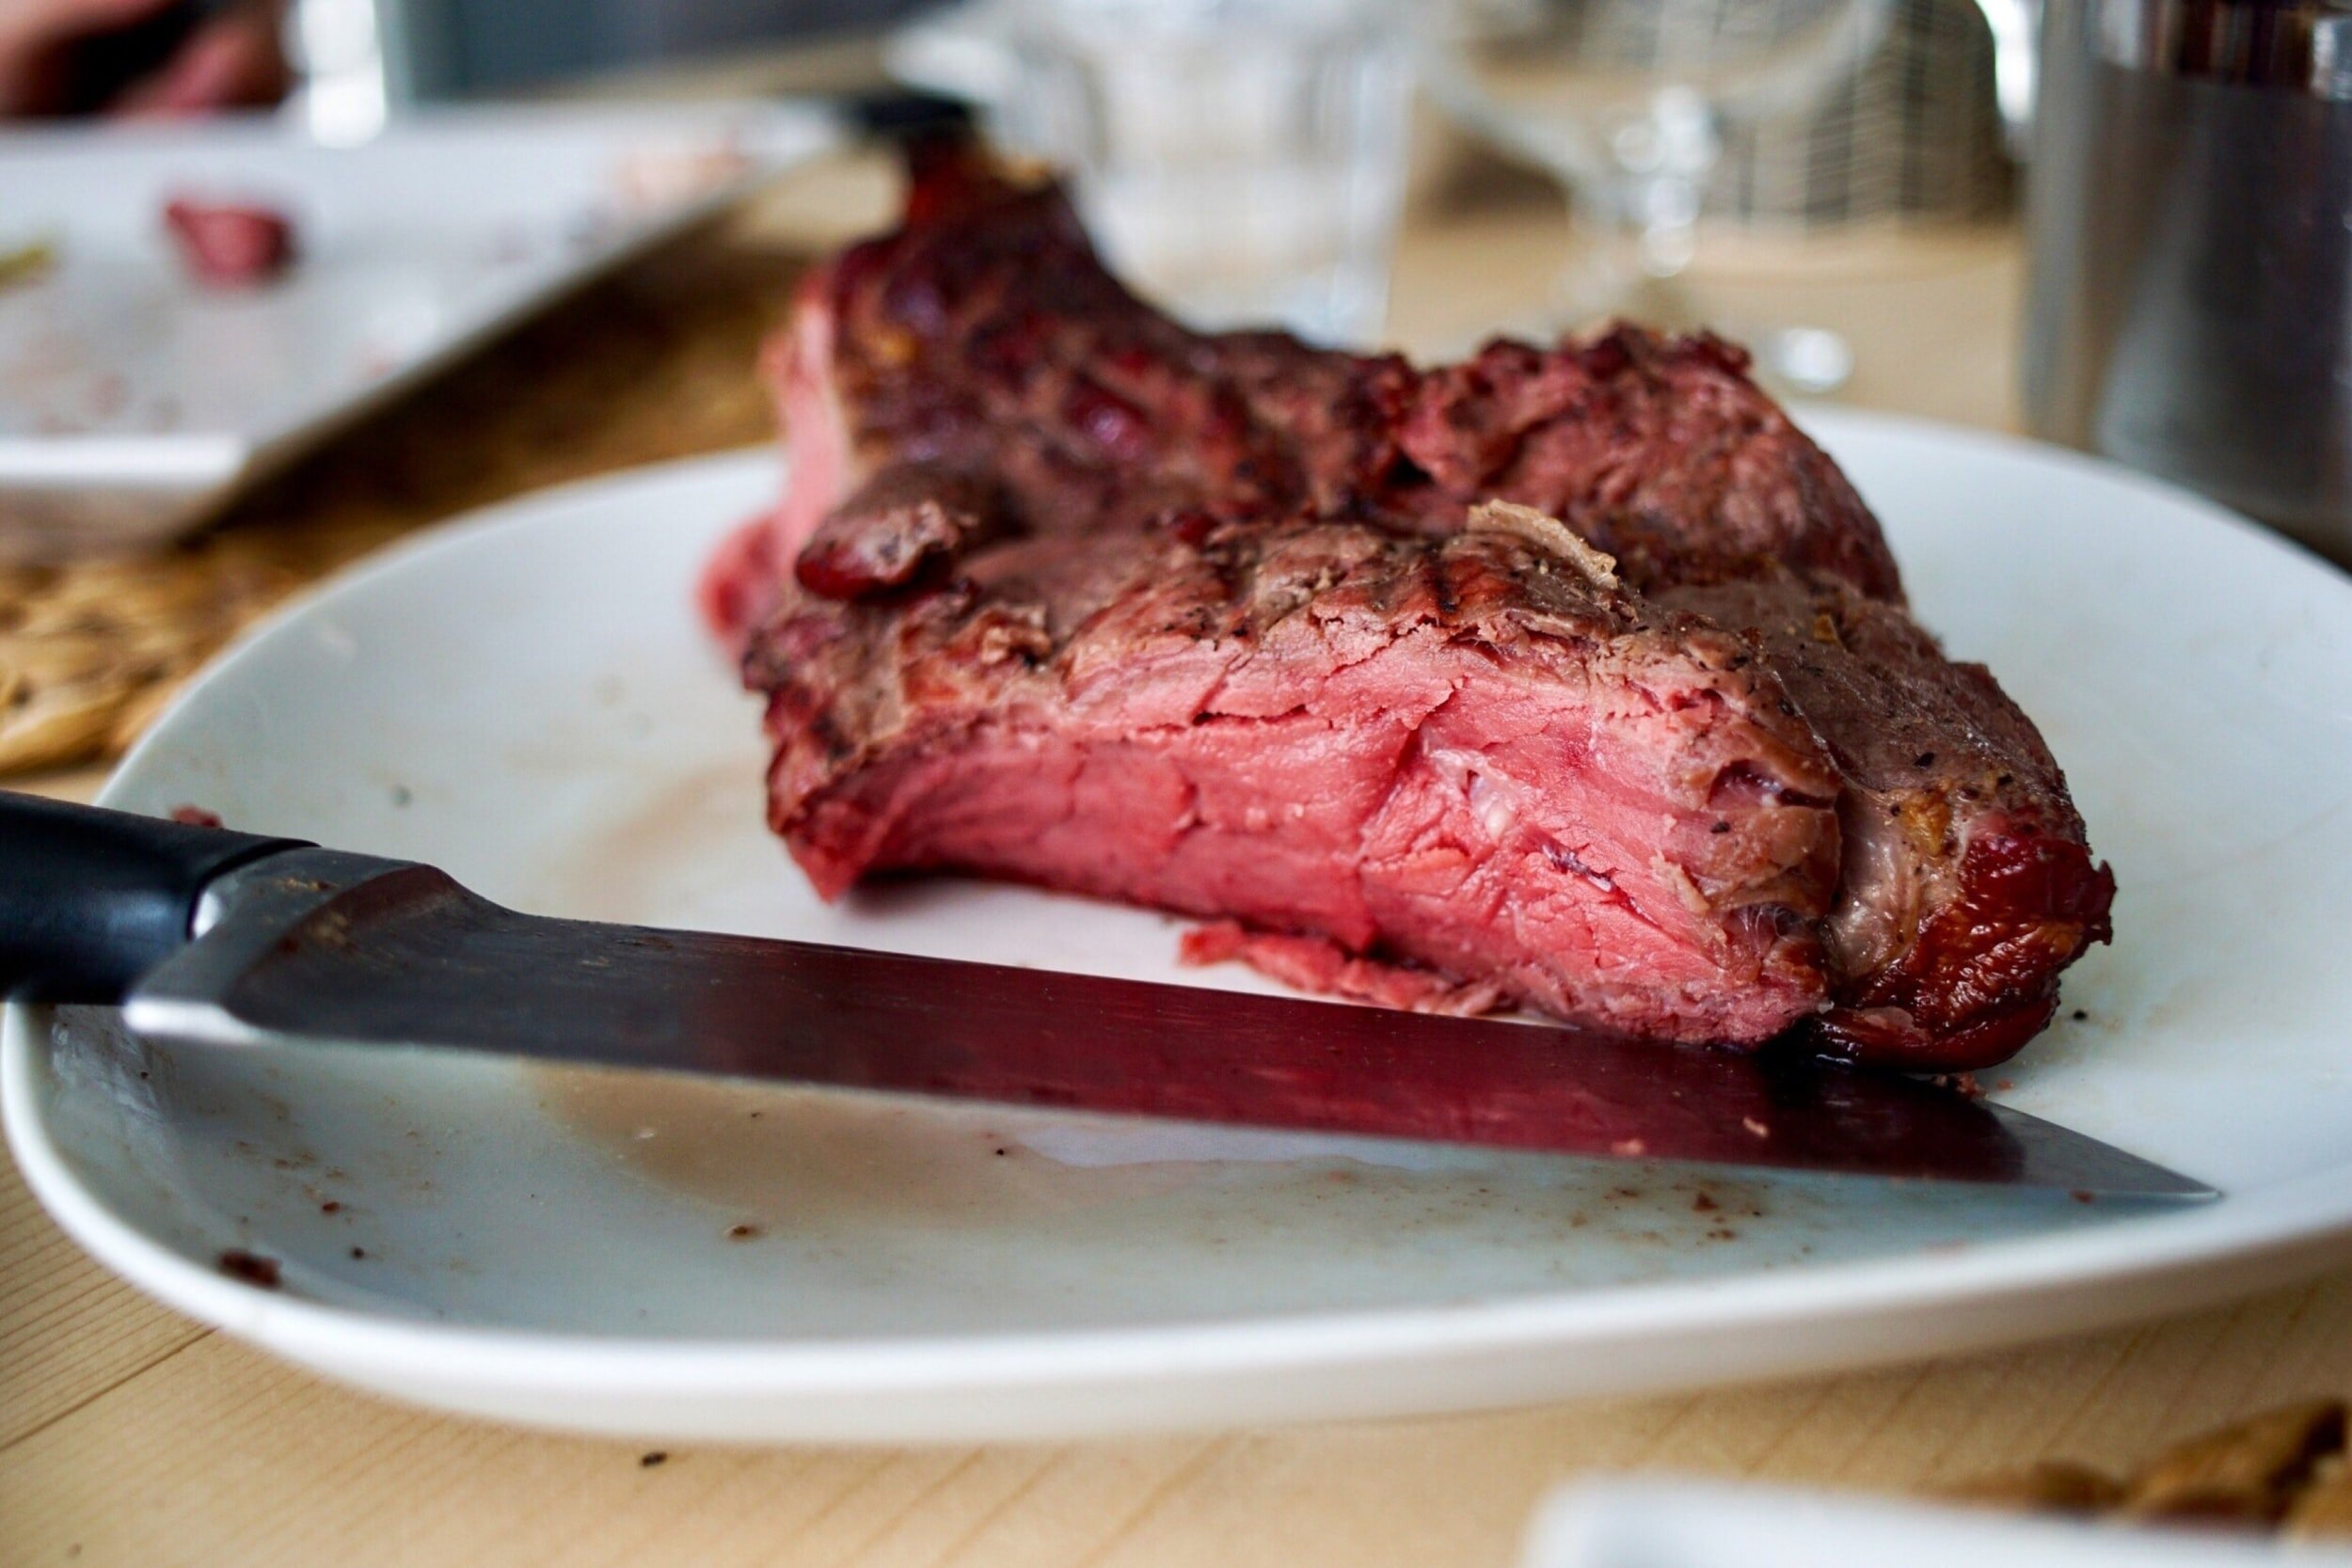
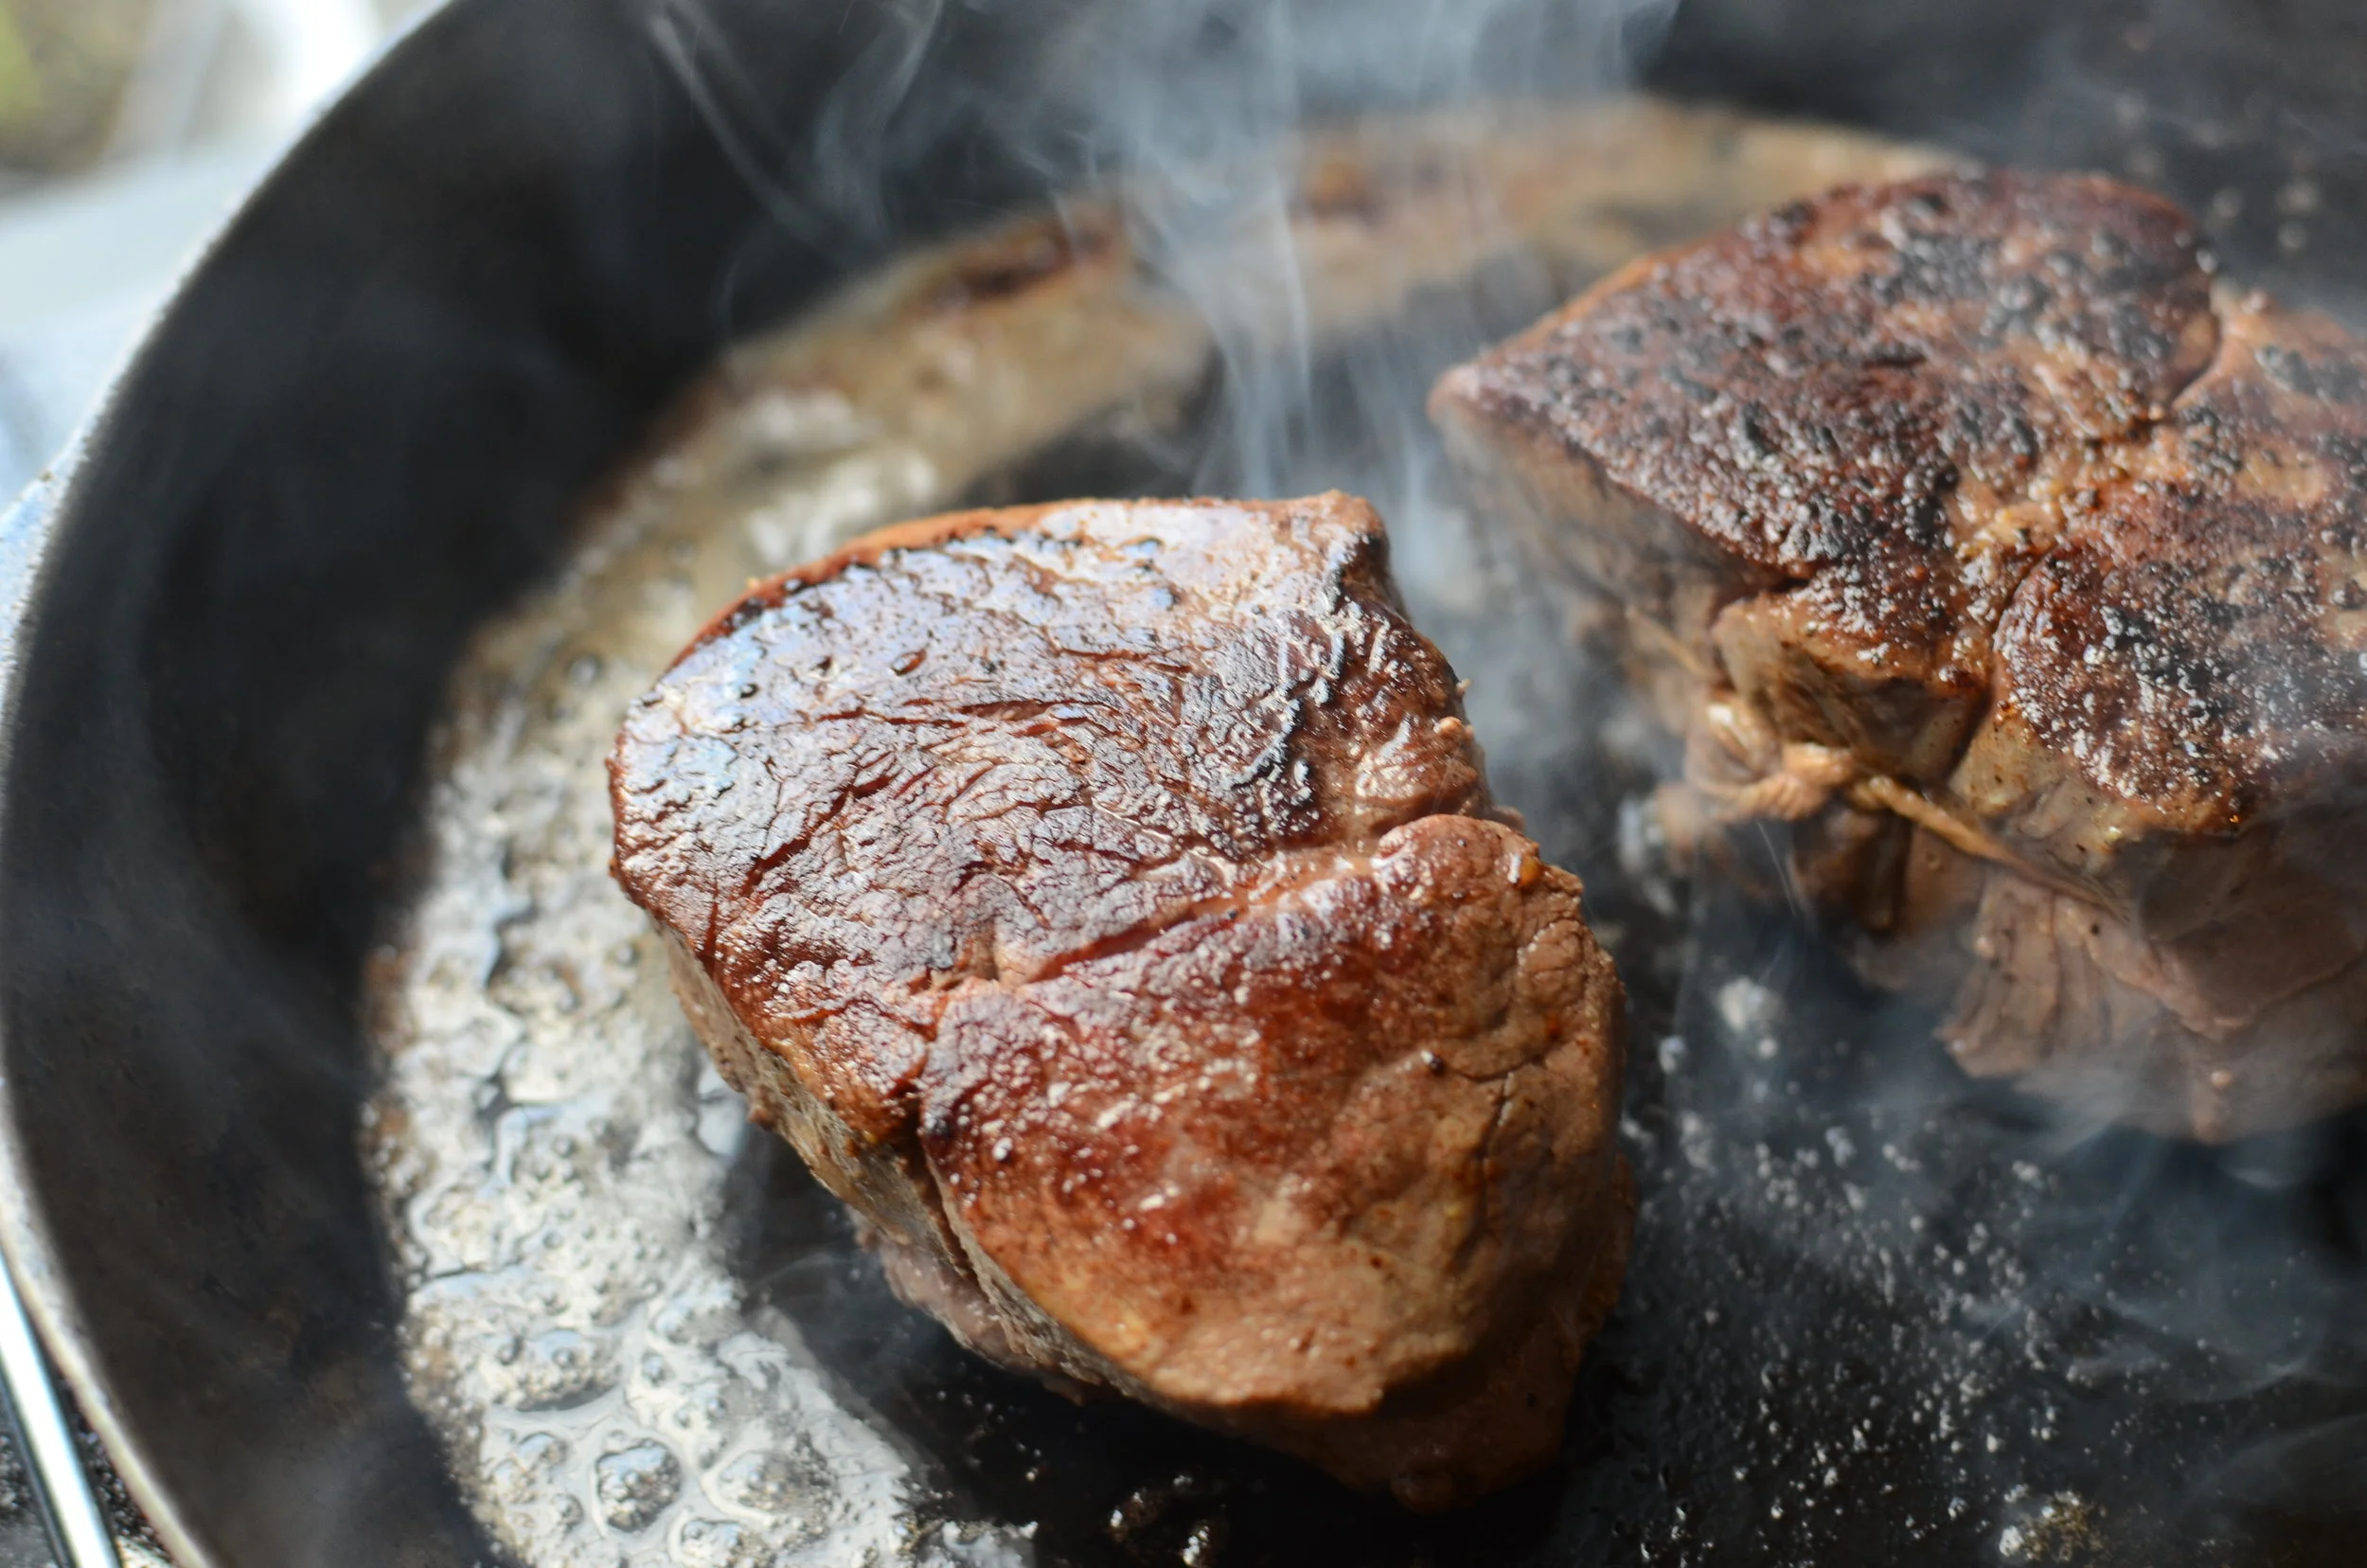
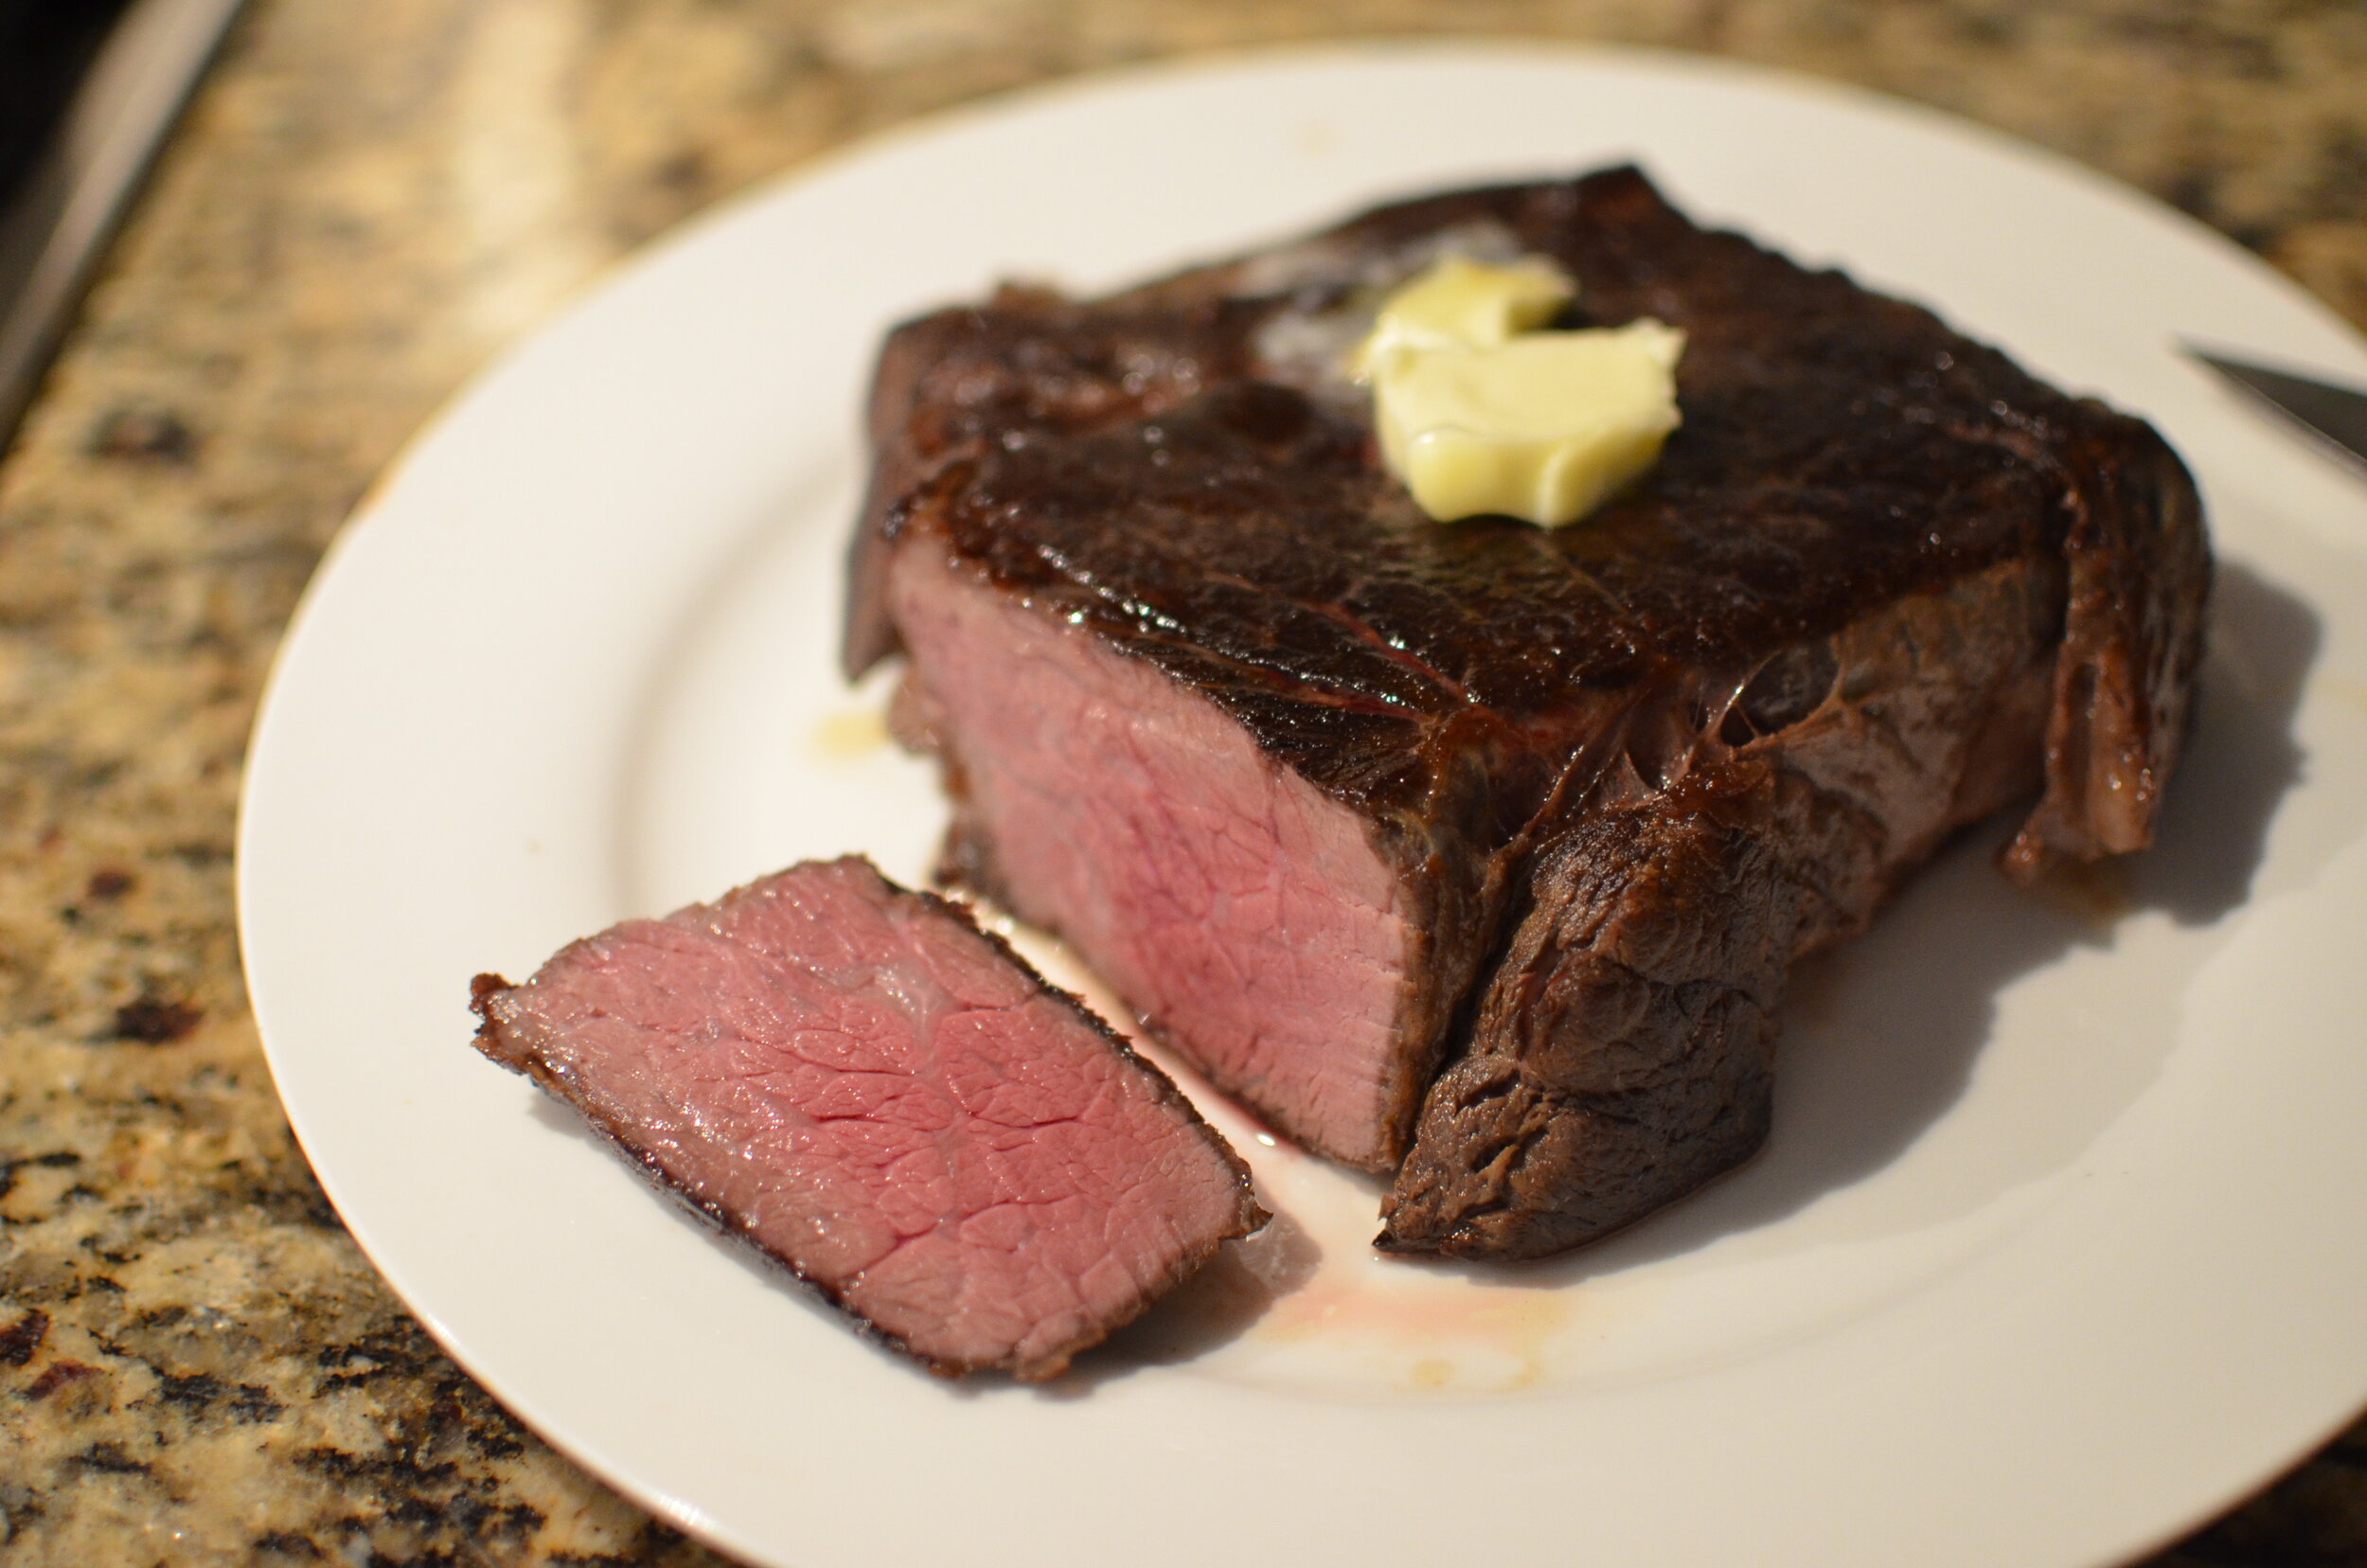
At the end of the cooking time, remove the steak(s) from the bag and pat dry. Sear on all sides in a very hot cast iron skillet that contains 1 tablespoon of oil. Searing should only take a minute or two per side. Don’t forget to sear the edges too!
Alternatively, you can sear the steak(s) on a hot grill or using a sous vide flame-thrower (carefully do this outside please).
Sous vide steaks do not need to rest before serving so you can enjoy them immediately. Happy cooking!
Items used to make this recipe:
(affiliate links)
sous vide immersion circulator https://amzn.to/3hDiP9W
sous vide flame-thrower https://amzn.to/3rvmLzQ
cambro container https://amzn.to/3jNY1iW
vacuum sealer https://amzn.to/3qRmoxJ
vacuum bags https://amzn.to/3j61IOV
freezer zip-top bags https://amzn.to/3j3vBzy
Sous Vide Chuck Roast Steak
makes 4-6 servings
Ingredients
3-pound chuck steak (about 1 1/2-inches thick)
1 teaspoon kosher salt
optional butter and flaked salt for serving
Directions
Sprinkle chuck roast steak on all sides with salt and place in a gallon-size freezer bag; remove as much air as possible before sealing (alternatively, vacuum seal in appropriate vacuum bag (like a foodsaver bag).
Clip bag to side of water-filled vessel, being sure steak is submerged under the water.
Place the immersion circulator in vessel and be sure it is well anchored (an official sous vide vessel or a large stockpot); set the temperature for 135F and set the cook time for 24 hours. If your sous vide vessel includes a lid, you probably won’t have to worry about evaporation, but if your vessel is uncovered, monitor the water level during the entire cooking process and add water as needed (mine does not have a cover and I had to add 1-2 cups of water every 8 hours).
Remove steak(s) from bag and pat dry. Sear in a very hot cast iron skillet that contains a tablespoon of oil; sear both sides for a minute or two, then sear the edges. Alternatively, you can sear the steak(s) on a grill or use a sous vide flame-thrower.
If desired, finish with a pat of butter and a sprinkling of flaked sea salt.
Notes
When using zip-top bags, choose freezer bags over storage bags. Storage bags aren’t as sturdy and may leak during the sous vide process.
Be sure to remove as much air from the bag as possible so the contents stay under the water level. If needed, you can add a dull, stainless steel butter knife or spoon to the bag. The stainless steel will not affect the steak, but will keep the bag from floating to the top of the water.
The steak(s) should stay submerged the entire cooking process. If you have a sous vide vessel that includes a lid, use it. Otherwise, monitor the water level for evaporation during cooking and add more water as needed.
The sous vide vessel you use should be large enough to allow the steaks to be submerged without exceeding the “MAX” water level indicated on the immersion circulator.
Vacuum seal bags are a great option, but not necessary. I usually use gallon-size zip-top freezer bags.
Cambro containers are a clear polycarbonate that withstand temperatures up to 160F, making them a great vessel to cook using the sous vide method.
Some immersions circulators are magnetic, making a clamp unnecessary as long as you use a magnetic vessel such as a stainless steel stockpot.
Non-magnetic immersion circulators usually include a clamp to anchor to a vessel.
Some immersion circulators are waterproof, but not all are. Don’t be tempted to use an immersion circulator that isn’t anchored to a vessel - it can be severely damaged if the electronic components fall into the water.