Making Strawberry Jam - How To....
Patricia @ ButterYum

I can't believe I waited so long to finally try my hand at making Jam, but now that I know how easy it is, I'll definitely be making it again. Honestly, start to finish took less than an hour. Also, I was surprised how well it turned out considering the fact that I broke two official jam making "rules".

The first rule I broke: Use fresh fruit.
Well, I didn't have any fresh strawberries, but I had a lot of frozen strawberries so I thought what the heck. I'm happy to report the frozen berries worked perfectly fine.

And the second rule I broke: (and I quote exactly as printed in the directions) - "DO NOT PUREE... Jam should have bits of fruit".
Hmmm... that suspiciously sounded like the preference of the direction's author to me. Why not puree the fruit? What if I don't like chunks of fruit in my jam??? As it turns out, I really DON'T like chunks of fruit in my jam, so I threw caution to the wind and pureed my thawed berries in a blender. Again, I'm happy to report the pureed berries worked perfectly fine!

But hey, if you're the kind of person who prefers chunks of fruit, by all means, smash your berries by hand. Okay, now that we have all that sorted out, let's continue.

Be sure you have all your sterilized canning jars, screw bands, tools, etc ready to go. The dishwasher works great for most of the items...

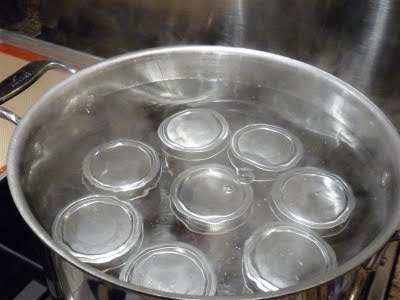
But the flat lids were too small for my dishwasher rack, so I boiled them on the stove top. Keep the lids in the hot water until you're ready to use them.
***UPDATE*** Ball and Kerr now recommend canning lids not be boiled. Instead, brand new lids should be kept at room temperature until used (no soaking or preheating is necessary). Brand new lids should be used every time you process canned goods. Used lids can be reused, but only for storage that does not require a vacuum seal.

You'll also need to have a large stockpot full of boiling water ready and waiting.
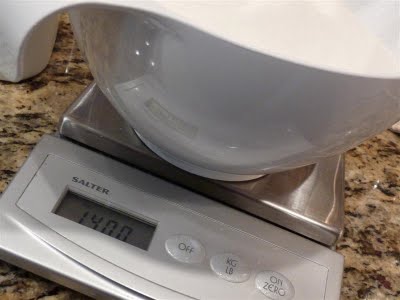
And don't forget about the sugar. This particular recipe calls for 7 cups, or 1400 grams. I know it’s a lot, but we are making jam after all.
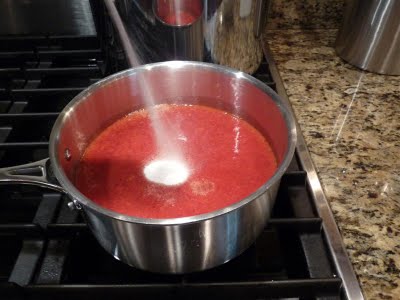
Okay, let's begin. Start by combining the fruit and pectin; stir to dissolve pectin. Add 1/2 tsp butter (this is optional, but it reduces foaming). Stirring constantly over high heat, bring mixture to a full rolling boil, one that doesn't stop bubbling when stirred.

Immediately add the sugar and stir to dissolve. Return to a full rolling boil. Boil for 1 minute; stirring constantly. Note: I could tell there wasn't going to be enough room in the small saucepan after I added the sugar, so I transferred my fruit/pectin mixture to a larger pan.

After boiling for one full minute, remove the pan from the heat and skim the froth from the surface. The froth isn't very pretty so you don't want to put it in your jars, but it's perfectly delicious and quite edible. Cook's treat :)

Now it's time to fill the jars. This recipe yields a little more than eight 8oz jars. That nifty funnel helped make filling the jars pretty mess free, but I still managed to get a few drops of jam on my jar rims. Easily remedied with a warm paper towel.

Time to top the jars with the lids. Check out this neat magnetic tool - allows you to place the lids on the jars without touching them - keeps everything nice and sterile. After the lids are in place, add the screw bands and screw them on "hand tight". That means don't over tighten them. Be careful, the jars are extremely hot!

Time to "process" the jars. I don't have a special canning basket, so I just put the jars in a large stock pot. The water level should be 1-2 inches above the jars. This jar lifter thingy keeps your fingers out of the hot water.
Cover the stock pot and bring the water to a gentle boil; boil for 10 minutes (for high altitude, follow the special instruction included with the pectin).

After 10 minutes, remove the jars from the boiling water and let them rest on a towel until you hear them POP (mine started popping almost immediately). That popping sound is good. Very, very good! When the jars are cool, check the seals by pressing the middle of the lid with your finger. If the lid springs back, the jar isn't sealed properly and you'll need to store that jar in the refrigerator. For the record, all of my jars sealed up just fine. That's about all there is to it!
I should mention that there are complete directions in the pectin package (I used SureJell fruit pectin). A special thanks to my cake buddy Gia for sending me such great tips and directions.
Items used to make this recipe:
(affiliate links)
quilted canning jars https://amzn.to/4aHtQSx
canning lids https://amzn.to/3NRxiAl
hot water canner https://amzn.to/3TRZner
canning accessories https://amzn.to/3ROSBDy
dissolvable canning labels https://amzn.to/3NRF4d8
sure jell premium fruit pectin https://amzn.to/41Jj6Pr
STRAWBERRY JAM
makes eight 8-ounce jars, plus a little bit more
Ingredients
5 cups crushed strawberries (frozen berries work wonderfully)
7 cups granulated sugar
1 package SureJell Premium Fruit Pectin
1/2 tsp. butter, optional
Directions
Follow the step-by-step instructions above (or refer to the printed directions from the Pectin's package insert).
*High Altitude - Processing times vary for high altitude locations. See pectin package directions for details.

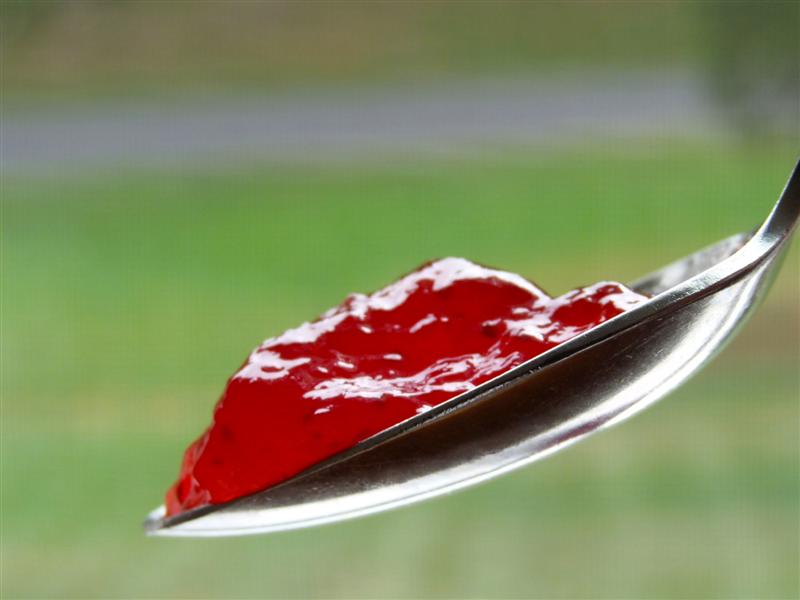
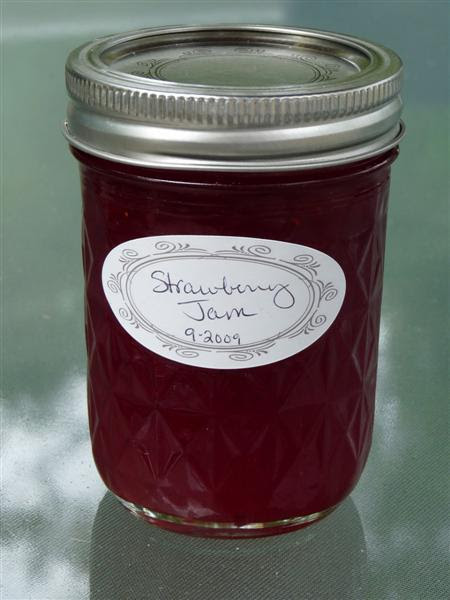
Now you can sit back and enjoy a sense of accomplishment as you admire your handy work...

...and have fun pretending you're a photographer (unless you really are a photographer - clearly, I am not).
Don't forget to share!