Chocolate Pistachio Biscotti
Patricia @ ButterYum
There's something quite indulgent about sitting down for a little "me time" with a hot beverage and a lovely biscotti cookie for dunking. Biscotti (biss-KO-tee) means "twice-cooked" or "twice-baked", and that's indeed how these cookies are made. They're first baked in loaf form, then sliced and baked again. The second baking is what gives them their crunchy, dunkable character.


Start by placing flour, dutch processed cocoa powder, baking soda, and salt in a mixing bowl.

Whisk together and set aside until needed.
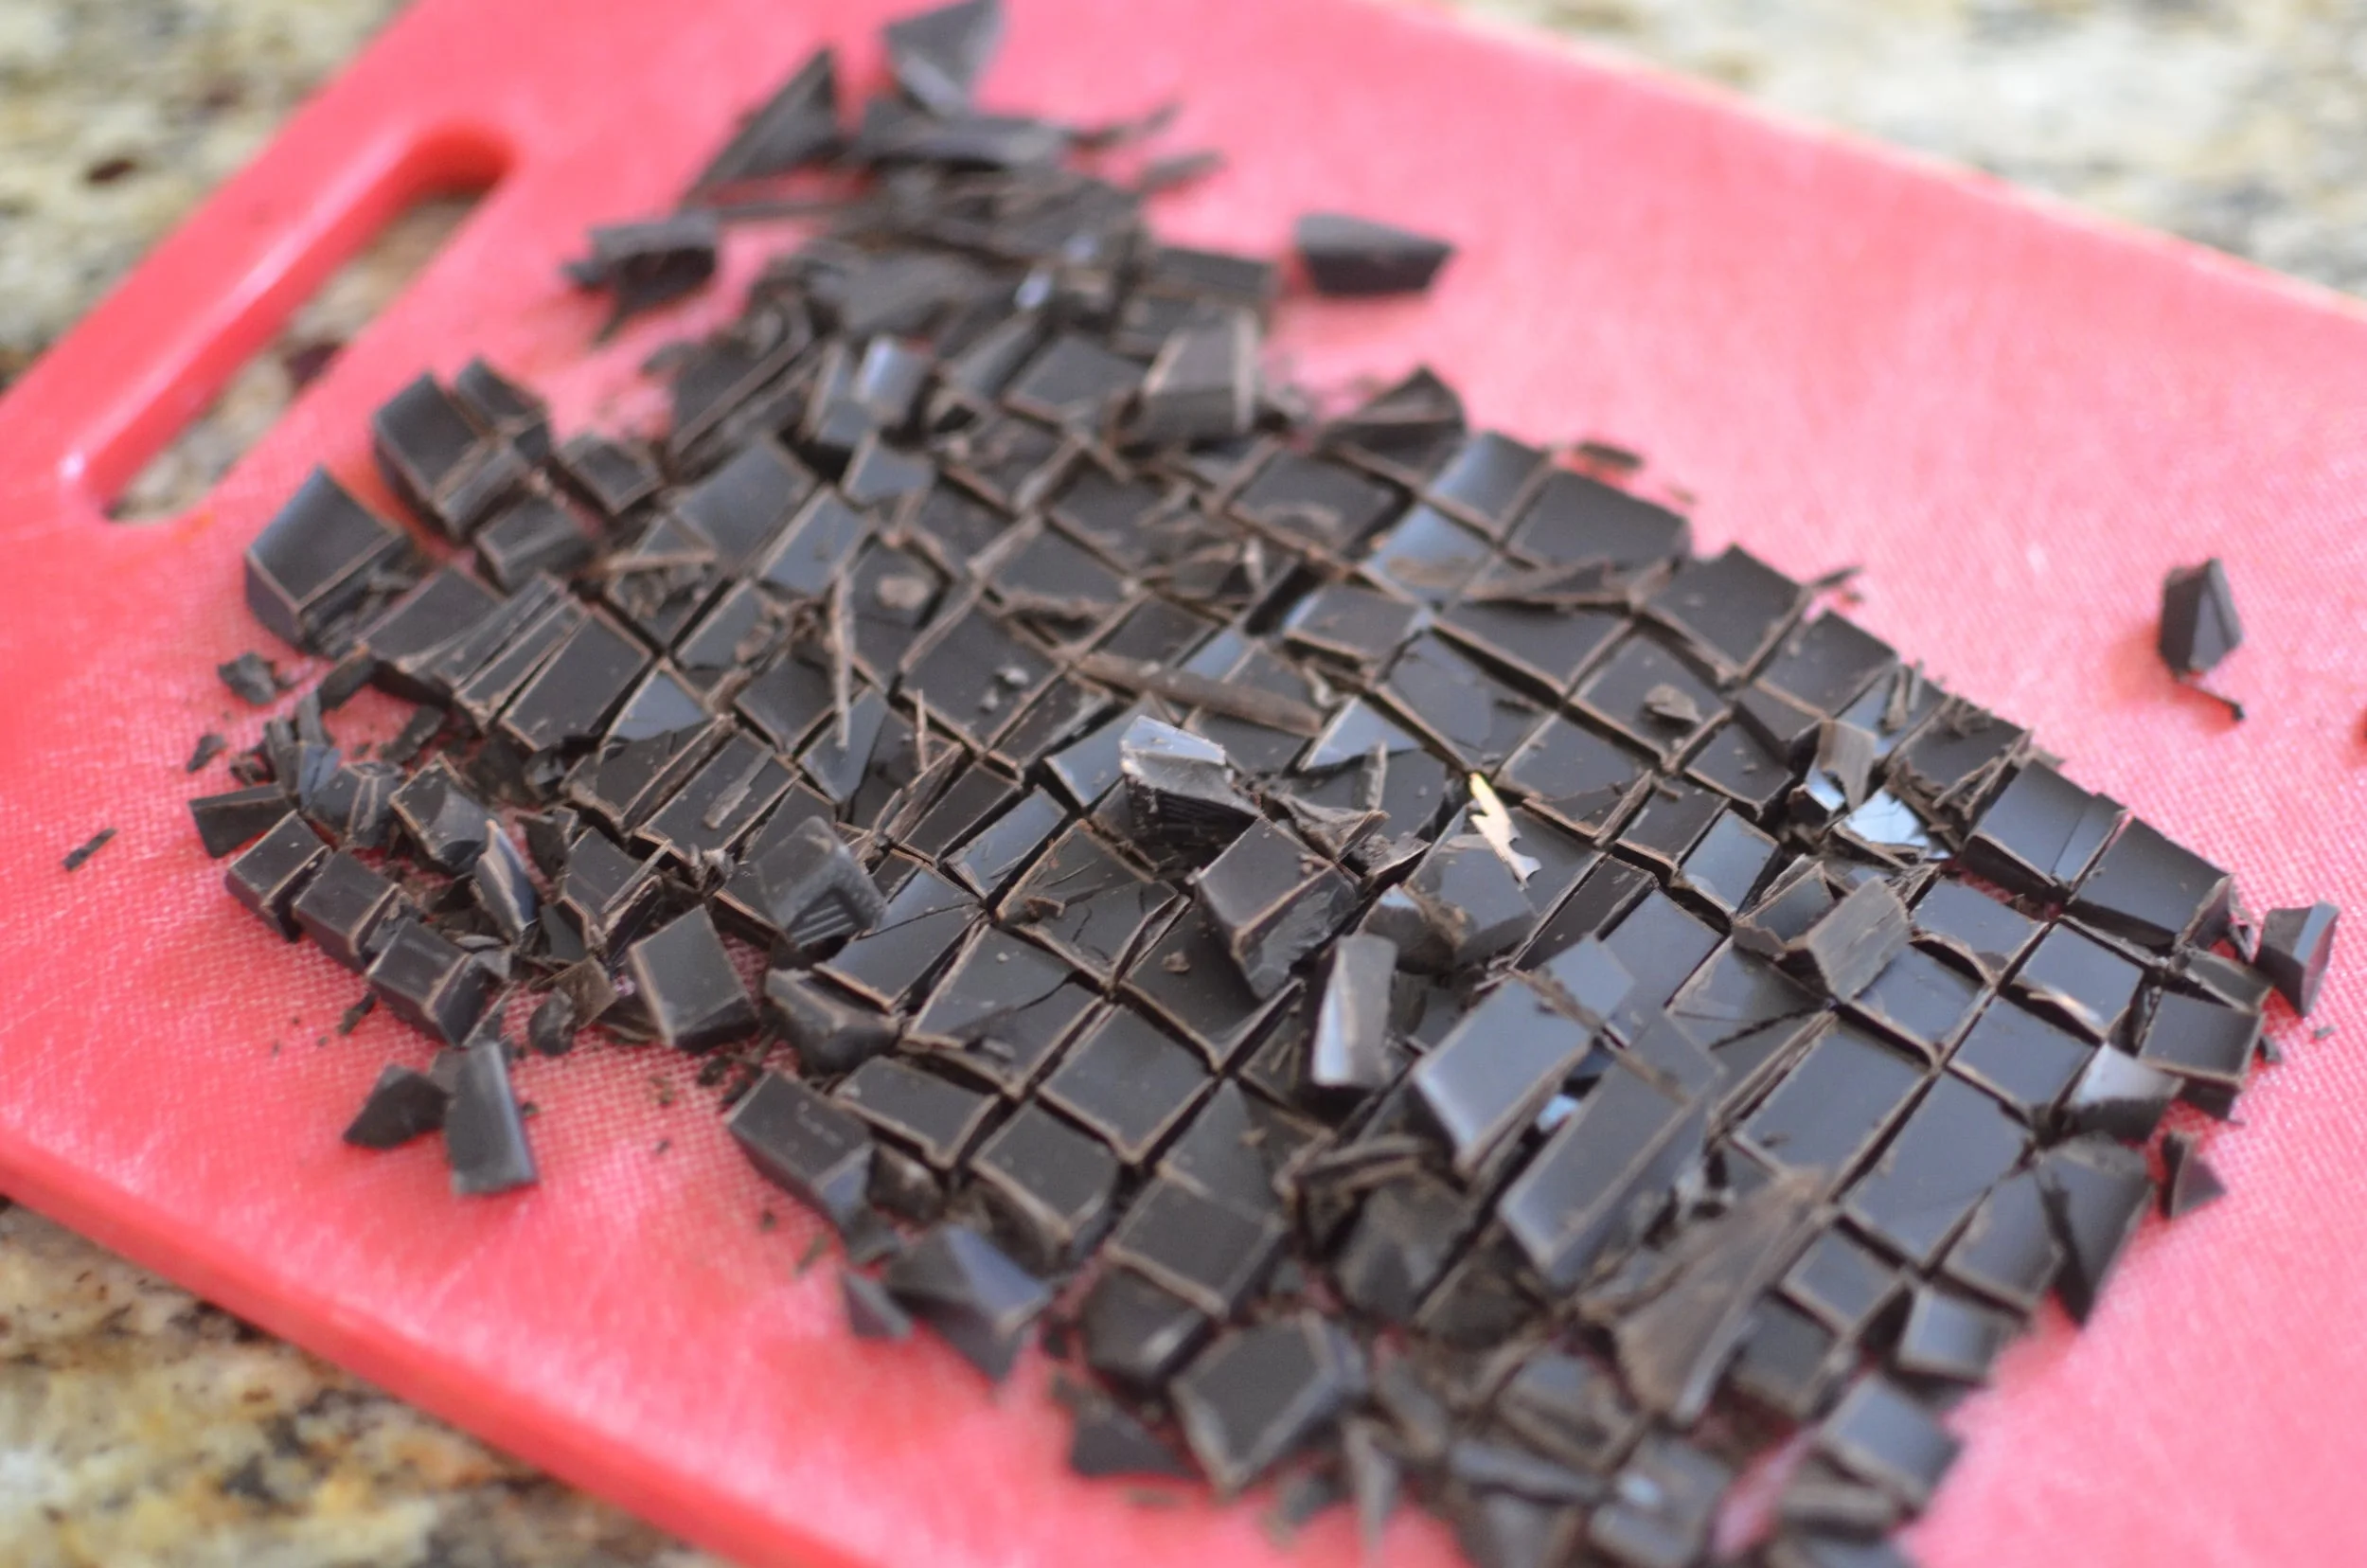
Next, chop the chocolate. In our house, we like to use a really good quality dark chocolate - I used 85% cocoa here, but you could use something a bit sweeter. Semi-sweet chocolate usually falls around 60% cocoa.

In a small mixing bowl, combine the chopped chocolate and brown sugar together and set aside until needed.

You'll also need a couple of large eggs and pure vanilla extract.

And a little instant espresso powder mixed with some hot water.

I love how espresso powder accentuates the flavor of chocolate.

And don't forget the pistachio and craisins. Chopped dried cherries would be a nice substitution for the craisins.

Now for the fun part - dump everything into a stand mixer fitted with a BeaterBlade or paddle attachment; mix until no traces of dry flour remain.

The dough should look like this when done. Now put the dough into a gallon-size zipper bag and chill for about 30 minutes while you preheat your oven.

Chilling the dough makes it a little easier to handle, but it's still very sticky so I suggest gloving up before handling.

Press the sticky mass into a 4x10-inch rectangle on a silpat or silicone lined half sheet pan.

See? I told you the dough was sticky.

Bake as directed, then cool for 20 to 30 minutes, or until you can comfortably handle it.

Transfer the loaf to a cutting board and cut into 1/2-inch thick slices with a serrated knife.

Place each slice onto a silpat or parchment lined half sheet pan and put them back into the oven to bake again, flipping half-way through so both sides crisp up.

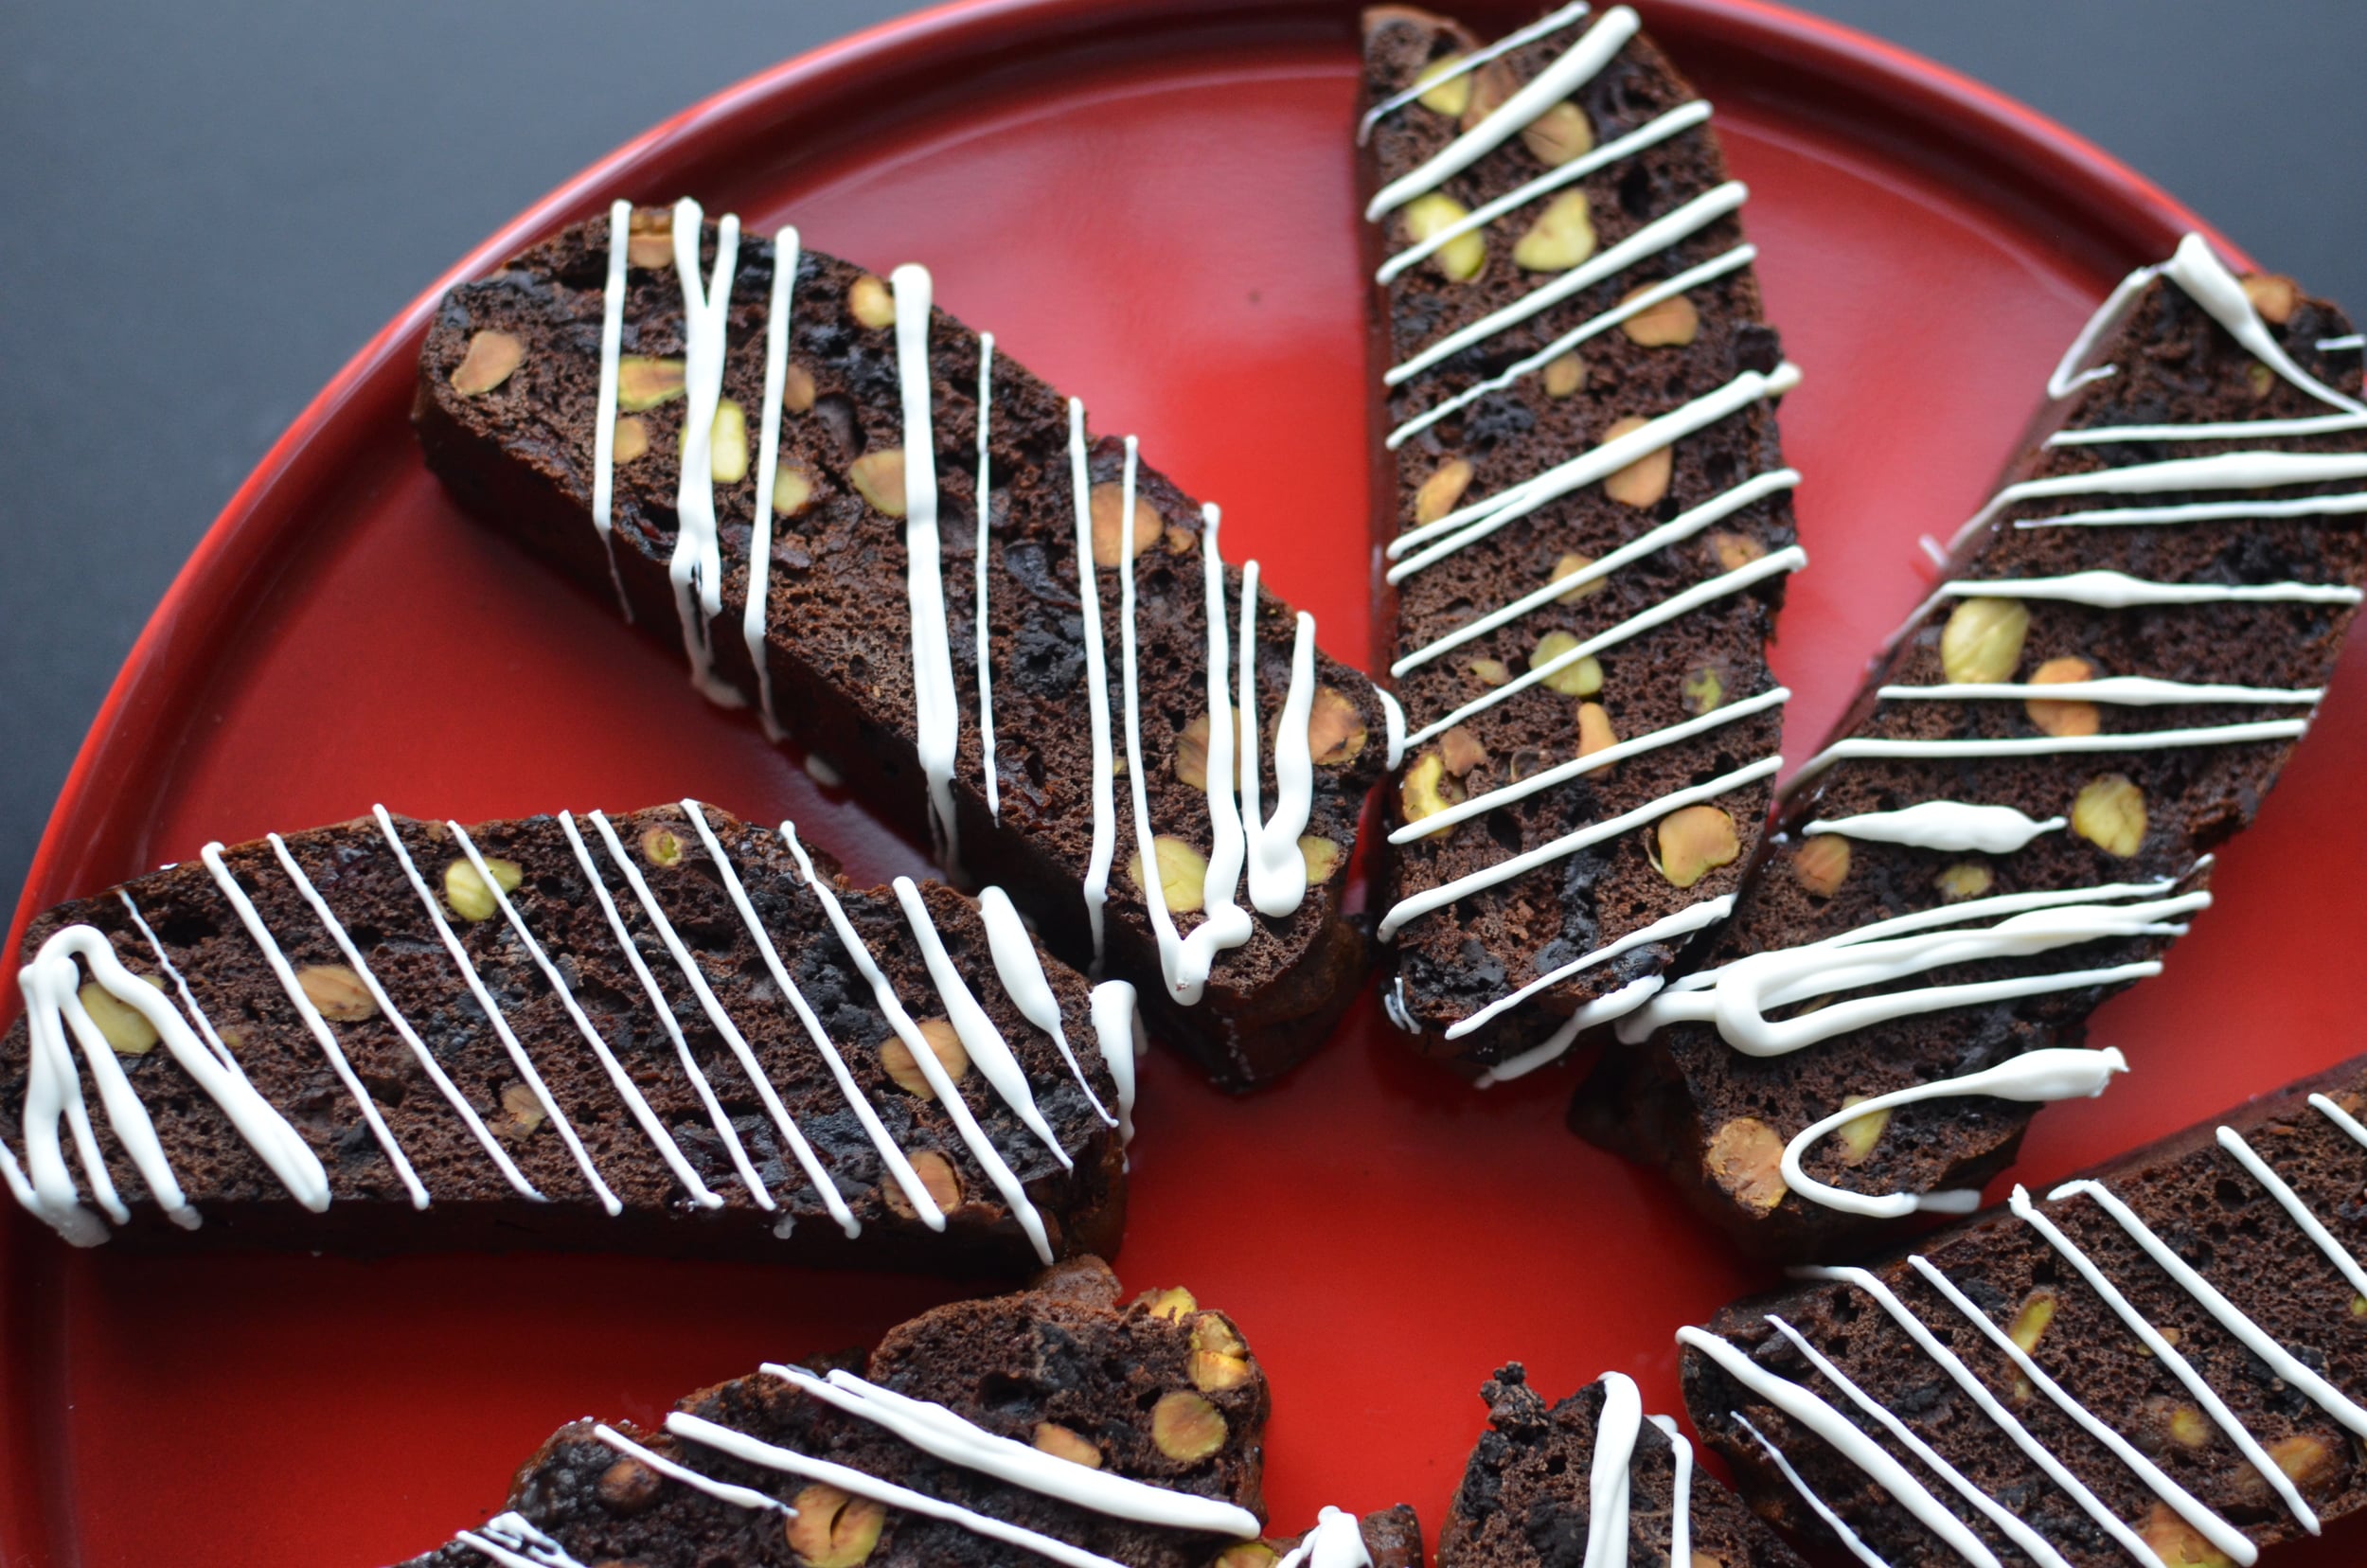
After the cookies have finished baking a 2nd time, allow them to cool completely on a rack, then drizzle with melted white chocolate. I melted my chocolate in the microwave before pouring it into a plastic zip-top bag.

Snip a very small hole in the corner of the bag and drizzle. Work quickly - the chocolate will firm up fast.

There you go. Leftovers can be stored up to a week or more in an airtight container.

Happy Dunking!

Chocolate Pistachio Biscotti
makes about 20 cookies
Ingredients
1 1/2 cup all purpose flour
1/4 cup Dutch-processed cocoa powder
1 teaspoon baking soda
1/2 teaspoon fine salt
3 ounces bittersweet or dark chocolate, chopped into small pieces
3/4 cup light brown sugar
2 large eggs
1 teaspoon pure vanilla extract
1 tablespoon instant espresso powder mixed with 2 tablespoons of hot water
1 cup shelled pistachios
1/2 cup craisins (or chopped dried cherries)
melted white chocolate for drizzling
Directions
In a medium bowl, whisk together the flour, cocoa, baking soda, and salt; set aside.
in a small bowl, combine chopped chocolate and brown sugar; set aside.
In the bowl of a stand mixer fitted with BeaterBlade or paddle attachment, place flour mixture, chocolate mixture, eggs, vanilla, espresso mixture, pistachios, and craisins; mix on medium speed until all traces of dry flour disappear.
Wrap cookie dough well with plastic and chill for at least 30 minutes (or up to a week).
Preheat oven to 300F and line a half sheet pan with a silpat or parchment paper.
Press cookie dough onto prepared sheet pan, forming a 4x10-inch loaf.
Bake in preheated oven for 35-40 minutes.
Remove from oven and allow loaf to rest for 20-30 minutes before transferring to a cutting board and cutting into 1/2-inch thick slices using a serrated knife.
Return sliced cookies to sheet pan and bake for another 6 or 7 minutes per side.
Cool cookies completely on a rack before drizzling with melted white chocolate. Leftovers can be stored for a week or more in an airtight container
adapted from Entertaining with Beth